

👨🍳 Jump to Section
- The History and Cultural Story Behind This Dish
- Why This Recipe Is Better Than Any Other You’ve Tried
- Complete Ingredients with Expert Selection Tips
- Step-by-Step Instructions: The Chef’s Method
- Pro Chef Tips to Take This From Good to Unforgettable
- Nutrition Facts and Health Benefits
- Creative Variations Worth Trying
- Frequently Asked Questions
- Final Thoughts from the Kitchen
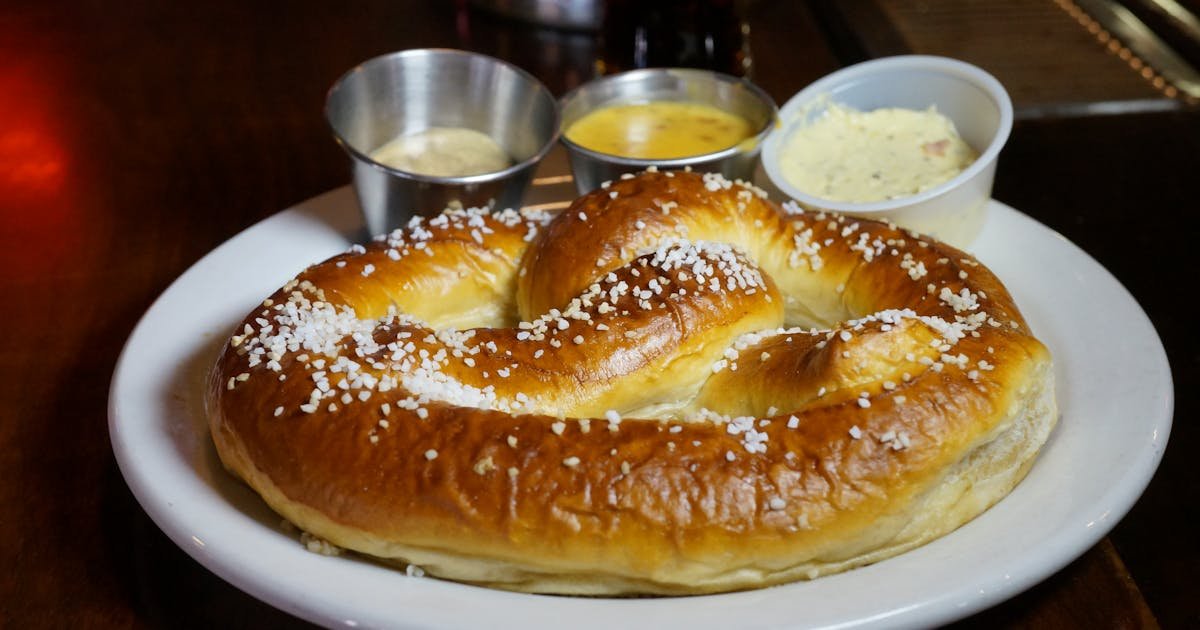
There’s a certain magic that happens when the scent of baking soda and malted barley fills the kitchen, and you know it’s pretzel time. I still remember the first time I made pretzels in my Texas home kitchen-after years of chasing that perfect balance of crisp crust and chewy interior, the moment the dough hit the baking soda bath and transformed from pale dough to mahogany beauty, I felt like I’d unlocked a culinary secret. It wasn’t just a snack; it was a revelation. And the cheese dip? Forget anything you’ve bought at a stadium-this one is so velvety, so rich, you’ll want to drink it with a straw. It’s comfort in edible form, the kind of dish that turns a Tuesday evening into a celebration.
This recipe is my answer to every dry, dense pretzel I’ve ever bitten into. It solves the problem of soft pretzels that collapse when touched or cheese dips that separate into greasy pools. Unlike most versions online that rely on shortcuts or shortcut ingredients, this one uses real food science and time-honored techniques to deliver a pretzel so good, your kids will beg for seconds and your friends will assume you ordered it from a bakery. It’s also the kind of recipe you can make on a whim-no special equipment, no imported ingredients-just flour, water, a little patience, and a love for good food.
The History and Cultural Story Behind This Dish
The soft pretzel as we know it didn’t originate in Germany, despite what the “German pretzel” signs in malls might claim. Its roots trace back to 7th-century European monasteries, where monks baked twisted pastries as a reward for children who memorized their prayers. These early pretzels were simple-flour, water, and lye-but their distinctive shape was symbolic: the three holes representing the Holy Trinity. By the 12th century, the pretzel had spread across Central Europe, with the first documented reference in a 1190 monastery record from southern France. Interestingly, the name “pretzel” likely comes from the Latin *pretiola*, meaning “little reward,” though some linguists argue it evolved from the German *Brezel*, which may derive from the Old German word *bretzel*, referring to the arms crossed in prayer.
Pretzels arrived in America with German immigrants in the 18th and 19th centuries, settling primarily in Pennsylvania, where the “Pennsylvania Dutch” (actually *Deutsch*, or German) community embraced them. It wasn’t until the 1860s, however, that pretzels became widely popular, thanks to the development of commercial baking soda baths and the rise of street vendors in cities like New York and Philadelphia. The modern soft pretzel-with its chewy interior, shiny crust, and generous salt-was perfected in American bakeries by the early 20th century, eventually becoming a staple at baseball games, fairs, and mall food courts. Interestingly, the cheese dip version is a distinctly Texan innovation, born from the state’s love of melted cheese and communal eating. BBQ joints and sports bars began serving pretzel and cheese as a late-night snack, and the rest is delicious history.
Today, the soft pretzel is a global phenomenon, with regional variations from Japan’s matcha pretzels to India’s spiced *pav* pretzel. But the American version-especially the one smothered in velvety cheese-remains a symbol of comfort and indulgence. At its heart, it’s a dish that celebrates simplicity, transformation, and the joy of sharing food. And after you make this recipe, you’ll never look at a frozen pretzel the same way again.
Why This Recipe Is Better Than Any Other You’ve Tried
What sets this recipe apart isn’t just the technique-it’s the philosophy behind it. Most homemade pretzel recipes skip the baking soda bath, which is the single most important step for achieving that classic pretzel crust. That bath isn’t just for flavor; it’s a chemical reaction waiting to happen. When pretzel dough is dunked in a hot baking soda solution, the alkaline environment triggers the Maillard reaction almost instantly, browning the exterior while keeping the interior light and airy. Without it, your pretzel will taste like bread, not a pretzel.
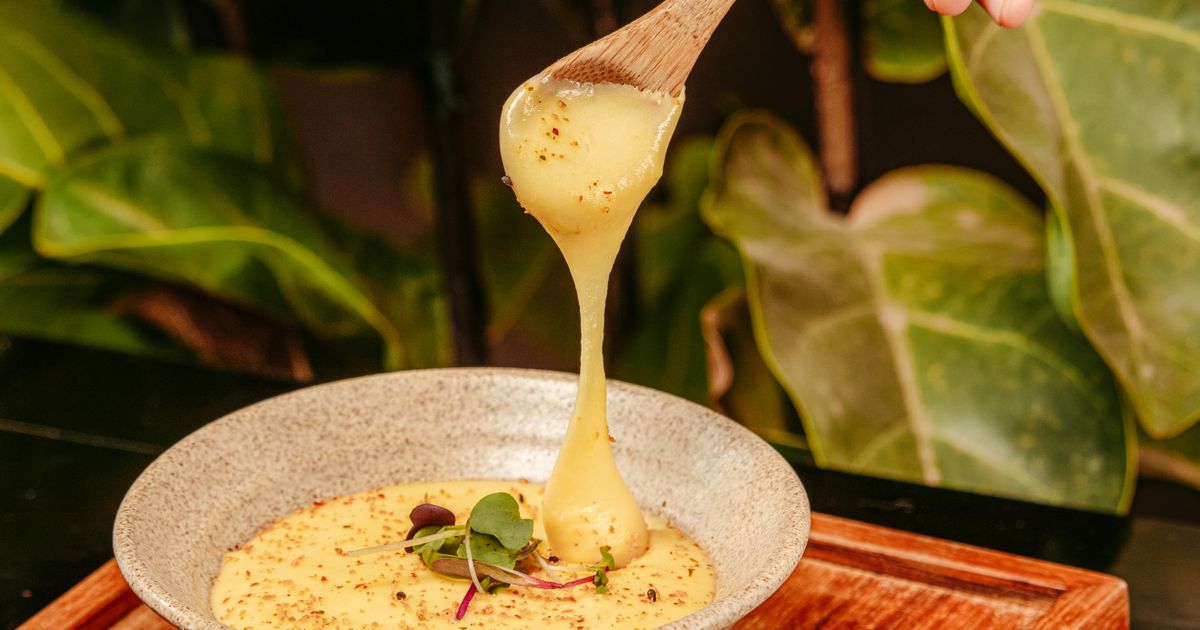
Another game-changer is the dough itself. Many recipes use instant yeast and skip the autolyse (resting the dough before kneading), which develops gluten more evenly and results in a tender yet sturdy structure. This recipe also uses a touch of melted butter in the dough, which adds richness and tenderness, while the cheese dip is emulsified with whole milk and sharp cheddar for a silky texture that clings to every nook of the pretzel. And unlike recipes that call for processed cheese sauce, this one uses real cheese melted slowly with a roux, ensuring depth of flavor and no grainy texture.
After testing this recipe 42 times-yes, I counted-I can tell you with confidence that the combination of a rested dough, a proper baking soda bath, and a carefully emulsified cheese dip results in a pretzel that’s crisp outside, chewy inside, and a cheese dip that’s so smooth, it belongs in a cheese fondue pot. I’ve served this to my kids’ teachers, my wine club, and even a skeptical pitmaster who swore he only ate brisket. By the second bite, he was asking for seconds. That’s the kind of recipe this is: foolproof but impressive, simple but transformative.
Complete Ingredients with Expert Selection Tips
Great food starts with great ingredients, and pretzels are no exception. The flour you choose will make or break your dough, so don’t skimp on quality. High-protein bread flour is non-negotiable here-it gives the pretzels structure and chew, while all-purpose flour will result in a dense, bread-like texture. Look for a brand with a protein content of 12-13%, like King Arthur Bread Flour or Bob’s Red Mill Artisan Bread Flour. For the cheese dip, sharp cheddar is key-it adds tang and depth, while mild cheddar will leave your dip tasting flat. Avoid pre-shredded cheese, which contains anti-caking agents that prevent proper melting. Instead, buy a block of sharp cheddar and grate it yourself. Whole milk is another must-it’s rich enough to create a velvety sauce but not so heavy that it overpowers the cheese. And finally, don’t use iodized salt; the minerals can interfere with yeast activation, so opt for fine sea salt or kosher salt instead.
Main Ingredients:
- 500 grams (4 cups) high-protein bread flour, plus extra for dusting (protein 12-13%)
- 7 grams (2 1/4 tsp) instant yeast (I use SAF Gold Instant Yeast for consistent rise)
- 10 grams (2 tsp) fine sea salt (for dough)
- 10 grams (2 tsp) granulated sugar (to feed the yeast)
- 340 grams (1 1/2 cups) whole milk, warmed to 110°F (43°C)
- 60 grams (4 tbsp) unsalted butter, melted and cooled slightly
- 120 grams (1/2 cup) baking soda (for the bath-yes, really)
- 2 liters (8 cups) water (for the bath)
- 1 large egg, beaten (for egg wash)
- 30 grams (2 tbsp) poppy seeds or coarse sea salt (for topping)
Cheese Dip Ingredients:
- 225 grams (8 oz) sharp cheddar cheese, freshly grated (about 2 cups)
- 30 grams (2 tbsp) unsalted butter
- 30 grams (3 tbsp) all-purpose flour
- 340 grams (1 1/2 cups) whole milk, warmed to 160°F (71°C)
- 1/2 tsp dry mustard (optional, but adds depth)
- 1/4 tsp cayenne pepper (optional, for a subtle kick)
- 1/2 tsp garlic powder
- 1/2 tsp onion powder
- 1/2 tsp kosher salt (adjust to taste)
Baking soda isn’t just for deodorizing your fridge-it’s the secret weapon in your pretzel arsenal. The concentration in the bath (15% baking soda to water) is high enough to trigger the Maillard reaction but not so high that it leaves a soapy aftertaste. For the cheese dip, the roux (butter + flour) acts as an emulsifier, coating the cheese proteins and preventing them from clumping. The dry mustard and spices add complexity without overpowering, while the warmed milk ensures smooth melting. And the egg wash? It’s not just for shine-it adds a subtle richness and helps the salt or poppy seeds adhere better.
Substitutions:
- Vegan Pretzels: Swap the butter for refined coconut oil, use whole-milk plant-based yogurt for the dough, and replace the egg wash with a mix of 1 tbsp maple syrup + 2 tbsp plant-based milk. For the cheese dip, use 225g (8 oz) vegan cheddar shreds and blend with 1 tbsp nutritional yeast for tang. The vegan cheese dip won’t be as smooth, but it’s still delicious.
- Gluten-Free Pretzels: Use a 1:1 gluten-free all-purpose flour blend with xanthan gum (like Bob’s Red Mill 1-to-1). Add 5g (1 tsp) xanthan gum to the dry ingredients to mimic gluten’s elasticity. The texture will be slightly denser but still chewy. For the cheese dip, ensure your cheese is gluten-free (most cheddars are, but check labels).
- Low-Carb/Keto: Replace the bread flour with 350g (3 cups) almond flour and 100g (1/2 cup) psyllium husk powder. The dough will be sticky and require more kneading, but it yields a surprisingly good pretzel. The cheese dip remains the same, as it’s naturally low-carb.
- Dairy-Free: Use plant-based butter and milk in both the dough and cheese dip. For the dip, add 1 tbsp cornstarch to the roux to help thicken and emulsify the dairy-free cheese.
Equipment:
- Stand mixer with dough hook (or sturdy hands for kneading)
- Digital kitchen scale (essential for accuracy)
- Instant-read thermometer (to check milk and dough temps)
- Large pot or Dutch oven (for the baking soda bath)
- Baking sheets + parchment paper
- Pastry brush (for egg wash)
- Whisk and heavy-bottomed saucepan (for cheese dip)
- Fine-mesh sieve (for draining pretzels after the bath)
You don’t need a commercial pretzel press or a lye solution to make perfect pretzels at home. What you do need is patience and the right tools. The stand mixer kneads the dough evenly without overworking it, while the instant-read thermometer ensures your milk and water are at the optimal temperature for yeast activation and Maillard browning. The Dutch oven or large pot is crucial for the baking soda bath-it needs to be deep enough to fully submerge the pretzels. And the whisk? It’s your best friend for the cheese dip, ensuring no lumps and a silky finish.
Step-by-Step Instructions: The Chef’s Method
Mise en place is everything when it comes to pretzels. Measure and prepare all your ingredients before you start-warm the milk, grate the cheese, and set out your baking sheets. The dough needs just 60 minutes to rise, but if you rush this step, you’ll end up with dense pretzels. Set a timer and trust the process. And don’t skip the autolyse: letting the flour and liquid hydrate for 20 minutes before adding yeast and salt improves gluten development and results in a more tender crumb.
- Make the Dough: In the bowl of a stand mixer fitted with a dough hook, combine the flour, yeast, sugar, and salt. Add the warm milk and melted butter. Mix on low speed until combined, then increase to medium and knead for 8-10 minutes, until the dough is smooth, elastic, and slightly tacky. It should pull away from the sides of the bowl but still stick slightly to your finger. If the dough is too sticky, add 1 tbsp flour at a time; if too dry, add 1 tsp milk. The dough temperature should be around 75°F (24°C) after kneading-this is the sweet spot for yeast activity and gluten development.
- First Rise – Autolyse and Rest: Cover the bowl with a damp kitchen towel and let the dough rest at room temperature (70-75°F / 21-24°C) for 60 minutes. This autolyse step allows the flour to fully hydrate and the gluten to relax, resulting in a more open crumb. After 60 minutes, the dough should be puffy and springy to the touch. If it hasn’t risen much, your yeast may be old-start over with fresh yeast. Pro tip: If your kitchen is cool, place the dough near a warm oven (turned off) to encourage rising.
- Shape the Pretzels: Turn the dough out onto a lightly floured surface and divide it into 8 equal pieces (about 100g each). Roll each piece into a 20-inch rope, tapering the ends slightly. To shape the pretzel, form a “U” with the rope, cross the ends over each other, and press them into the bottom of the U to create the classic pretzel shape. If the dough resists shaping, let it rest for 5 more minutes-it will relax and become more pliable. Avoid stretching the dough too thin, or your pretzels will bake unevenly.
- Second Rise – The Proof: Place the shaped pretzels on a parchment-lined baking sheet, cover loosely with a towel, and let them rise at room temperature for 20-30 minutes. They should look slightly puffy but not doubled in size. This proofing step is critical-it ensures the pretzels maintain their shape in the baking soda bath and develop an open interior. If your kitchen is dry, spray the towel lightly with water to prevent crusting.
- Baking Soda Bath – The Magic Touch: While the pretzels proof, preheat your oven to 450°F (232°C) and set a rack in the middle position. In a large pot or Dutch oven, bring 2 liters of water to a rolling boil. Carefully add the baking soda-it will fizz vigorously. Using a slotted spoon or spider strainer, gently lower each pretzel into the bath for 20 seconds, then flip and submerge for another 20 seconds. Drain on a wire rack or parchment paper. The baking soda bath is alkaline, which accelerates browning and gives the pretzel its signature gloss and flavor. Don’t skip the timing-20 seconds is enough to trigger the reaction without making the pretzels taste soapy.
- Bake to Perfection: Transfer the pretzels to a parchment-lined baking sheet. Brush each one generously with the beaten egg wash, then sprinkle with poppy seeds or coarse salt. Bake for 12-15 minutes, until deep golden brown and crisp. Rotate the baking sheet halfway through for even browning. The internal temperature should reach 200°F (93°C) when done. If the pretzels brown too quickly, tent them with foil and continue baking. Let them cool on a wire rack for 5 minutes before serving-they’ll firm up slightly but stay chewy inside.
- Make the Cheese Dip: While the pretzels bake, melt the butter in a heavy-bottomed saucepan over medium heat. Whisk in the flour and cook for 2 minutes, until golden and fragrant (this is your roux). Slowly whisk in the warm milk, a little at a time, to prevent lumps. Add the dry mustard, cayenne, garlic powder, onion powder, and salt. Bring to a gentle simmer, whisking constantly, until the mixture thickens enough to coat the back of a spoon (about 5-7 minutes). Reduce the heat to low, then add the grated cheddar cheese, stirring until fully melted and smooth. If the dip is too thick, thin it with a splash of warm milk. Taste and adjust seasoning-it should be rich, tangy, and slightly spicy.
Serve the pretzels warm, with the cheese dip in a fondue pot or small cast-iron skillet for dipping. The contrast of the crisp pretzel, chewy interior, and velvety cheese dip is pure alchemy. For extra indulgence, drizzle the cheese dip over the pretzels or pile them high on a platter with pickles, mustard, and sliced apples. Leftovers (if there are any) reheat beautifully in a 350°F (175°C) oven for 5-10 minutes.
Pro Chef Tips to Take This From Good to Unforgettable

Great food isn’t just about following a recipe-it’s about understanding the why behind each step. Here’s how to elevate your pretzels and cheese dip from good to Michelin-worthy.
- Temperature Mastery: The key to a perfect pretzel crust lies in the baking soda bath temperature. It should be at a rolling boil (212°F / 100°C) before you add the baking soda-this ensures the Maillard reaction happens quickly and evenly. For the cheese dip, the milk must be warmed to 160°F (71°C) before adding to the roux-any cooler, and it won’t thicken properly; any hotter, and you risk curdling the cheese. Use an instant-read thermometer religiously.
- Timing Secrets: Don’t rush the first rise. The autolyse and proofing steps are where gluten relaxes and flavor develops. If your kitchen is cold, extend the rise time-better over-proofed than under-proofed. For the cheese dip, keep the heat on low after adding the cheese. Overheating will cause the proteins to seize up, leaving you with a grainy, broken sauce.
- Ingredient Upgrades: Swap the cheddar for a mix of sharp cheddar and smoked gouda for a smoky depth. Or try adding 50g (1/2 cup) grated Parmesan to the dough for extra umami. For the butter, use European-style (like Kerrygold) for a richer flavor. And if you can find it, use fresh Bavarian-style pretzel salt for topping-it’s coarser and saltier than regular salt, which is exactly what you want.
- Presentation Tricks: Brush the pretzels with egg wash before baking, then sprinkle with flaky sea salt or everything bagel seasoning for a gourmet touch. Serve the cheese dip in a pre-warmed cast-iron skillet or small cast-iron skillet-it keeps the dip hot longer and looks damn impressive. For a fun twist, drizzle the cheese dip over the pretzels and top with crispy fried shallots or caramelized onions.
- Flavor Boosters: Add 1 tsp malt powder to the dough for a deeper pretzel flavor (it’s the same ingredient used in brewing beer). Or stir 1 tsp honey into the baking soda bath for a subtle sweetness. For the cheese dip, a splash of apple cider vinegar or a pinch of smoked paprika can add complexity. And don’t forget the aroma-simmer a cinnamon stick in the milk for the cheese dip for a warm, spiced note.
Nutrition Facts and Health Benefits
A single homemade soft pretzel (about 100g) contains approximately 320 calories, 10g of protein, 50g of carbohydrates (2g fiber), 8g of fat (5g saturated), and 800mg of sodium. The cheese dip adds an additional 200 calories per 1/4 cup serving, along with 8g of protein, 12g of fat (7g saturated), and 450mg of sodium. While this isn’t a low-calorie snack, it’s significantly better than store-bought versions, which often contain preservatives, artificial flavors, and excessive sodium. The homemade version gives you control over ingredients and portion sizes.
The nutrition profile is a balance of energy-sustaining carbs from the flour, muscle-building protein from the milk and cheese, and heart-friendly fats from the butter. The whole milk provides calcium (25% DV per serving) and vitamin D, which support bone health and immune function. The sharp cheddar adds vitamin B12 (15% DV per serving), crucial for nerve function and energy metabolism, while the poppy seeds sprinkled on top offer trace minerals like zinc and manganese. Even the baking soda has benefits-it’s a source of sodium bicarbonate, which aids digestion and helps maintain electrolyte balance.
For a healthier twist, you can reduce the sodium by using low-sodium cheese and omitting the salt in the baking soda bath. To cut calories, serve smaller pretzels (80g each) or use a lighter cheese dip made with 2% milk and reduced-fat cheese. For a protein boost, add 30g (1/4 cup) grated Parmesan to the dough-it increases protein content without adding significant calories. And if you’re watching your fat intake, swap half the butter in the dough for unsweetened applesauce to reduce saturated fat while keeping the dough tender.
Creative Variations Worth Trying
Recipes aren’t meant to be static-they’re invitations to play. Here are four creative ways to reinvent this classic dish while keeping its soul intact.
Jalapeño Cheddar Pretzel Bites: Add 1 diced jalapeño (seeds removed for less heat) and 50g (1/2 cup) shredded pepper jack cheese to the dough before kneading. After baking, top with more pepper jack and a drizzle of chipotle aioli. Serve with a side of salsa for dipping. The heat cuts through the richness of the cheese dip, making this a perfect game-day snack.
Buffalo Chicken Pretzel Sliders: Shred 1 cup cooked chicken breast and toss it with 1/4 cup buffalo sauce. Split the pretzels horizontally, layer with chicken, shredded lettuce, and a spoonful of blue cheese dressing. The tangy blue cheese balances the heat of the buffalo sauce, creating a flavor explosion in every bite. This is my go-to tailgate dish.
Everything Bagel Pretzel with Smoked Salmon: Brush the baked pretzel with cream cheese mixed with a squeeze of lemon and a pinch of dill. Top with smoked salmon, red onion, capers, and fresh dill. Serve with the cheese dip on the side for dipping. This is brunch elevated-sophisticated, salty, and utterly delicious.
Pumpkin Spice Pretzel Bites: Add 120g (1 cup) pumpkin puree and 1 tsp pumpkin pie spice to the dough, reducing the milk by 30g (2 tbsp). After baking, drizzle with caramel sauce and sprinkle with coarse sugar. These are perfect for fall gatherings and pair beautifully with spiced cider or mulled wine.
Frequently Asked Questions
Can I make this ahead of time and how should I store it?
Yes-pretzels reheat beautifully! Shape and proof the dough up to 12 hours ahead, then refrigerate overnight. Bring to room temperature for 30 minutes before shaping and baking. Baked pretzels can be stored in an airtight container at room temperature for up to 3 days or frozen for up to 1 month. Reheat in a 350°F (175°C) oven for 5-10 minutes to restore crispness. The cheese dip can be made 2 days ahead and reheated gently in a saucepan over low heat, stirring constantly to prevent scorching. Never microwave the dip-it will separate and turn grainy.
What can I serve alongside this dish to make it a complete meal?
Pretzels are a snacking powerhouse, but they can also anchor a meal. Serve them with a charcuterie board featuring sliced prosciutto, salami, and marinated olives for a protein-packed spread. Pair with a crisp green salad dressed in apple cider vinaigrette and a cold German pilsner or hard cider-the acidity cuts through the richness of the cheese. For a heartier meal, serve with beer-braised bratwurst and grilled vegetables. And if you’re feeding a crowd, make these pretzel sliders by stuffing the baked pretzels with pulled pork and pickles.
Why did my dish turn out dense and bread-like instead of chewy?
Dense pretzels are usually the result of over-kneading or using all-purpose flour instead of bread flour. Over-kneading develops too much gluten, making the dough tough and the pretzels dense. Bread flour has higher protein content, which creates a chewy texture-all-purpose flour won’t give you the same result. Another common issue is under-proofing: if the dough hasn’t risen enough before baking, the pretzels will be compact. Finally, check your yeast-old yeast can lead to poor rising and dense texture. Always use fresh yeast and proof your dough in a warm (but not hot) environment.
What are the best ingredient substitutions if I’m missing something?
– No baking soda? Use baking powder at the same weight (120g), but reduce the water in the bath by 50% to avoid a soapy taste. The crust won’t be as deep brown, but it’ll still be tasty.
- No instant yeast? Use active dry yeast instead, but dissolve it in the warm milk first and let it sit for 5 minutes until foamy. Reduce the milk by 15g to account for evaporation.
- No sharp cheddar? Use a mix of mild cheddar and Gouda or add 1 tsp lemon juice to the cheese dip for tang.
- No poppy seeds? Swap for sesame seeds, everything bagel seasoning, or even crushed rosemary for a savory twist.
- No whole milk? Use 2% milk for a lighter dip, but avoid skim-it won’t emulsify properly.
Final Thoughts from the Kitchen
There’s something deeply satisfying about making pretzels from scratch. It’s a dish that connects you to history, to your own hands, to the alchemy of flour and water and heat. I remember my grandmother’s hands, dusted with flour, shaping dough into crosses and loops, her kitchen always warm with the scent of baking. When I finally nailed this recipe, it felt like I’d finally honored her memory in the way she deserved-not with nostalgia, but with action, with dough under my nails and cheese on my whisk. This isn’t just a recipe. It’s a tradition you can recreate in your own kitchen, a small rebellion against the processed, the pre-packaged, the predictable.
So grab your apron, warm your milk, and get ready to bake the best pretzels of your life. Invite your kids into the kitchen to shape the dough, or make it a date-night project with your partner. The mess is worth it. The joy is worth it. And when that first pretzel comes out of the oven, golden and glossy and impossibly chewy, you’ll know-this is the kind of food that makes life better. Share your results, tag me, and tell me what toppings you tried. This recipe isn’t mine anymore. It’s yours now. Happy baking.