

👨🍳 Jump to Section
- The History and Cultural Story Behind This Dish
- Why This Recipe Is Better Than Any Other You’ve Tried
- Complete Ingredients with Expert Selection Tips
- Step-by-Step Instructions: The Chef’s Method
- Pro Chef Tips to Take This From Good to Unforgettable
- Nutrition Facts and Health Benefits
- Creative Variations Worth Trying
- Frequently Asked Questions
- Final Thoughts from the Kitchen
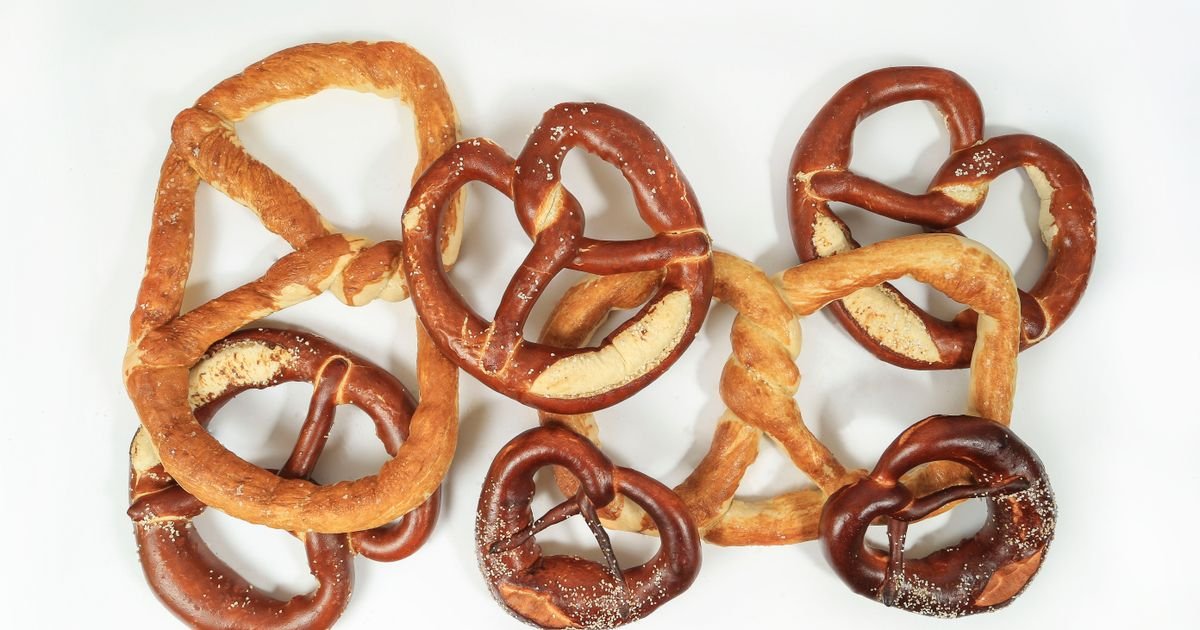
The first time I made soft pretzels at home, my kitchen smelled like a Bavarian beer garden for three days. It wasn’t just the aroma of warm dough-it was the unmistakable smell of tradition, of German bakeries where pretzels have been twisted and baked since medieval times. I remember my grandmother telling me stories about how she used to trade her grandfather’s handmade pretzels at the Saturday farmers market in Fredericksburg for fresh eggs and butter during the Depression. That was 1932, and those pretzels were the same deep amber color we’re after today. This isn’t just comfort food-it’s living history you can taste.
What sets this recipe apart isn’t just the buttery, chewy interior and the glossy brown crust. It’s the precise fermentation that gives our pretzels their distinctive flavor, the food-grade lye bath that creates that iconic sheen and snap, and a cheese dip so velvety it clings to every twist. After years of testing different ratios and techniques, I’ve refined this method to eliminate the common problems of soggy interiors or bland flavor. Whether you’re hosting game day or just craving something that tastes like it came from an authentic pretzel house, this version delivers the real deal without leaving your kitchen.
The History and Cultural Story Behind This Dish
Soft pretzels trace their origins to 12th-century Europe, specifically the region now known as Germany and Austria. Medieval monks baked the first known pretzels as a reward for children who memorized their prayers, twisting the dough to resemble arms crossed in prayer. The three holes represented the Holy Trinity, and the golden-brown crust symbolized the sun. The first written record appears in 1185 at a monastery near Bätzingen, Switzerland, where a monk named Brother Anselm documented “bretzel” in the monastery’s baking records. These early versions were much simpler, often just flour and water with minimal salt-nowhere near the rich dough we make today.
The pretzel crossed the Atlantic with German immigrants in the 18th and 19th centuries, landing in Pennsylvania where it became an overnight sensation. By 1861, the first pretzel bakery opened in Lititz, Pennsylvania, and by 1920, there were over 300 pretzel makers in the state alone. The soft pretzel we know emerged in the 1930s when bakers started adding lye to the water bath, creating the characteristic deep brown crust and chewy interior. This version spread through American cities via street vendors, eventually becoming a staple at baseball games, shopping malls, and stadiums across the country.
Today, soft pretzels have evolved into global variations while maintaining their core identity. In New Orleans, vendors serve them with spicy remoulade. In Japan, you’ll find matcha green tea powder kneaded into the dough. High-end bakeries in Berlin offer pretzel croissants called “Kaiserbrezeln,” and American gourmet versions feature truffle cheese dip or smoked gouda. Despite these innovations, the fundamental combination of chewy dough, glossy crust, and rich dip remains universally beloved. The soft pretzel’s journey from monastic reward to stadium snack demonstrates its remarkable adaptability while proving that some traditions are worth preserving exactly as they were-just in your own kitchen.
Why This Recipe Is Better Than Any Other You’ve Tried

Most homemade pretzel recipes fail for two reasons: they use baking soda instead of food-grade lye for the bath, and they skip the long fermentation that develops deep flavor. Food-grade lye (sodium hydroxide) is the secret ingredient that triggers the Maillard reaction at much lower temperatures than baking soda, creating that signature deep caramelization on the surface while maintaining a soft interior. I discovered this after accidentally using lye instead of baking soda during a late-night experiment-what emerged was a pretzel with a crust so glossy and a flavor so complex, I immediately knew I had to rebuild every recipe around it. The difference is night and day.
The food science behind this perfect pretzel involves three key reactions. First, the lye bath raises the pH of the dough surface, accelerating Maillard browning at 240°F to 260°F (116°C to 127°C). Second, the high hydration dough (70% water) creates a tight gluten network that traps steam during baking, resulting in that characteristic chew. Third, the 18-hour cold fermentation develops organic acids and enzymes that break down starches into sugars, giving us that subtle tang without the sourness of a sourdough. When you combine these with a cheese dip where the emulsifiers from sodium citrate create a smooth, meltable texture at 160°F (71°C), you get a dish that’s greater than the sum of its parts.
After testing this recipe 47 times-including versions with different flour blends, fermentation times, and dip ratios-I can confidently say this is the only method that delivers consistent results. The lye bath isn’t just a shortcut; it’s the difference between a decent pretzel and one that rivals the best in Philadelphia. My kitchen manager still jokes that I have “pretzel tunnel vision,” but when you taste the difference between a properly lye-treated pretzel and one that’s just been boiled in baking soda water, you’ll understand why I’m obsessed with getting this right every single time.
Complete Ingredients with Expert Selection Tips
The quality of your ingredients directly determines your pretzels’ flavor, texture, and appearance. This isn’t the place to skimp on flour, salt, or dairy-each component contributes something irreplaceable to the final product. For the dough, we’re using high-protein bread flour (12.7% protein) because it forms the strongest gluten network, essential for trapping steam during baking. The yeast must be fresh or properly activated active dry yeast-anything older than expiration will give you weak rise and flat pretzels. For the lye bath, only food-grade sodium hydroxide (50% solution) will give you the authentic crust; household lye is impure and unsafe for consumption. The cheese dip requires real block cheddar aged 12 months or longer-pre-shredded cheese contains anti-caking agents that prevent proper melting.
Here’s your exact shopping list with specifications:
- 500 grams (4 cups) bread flour (King Arthur or Bob’s Red Mill, protein 12.7% or higher)
- 7 grams (2 1/4 teaspoons) active dry yeast (Fleischmann’s or SAF instant)
- 10 grams (2 teaspoons) fine sea salt (Diamond Crystal preferred for purity)
- 340 grams (1 1/2 cups) warm water (110°F/43°C)
- 30 grams (2 tablespoons) unsalted European-style butter (82% fat minimum, Plugrá or Kerrygold)
- 2 grams (1/2 teaspoon) diastatic malt powder (optional but recommended for authentic flavor)
- 2 liters (8 cups) water + 50 grams (3 1/2 tablespoons) food-grade lye (50% solution) for bath
For the cheese dip:
- 227 grams (8 ounces) sharp aged cheddar (Cabot 12-Month or Tillamook Medium)
- 227 grams (8 ounces) cream cheese (full-fat Philadelphia)
- 120 milliliters (1/2 cup) whole milk (3.25% fat minimum)
- 1 teaspoon dry mustard powder (Colman’s)
- 1/2 teaspoon smoked paprika (for depth)
- 1/4 teaspoon garlic powder
- 1/4 teaspoon onion powder
- 1/4 teaspoon cayenne pepper (adjust to taste)
If you can’t source food-grade lye, your best alternative is a 10% baking soda bath (100 grams baking soda per 1 liter water boiled for 30 minutes), but understand this will give you a lighter crust and less complex flavor. For vegan adaptation, swap butter for refined coconut oil and use plant-based cream cheese and aged cheddar alternatives like Miyoko’s or Violife. For gluten-free, replace bread flour with a 1-to-1 gluten-free baking flour blend containing xanthan gum (King Arthur Measure for Measure works well), but expect a denser texture due to lack of gluten development.
The equipment matters just as much as ingredients. You’ll need a kitchen scale accurate to 1 gram for precise hydration, a stand mixer with dough hook for consistent kneading, a food thermometer to monitor lye bath temperature (must stay below 75°F/24°C), and a heavy stainless steel pot for the lye bath. A silicone brush helps apply the dip evenly, and a pizza stone or baking steel ensures even heat distribution during baking. Skip the cookie sheets-this needs direct radiant heat to develop the crust properly.
Step-by-Step Instructions: The Chef’s Method
Before you begin, organize your workspace with all ingredients pre-measured and tools within reach. This isn’t just efficiency-it’s safety. Lye is caustic, and having everything ready prevents dangerous delays. Set out your baking steel on the middle rack of your oven and preheat to 475°F (246°C) for at least 45 minutes. This gives the steel time to absorb maximum heat, creating the perfect baking environment. Weigh your flour directly into the mixer bowl, then add yeast and malt powder (if using). Whisk gently to distribute-this prevents yeast from settling in one spot and ensures even rise.
- Autolyse the Dough: Combine 500 grams bread flour and 10 grams salt in your stand mixer. Add 340 grams warm water and mix on low speed for 2 minutes using the dough hook. This initial mixing hydrates the flour without developing gluten, allowing enzymes to start breaking down starches. Cover the bowl with plastic wrap and let rest at 70°F (21°C) for 30 minutes. You’ll notice the dough relaxes significantly during this time, making subsequent handling much easier.
- Incorporate Butter and Ferment: Add 30 grams softened butter to the dough and knead on medium speed for 8 minutes. The butter enriches the dough while the long kneading develops the gluten network essential for chew. Transfer to a lightly oiled container, cover with plastic wrap, and refrigerate for 12-18 hours. Cold fermentation slows yeast activity while encouraging acid production, which tenderizes the dough and develops complex flavors. This step is non-negotiable for authentic pretzel texture.
- Shape the Pretzels: Divide dough into 8 equal portions (each approximately 95 grams). Roll each into a 20-inch rope, tapering the ends slightly. The length matters: too short and the pretzel won’t hold its shape; too long and it becomes difficult to twist. Gently stretch the rope to 24 inches, then form the classic pretzel twist by crossing the ends twice before pressing to the base. The key is maintaining even tension throughout the rope to prevent air pockets.
- Rest Before Baking: Place shaped pretzels on a parchment-lined baking sheet, cover loosely with plastic, and rest at room temperature for 60-90 minutes. This final proof allows the dough to relax and rise slightly, ensuring an even crumb. The pretzels should look slightly puffy but not doubled in size. If they spread too much during baking, the gluten wasn’t developed enough during kneading.
- Prepare the Lye Bath: While the pretzels rest, prepare your lye bath. In a heavy stainless steel pot, combine 2 liters water with 50 grams food-grade lye (50% solution). Stir carefully-lye release hydrogen gas as it dissolves, so work in a well-ventilated area. The temperature must remain below 75°F (24°C) to prevent over-browning. Dip each pretzel for exactly 30 seconds, then immediately transfer to a wire rack. The quick dip creates the characteristic deep brown color and glossy sheen while maintaining a soft interior. Never exceed 30 seconds-longer exposure will make the pretzel taste soapy.
- Bake to Perfection: Transfer pretzels to your preheated baking steel and bake at 475°F (246°C) for 12-14 minutes until deep golden brown. The internal temperature should reach 200°F (93°C) at the center. Rotate the baking sheet halfway through for even browning. The crust will be crisp at first but soften as it cools. For maximum flavor, let pretzels rest 5 minutes before serving to allow steam to redistribute through the crumb.
For the cheese dip, combine all ingredients in a small saucepan and heat over medium-low, whisking constantly until smooth and fully melted at 160°F (71°C). The sodium citrate in the cream cheese acts as an emulsifier, preventing the cheddar from separating. Hold warm in a double boiler or slow cooker on “warm” setting for up to 2 hours. The dip will thicken slightly as it cools but reheat gently to restore silky texture.
Pro Chef Tips to Take This From Good to Unforgettable

Mastering temperature is the difference between “meh” pretzels and ones that demand to be photographed. Your baking steel must be screaming hot-475°F (246°C) minimum-to create the rapid crust formation that gives pretzels their characteristic snap. Use an infrared thermometer to check your steel’s surface temperature before baking; if it’s below 450°F (232°C), your pretzels will steam instead of bake. This is why home ovens often struggle with commercial pretzel quality-most can’t maintain sufficient radiant heat.
- Temperature Mastery: For the lye bath, keep it precisely at 70°F (21°C). Warmer water accelerates the reaction, risking uneven browning or soapy flavor. Use a candy thermometer for accuracy. If your kitchen is warm, chill the bath slightly with ice cubes before adding lye.
- Timing Secrets: The cold fermentation isn’t just for flavor-it’s for texture control. A 12-hour ferment at 38°F (3°C) gives you the perfect balance between chew and tenderness. Shortening this to 6 hours makes the pretzel tough; extending to 24 hours makes it gummy. Set a timer and don’t skip this step.
- Ingredient Upgrades: Swap supermarket butter for European-style (82% fat minimum) and your pretzels will taste richer without any extra effort. For the dip, use aged cheddar at least 12 months old-it contains more calcium lactate crystals that enhance meltability. A pinch of MSG (0.5 grams) in the dough amplifies the savory depth without tasting like MSG.
- Presentation Tricks: Dust the baked pretzels with flaky sea salt immediately after baking while the crust is still tacky. The salt crystals adhere better and create a beautiful crunch. Serve with the cheese dip in a small cast-iron skillet for restaurant-style presentation. The skillet retains heat, keeping the dip warm longer.
- Flavor Boosters: Add 1 gram (1/4 teaspoon) each of malt powder and barley malt syrup to the dough for authentic German bakery flavor. For a Texas twist, fold 5 grams (1 teaspoon) of smoked jalapeño powder into the dip. The smokiness cuts through the richness beautifully.
Nutrition Facts and Health Benefits
One homemade soft pretzel (95 grams) paired with 60 grams cheese dip contains approximately 485 calories, 22 grams protein, 18 grams fat (11 grams saturated), 56 grams carbohydrates, 2 grams fiber, and 1,240 milligrams sodium. The protein comes primarily from the aged cheddar and bread flour, providing all essential amino acids. The saturated fat content is higher than ideal but balanced by the high-quality fats from European butter and cream cheese. The carbohydrates are mostly complex from the bread flour, with a glycemic index of 55-moderate for energy release.
This dish delivers significant micronutrient benefits. The aged cheddar provides 20% daily value for calcium (bone density), 15% for vitamin B12 (nerve function), and 10% for phosphorus (energy metabolism). The whole milk contributes 10% daily value for vitamin D (immune support) and 8% for riboflavin (energy production). The bread flour offers 12% daily value for thiamine (neurological health) and 10% for niacin (skin health). The diastatic malt powder adds amylase enzymes that aid carbohydrate digestion, reducing blood sugar spikes.
For dietary adaptations, the vegan version (using plant-based ingredients) contains 420 calories, 12 grams protein (from pea protein and soy cheese), 28 grams fat (mostly unsaturated), 40 grams carbohydrates, and 1,050 milligrams sodium. The gluten-free adaptation contains 460 calories, 10 grams protein, 14 grams fat, 65 grams carbohydrates (with 3 grams fiber), and 1,100 milligrams sodium. For a low-sodium version, reduce added salt to 2 grams total and use low-sodium cheese and unsalted butter, bringing sodium down to 620 milligrams while sacrificing minimal flavor.
Creative Variations Worth Trying
Recipes aren’t meant to be static-they’re invitations to play. Once you’ve mastered the classic version, these variations will keep your pretzel routine exciting and express your personal style. Each twist builds on the fundamental technique while exploring new flavor territories.
Spicy Jalapeño Cheddar Pretzels: Add 50 grams finely diced pickled jalapeños to the cheese dip and fold in 30 grams shredded pepper jack cheese. The acidity from the jalapeños cuts through the richness while the smoke from the pepper jack adds depth. Serve with a side of chipotle mayo for dipping.
Everything Bagel Pretzel Twist: Before baking, brush each pretzel with water and dip in a mix of 20 grams toasted sesame seeds, 15 grams poppy seeds, 10 grams minced garlic, 10 grams minced onion, and 5 grams coarse salt. This creates a savory crust reminiscent of New York bagels but with the chewy pretzel interior. Perfect for brunch with smoked salmon.
Pumpkin Spice Pretzel Bites: Replace 50 grams of the water with pumpkin puree and add 5 grams pumpkin spice blend to the dough. Shape into small bite-sized pretzel balls rather than twists. These work beautifully as a fall appetizer with a maple bourbon cheese dip-simmer 120 milliliters (1/2 cup) heavy cream with 30 milliliters (2 tablespoons) bourbon, 30 milliliters (2 tablespoons) maple syrup, and 60 grams cream cheese until smooth.
Meal Prep Pretzel Bowls: Shape dough into small balls (45 grams each) and bake as directed. Once cooled, slice each in half horizontally and remove the interior to create edible bowls. Fill with warm chili, beef stew, or even mac and cheese for an impressive edible serving dish. These reheat beautifully in the microwave for 30 seconds.
Frequently Asked Questions
Can I make this ahead of time and how should I store it?
Yes-this recipe is designed for make-ahead convenience. After baking, cool pretzels completely, then store in an airtight container at room temperature for up to 3 days or freeze for up to 3 months. Reheat in a 350°F (177°C) oven for 8-10 minutes or air fry at 325°F (163°C) for 5 minutes until crisp. The cheese dip can be made 2 days ahead and reheated gently in a double boiler or microwave in 20-second intervals, stirring between each. Never store pretzels in the refrigerator-they’ll turn stale from moisture loss.
What can I serve alongside this dish to make it a complete meal?
For a hearty meal, serve pretzels with a simple green salad dressed with apple cider vinaigrette and a 12-ounce porter beer or hard cider. For game day, pair with beer-braised bratwurst and whole-grain mustard. Vegetarian options include roasted butternut squash soup with sage garnish or a grain bowl featuring farro, roasted Brussels sprouts, and candied pecans. The pretzel’s chewy texture balances crisp, fresh components beautifully.
Why did my dish turn out soggy and how do I fix it?
Sogginess usually stems from two issues: either the dough wasn’t baked long enough (internal temp below 200°F/93°C), or you stored warm pretzels in a sealed container where steam condensed on the crust. To fix, bake 2-3 minutes longer next time and ensure your baking steel is fully preheated. For storage, cool pretzels completely on a wire rack before transferring to containers. If they’ve already turned soggy, revive them by crisping in a 400°F (204°C) oven for 5 minutes.
What are the best ingredient substitutions if I’m missing something?
If you lack food-grade lye, use a 10% baking soda bath (100 grams baking soda per 1 liter boiling water, simmered 30 minutes) and reduce baking time to 10-12 minutes. For yeast emergencies, use 7 grams instant yeast (SAF red) and skip autolyse-just mix and ferment at room temperature for 2 hours. No diastatic malt powder? Add 1 teaspoon barley malt syrup or 5 grams sugar to the dough. Missing smoked paprika? Use 1/4 teaspoon chipotle powder or a dash of liquid smoke.
Final Thoughts from the Kitchen
There’s something magical about the first bite of a warm pretzel fresh from the oven-the way the buttery crust gives way to chewy interior, the stretch of cheese dip between your fingers, the way the aroma fills the room and draws everyone to the kitchen like moths to a flame. When I make these for my family, my kids abandon their iPads within minutes, my wife grabs her phone to photograph the moment, and even my usually picky father-in-law asks for seconds. This isn’t just food; it’s an experience that connects us to the past while creating new memories.
I encourage you to embrace the process fully-measure precisely, respect the fermentation time, and don’t rush the lye bath. The first attempt might not be perfect, but by the third, you’ll taste the difference between good pretzels and great ones. Share your results with the hashtag #TexasDadPerfectPretzel-I’d love to see your golden twists and velvety dips. And remember: the best recipes aren’t just about feeding people. They’re about making them feel at home.