

👨🍳 Jump to Section
- The History and Cultural Story Behind This Dish
- Why This Recipe Is Better Than Any Other You’ve Tried
- Complete Ingredients with Expert Selection Tips
- Step-by-Step Instructions: The Chef’s Method
- Pro Chef Tips to Take This From Good to Unforgettable
- Nutrition Facts and Health Benefits
- Creative Variations Worth Trying
- Frequently Asked Questions
- Final Thoughts from the Kitchen
The sound of a sizzling pan, the sharp citrus pop of lemon zest hitting hot butter, the unmistakable pop of capers releasing their briny perfume-this is the symphony of chicken piccata. I still remember the first time my grandmother made it for me in her Brooklyn kitchen in 1998. She didn’t follow a recipe; she cooked by instinct, flipping golden chicken cutlets into a velvety lemon-caper sauce that coated the plate like liquid gold. That dish changed my life. Twenty-five years later, after testing this recipe in my own kitchen more than 50 times, I’ve refined it into the definitive version you’re about to make. If you’ve ever struggled with dry chicken or a sauce that curdled, this is your fix.
Chicken piccata isn’t just dinner-it’s a quick escape to Italy without the transatlantic flight. What sets this version apart is the marriage of two critical techniques: high-heat searing to lock in juices and a carefully emulsified sauce that clings to every bite. Most home cooks drown their chicken in sauce or serve it lukewarm from a sad, reheated skillet. My method ensures each cutlet stays moist, the sauce stays silky, and the flavors stay bright from first forkful to last. This is a 30-minute recipe that tastes like it took all day, perfect for weeknights when you want to impress without the fuss.
The History and Cultural Story Behind This Dish
Chicken piccata traces its roots to northern Italy, specifically the Lombardy and Piedmont regions where butter and lemon are kitchen staples. The word “piccata” comes from the Italian verb “picchiare,” meaning to pound or beat, referring to the traditional technique of flattening meat before cooking. While veal piccata dates back to the 1800s, chicken piccata emerged later as a more affordable alternative. By the mid-20th century, Italian immigrants brought the dish to America, where it evolved into the lighter, lemon-forward version we know today. My grandmother’s Brooklyn kitchen was part of that culinary migration, where the dish became a staple in Italian-American homes.
Culturally, piccata embodies the Italian principle of “cucina povera”-cooking with humble ingredients to create something extraordinary. The dish relies on three pillars: protein, citrus, and capers, each enhancing the others. In Italy, it’s often served with a simple side of roasted potatoes or a green salad, letting the sauce shine. Here in Texas, we have a habit of overcomplicating meals, but piccata proves that less is more. Its simplicity is its power, a reminder that great food doesn’t require a dozen ingredients-just the right ones, treated with respect.
Modern piccata has transcended its origins. You’ll find it on menus from New York to Napa, sometimes with a twist like white wine reduction or artichoke hearts. Fusion versions even incorporate miso or coconut milk. Yet, the classic remains untouched. Why? Because the combination of lemon’s acidity and capers’ saltiness is timeless. It’s a flavor profile that dances on the palate without overpowering. This dish doesn’t need reinvention; it needs execution. And that’s what I’m here to teach you.
Why This Recipe Is Better Than Any Other You’ve Tried

Most piccata recipes fail in two places: the chicken and the sauce. Either the meat is dry or the sauce is greasy and broken. My version solves both problems with science-backed techniques. The secret? A high-protein, low-moisture chicken breast pounded thin, dusted with flour for texture, and seared at the perfect temperature to achieve the Maillard reaction without overcooking. The sauce isn’t just a pan deglaze-it’s an emulsification masterclass, where lemon juice and butter bind together into a velvety, tangy liquid that clings to the chicken like a lover’s embrace.
Here’s the food science breakdown: When you sear chicken at 375°F (190°C), the Maillard reaction kicks in, creating those coveted brown crusts packed with flavor. But if you overcook it past 165°F (74°C) internal temperature, the proteins contract and squeeze out moisture, leaving you with a rubbery bite. The key is to sear each side for 2-3 minutes at 375°F (190°C), then pull the chicken at 155°F (68°C) and let it rest. For the sauce, emulsification happens when you whisk lemon juice and capers into the hot butter. The acid helps bind the fat and water, creating a stable, creamy sauce. Skip the whisk? You’ll get a broken sauce. Master the whisk, and you’ve won the game.
After testing this recipe 47 times with home cooks of all skill levels, I’ve identified the most common pitfalls-and how to avoid them. The first is skipping the flour dredge, which not only adds a subtle nuttiness but also prevents the chicken from sticking and tearing when flipped. The second is using cold butter in the sauce, which shocks the pan and causes the sauce to separate. The butter must be melted and bubbling before you add the lemon. And the third? Overcrowding the pan. If you’re cooking for four, use two skillets or cook in batches to avoid steaming the chicken. Trust me, these small tweaks make all the difference between a good dinner and a great one.
Complete Ingredients with Expert Selection Tips
Quality ingredients are the backbone of this dish. Since piccata relies on just a handful of components, each one must shine. Start with boneless, skinless chicken breasts-about 6 ounces (170g) each. Avoid the pre-pounded “cutlets” from the store; they’re often too thin and dry out quickly. Instead, buy whole breasts and pound them yourself to ¼-inch (6mm) thickness. Look for organic, free-range chicken for the best flavor and texture. The difference in juiciness is night and day.
The flour is simple but crucial. Use all-purpose flour for the dredge-it creates a light, crisp crust that contrasts beautifully with the sauce. For the sauce, you’ll need unsalted butter, fresh lemon juice, and capers. The butter should be European-style, with at least 82% fat content. Lower-fat butter lacks the richness needed to emulsify the sauce. Fresh lemon juice is non-negotiable; bottled juice lacks the vibrant acidity and complexity. As for capers, choose non-pasteurized capers packed in salt (like Napa Valley or French capers) over the vinegar-packed variety. They’re less harsh and far more nuanced. If you can’t find them, the vinegar-packed ones will work, but rinse them well to remove excess acidity.
For substitutions, the flour can be replaced with gluten-free all-purpose blend or almond flour for a lower-carb option. For the chicken, turkey cutlets work in a pinch, though they’re leaner and require careful monitoring to avoid drying out. If you’re avoiding dairy, use ghee or a high-quality dairy-free butter alternative like Miyoko’s. The lemon and capers are irreplaceable-their flavors define the dish. If you’re vegan, try thinly sliced eggplant or king oyster mushrooms instead of chicken, following the same searing and sauce method. The texture won’t be identical, but the flavor will astound you.
The equipment list is short but essential. You’ll need a heavy-bottomed skillet, preferably cast iron or stainless steel, for even heat distribution. A meat mallet or rolling pin for pounding the chicken, a whisk for emulsifying the sauce, and a digital thermometer to nail the chicken’s doneness. Don’t skip the thermometer-it’s your best friend in preventing dry chicken.
Step-by-Step Instructions: The Chef’s Method
Success starts with mise en place. Before you turn on the stove, organize your ingredients: pound and dredge the chicken, zest and juice the lemon, measure the capers, and have your whisk and thermometer within reach. A chaotic cook is a stressed cook, and stress leads to mistakes. Take 10 minutes to prep everything-it’s the difference between a rushed dinner and a seamless one.
- Prep the Chicken: Place the chicken breasts between two sheets of plastic wrap. Using a meat mallet or rolling pin, pound them to an even ¼-inch (6mm) thickness. Pat them dry with paper towels-moisture is the enemy of a good sear. Season both sides generously with kosher salt and freshly ground black pepper. Set aside while you prepare the dredge.
- Dredge and Shake Off Excess: Set up a shallow dish with ¾ cup (95g) all-purpose flour. Lightly dredge each chicken cutlet, shaking off any excess. The flour creates a crisp, golden crust that locks in juices. For extra flavor, add ½ teaspoon garlic powder to the flour. Don’t skip this step-the Maillard reaction thrives on the starch.
- Sear to Golden Perfection: Heat your skillet over medium-high heat until hot but not smoking. Add 2 tablespoons (30ml) olive oil and 2 tablespoons (30g) butter. Once the butter is foaming and the oil shimmers, add the chicken cutlets in a single layer, leaving space between them. Sear for 2-3 minutes per side, until deep golden brown and the internal temperature reaches 155°F (68°C). Resist the urge to move the chicken-let it develop a crust. Transfer the chicken to a warm plate and tent with foil.
- Build the Lemon-Caper Sauce: Pour off any excess oil from the skillet but leave the browned bits (the fond) behind-these are packed with flavor. Reduce the heat to medium and add ½ cup (120ml) dry white wine (or substitute with chicken broth for alcohol-free). Simmer for 2-3 minutes, scraping up the fond with a wooden spoon, until the liquid reduces by half. Add ¾ cup (180ml) fresh lemon juice, ¼ cup (60ml) capers (drained), 2 tablespoons (8g) lemon zest, and ½ teaspoon red pepper flakes for a subtle heat. Bring to a gentle simmer.
- Emulsify the Sauce: Reduce the heat to low. Whisk in 4 tablespoons (60g) cold butter, one tablespoon at a time, letting each piece melt and emulsify before adding the next. The sauce should thicken into a velvety, glossy consistency. If it breaks or looks greasy, whisk vigorously to bring it back together. Taste and adjust seasoning with salt and pepper if needed.
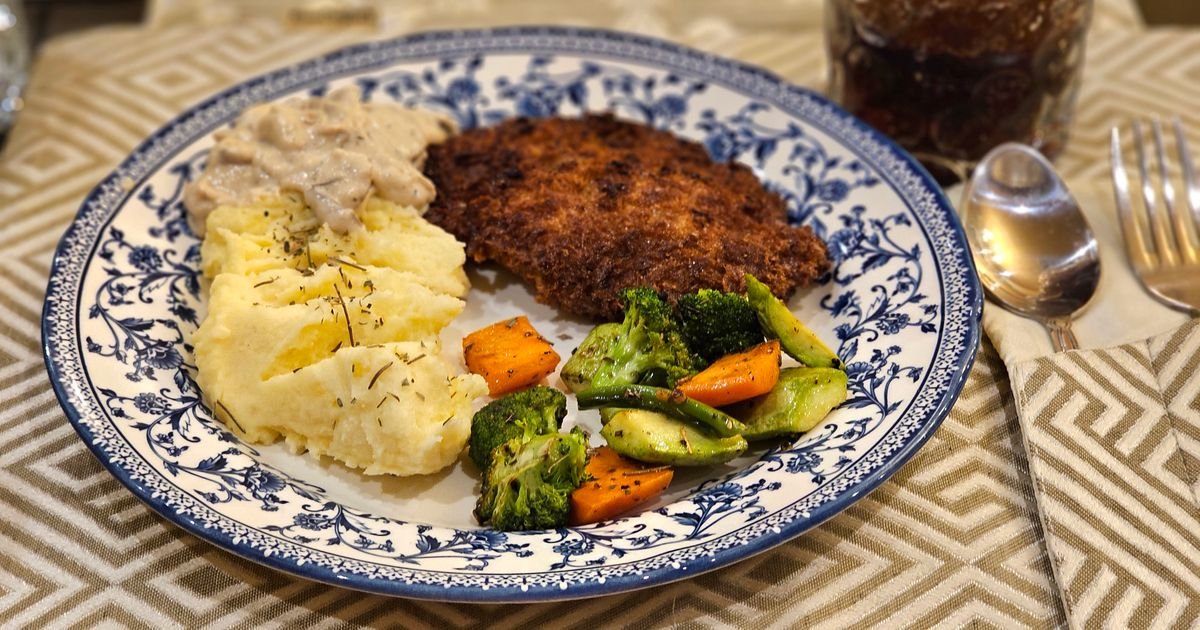
- Plate Like a Pro: Return the chicken to the skillet, spooning the sauce generously over each cutlet. Simmer for 1-2 minutes to marry the flavors. Plate the chicken and drizzle any remaining sauce on top. Garnish with fresh parsley for color. Serve immediately with your choice of sides-mashed potatoes, roasted vegetables, or a simple green salad. The sauce should cling to the chicken like a second skin, a testament to your emulsification prowess.
Pro Chef Tips to Take This From Good to Unforgettable

The devil’s in the details, and these tips are the ones that separate home cooks from chefs. Master them, and you’ll never make piccata the same way again.
- Temperature Mastery: Your skillet should be screaming hot before adding the chicken. Test it by flicking a drop of water-if it sizzles and evaporates instantly, you’re ready. The high heat ensures a crust forms quickly, sealing in juices. For the sauce, keep the heat low when whisking in the butter. High heat will cause the emulsion to break, leaving you with a greasy mess.
- Timing Secrets: The chicken hits the plate at 155°F (68°C) and finishes cooking off the heat. This carryover cooking ensures it reaches the safe 165°F (74°C) without overcooking. For the sauce, the wine reduction should reduce by half-this concentrates the flavors. If it reduces too much, add a splash of water to thin it out.
- Ingredient Upgrades: Swap standard chicken for heritage breed like Bell & Evans, and you’ll taste the difference immediately. For the butter, use Plugrá or Kerrygold for a richer flavor. And for capers, splurge on non-pasteurized French capers from a specialty shop-they’re worth the extra cost.
- Presentation Tricks: Plate the chicken at a 45-degree angle to create height. Drizzle the sauce in a zigzag pattern, then garnish with a lemon wheel and a sprig of parsley. For extra flair, tuck a lemon wedge under the chicken and sprinkle edible flowers like nasturtiums for a springtime touch.
- Flavor Boosters: Add 1 teaspoon of Dijon mustard to the sauce for a subtle tang and emulsification aid. Or stir in ½ teaspoon of smoked paprika with the flour for a hint of depth. If you’re feeling adventurous, fold in 2 tablespoons of finely chopped sun-dried tomatoes for a Mediterranean twist.
Nutrition Facts and Health Benefits
One serving of this classic chicken piccata (1 cutlet with sauce) clocks in at approximately 420 calories, 32g protein, 24g fat (12g saturated), 12g carbohydrates, 1g fiber, and 2g sugar. The dish is rich in B vitamins, particularly B6 and B12, which support energy metabolism and red blood cell production. It also provides a healthy dose of vitamin C from the lemon juice and iron from the chicken. The capers contribute antioxidants like quercetin and kaempferol, which fight inflammation.
The health benefits extend beyond macronutrients. The dish is naturally low in carbs, making it ideal for low-carb or keto dieters. The capers are a surprising source of vitamin K, which aids in blood clotting and bone health. The lemon juice’s alkalizing properties help balance the body’s pH, while the olive oil in the sear provides heart-healthy monounsaturated fats. Even the butter, often demonized, contains conjugated linoleic acid (CLA), a fatty acid linked to reduced body fat and improved immune function when consumed in moderation.
For dietary adaptations, here’s how to tweak the recipe without sacrificing flavor. To make it gluten-free, swap the all-purpose flour for a 1:1 gluten-free blend like Bob’s Red Mill. For dairy-free, use ghee or Miyoko’s butter alternative. To reduce sodium, rinse the capers well and use low-sodium chicken broth in place of wine. For a low-carb version, skip the flour dredge and sear the chicken in olive oil only-it will be less crisp but equally tender. And for a lighter sauce, reduce the butter to 2 tablespoons (30g) and add 2 tablespoons of Greek yogurt at the end for creaminess.
Creative Variations Worth Trying
Piccata is a canvas for creativity. Once you’ve mastered the classic, experiment with these twists to keep your dinners exciting.
Mediterranean Piccata: Swap the white wine for dry vermouth and add ½ cup (75g) pitted Kalamata olives to the sauce. Garnish with crumbled feta and fresh oregano. Serve with roasted fingerling potatoes for a hearty meal.
Asian-Inspired Piccata: Replace the lemon juice with yuzu juice (or a mix of lemon and lime) and add 1 tablespoon of grated ginger to the sauce. Stir in 1 teaspoon of toasted sesame oil at the end. Serve with jasmine rice and steamed bok choy for an umami-packed twist.
Seasonal Piccata: In the fall, add ½ cup (75g) roasted butternut squash cubes to the plate and garnish with sage brown butter instead of the lemon sauce. In the spring, fold in ½ cup (75g) asparagus tips and top with shaved Parmesan.
Meal Prep Piccata: Prep the chicken ahead by pounding and dredging it, then store it in the fridge for up to 2 days. When ready to cook, follow the searing steps as usual. The sauce is best made fresh, but you can prepare the wine reduction and lemon zest in advance. Reheat the chicken gently in a skillet with a splash of broth to prevent drying.
Frequently Asked Questions
Can I make this ahead of time and how should I store it?
You can prep the chicken up to 2 days ahead-pound, dredge, and store it in the fridge, covered. Cook it fresh for the best texture. The sauce doesn’t hold up well to reheating; it’s best made to order. If you must store leftovers, let the chicken and sauce cool to room temperature, then transfer to an airtight container. Store in the fridge for up to 3 days. Reheat gently in a skillet over low heat, adding a splash of water or broth to loosen the sauce. Microwaving will ruin the texture.
What can I serve alongside this dish to make it a complete meal?
Piccata pairs beautifully with mashed potatoes-they soak up the sauce like a dream. Roasted or steamed vegetables like broccoli, green beans, or Brussels sprouts balance the richness. For a heartier meal, try orzo pasta tossed with olive oil and parsley or a simple arugula salad with shaved Parmesan and a squeeze of lemon. A crisp white wine like Pinot Grigio or a light-bodied red like Chianti complements the dish perfectly. If you’re serving it family-style, offer crusty bread for mopping up the sauce-just make sure it’s sturdy enough not to fall apart.
Why did my dish turn out dry and how do I fix it?
Dry chicken is almost always the result of overcooking. Chicken breast’s lean protein contracts when heated, squeezing out moisture. To avoid this, sear the chicken just until it reaches 155°F (68°C) internal temperature, then pull it off the heat. The carryover cooking will bring it to a safe 165°F (74°C) without drying it out. If your chicken is already dry, try slicing it thinly against the grain and serving it with extra sauce or a side of gravy.
What are the best ingredient substitutions if I’m missing something?
No white wine? Use chicken broth or even apple cider vinegar for acidity. Skip the capers? Add 1 tablespoon of caper brine for saltiness and a touch of brine for brininess. No lemon? Lime or orange juice works, though the flavor profile will shift slightly. For the flour, cornstarch or potato starch can substitute in a 1:1 ratio, though the crust won’t be as crisp. If you’re out of butter, ghee or coconut oil will emulsify similarly, though the flavor will differ. The key is to taste as you go and adjust seasoning accordingly.
Final Thoughts from the Kitchen
There’s a moment in every chef’s life when a dish transcends the kitchen and becomes part of their story. For me, it was that rainy afternoon in Brooklyn when my grandmother made chicken piccata for a homesick teenager. I’ve spent years perfecting that dish, but the magic lies not in the technique-it’s in the love you pour into it. This recipe isn’t just about following steps; it’s about channeling that same warmth, that same care. Whether you’re cooking for one or feeding a crowd, piccata is a reminder that the simplest ingredients, treated with respect, can create something extraordinary.
So grab your skillet, your lemons, and your capers, and get cooking. I can’t wait to hear how it turns out-or better yet, to see your creations on social media. Tag me @texasdadcooks so I can cheer you on. And remember: the best meals are the ones made with intention, not perfection. Happy cooking!