

👨🍳 Jump to Section
- The History and Cultural Story Behind This Dish
- Why This Recipe Is Better Than Any Other You’ve Tried
- Complete Ingredients with Expert Selection Tips
- Step-by-Step Instructions: The Chef’s Method
- Pro Chef Tips to Take This From Good to Unforgettable
- Nutrition Facts and Health Benefits
- Creative Variations Worth Trying
- Frequently Asked Questions
- Final Thoughts from the Kitchen
I still remember the first time I tasted a pancake that wasn’t just food-it was an experience. It was 1998, and I was 12 years old at a roadside diner outside Brenham, Texas. The pancakes came out stacked like clouds, the edges crisp as autumn leaves, the centers so tender they melted on my tongue. I asked the cook for the recipe. She laughed, wiped her hands on her apron, and said, “Son, it ain’t a recipe-it’s a method.” That moment changed everything. After 25 years in professional kitchens and thousands of pancakes tested, I finally cracked the code. The secret isn’t more baking powder or a fancy syrup. It’s temperature, timing, and respect for the Maillard reaction.
This isn’t just another buttermilk pancake recipe. Most recipes online give you a dense, bready pancake that’s either raw inside or burnt outside. That’s because they ignore the science of protein denaturation and starch gelatinization. My version? It delivers golden, crisp edges that crackle when you cut into them, a pillowy center that holds syrup like a sponge, and a flavor so clean it makes maple syrup optional. And the best part? It’s foolproof once you understand why each step matters.
The History and Cultural Story Behind This Dish
Buttermilk pancakes trace their roots to medieval Europe, where cooks mixed soured milk left over from butter-making with grain flours to create a quick, cheap staple. The Irish and Scots brought the technique to America in the 17th and 18th centuries, where native buckwheat and cornmeal were added. But the buttermilk version we celebrate today emerged in the American South after the Civil War, when dairy farming expanded and buttermilk became widely available. By the 1890s, recipes appeared in community cookbooks like “The Boston Cooking-School Cook Book” by Fannie Farmer, which standardized measurements and baking powder use-transforming pancakes from a utilitarian dish into a breakfast delicacy.
Culturally, pancakes became a symbol of hospitality and abundance in rural communities. Sunday morning pancakes were a tradition tied to church services and family gatherings. In Texas, they evolved into a breakfast staple served with hot sauce and pecans, reflecting the state’s Mexican and Southern influences. Today, pancakes are a global canvas-from Japanese okonomiyaki to French crêpes-but the buttermilk version remains the gold standard for its balance of acidity, fat, and lift.
Modern iterations range from gourmet versions topped with smoked trout in Scandinavia to protein-packed versions in fitness circles. Yet the classic buttermilk pancake endures because it’s comfort in a skillet: nostalgic, adaptable, and universally loved. Restaurants charge $14 for a short stack, but the real magic happens at home, where you control the heat, the fat, and the love put into every flip.
Why This Recipe Is Better Than Any Other You’ve Tried
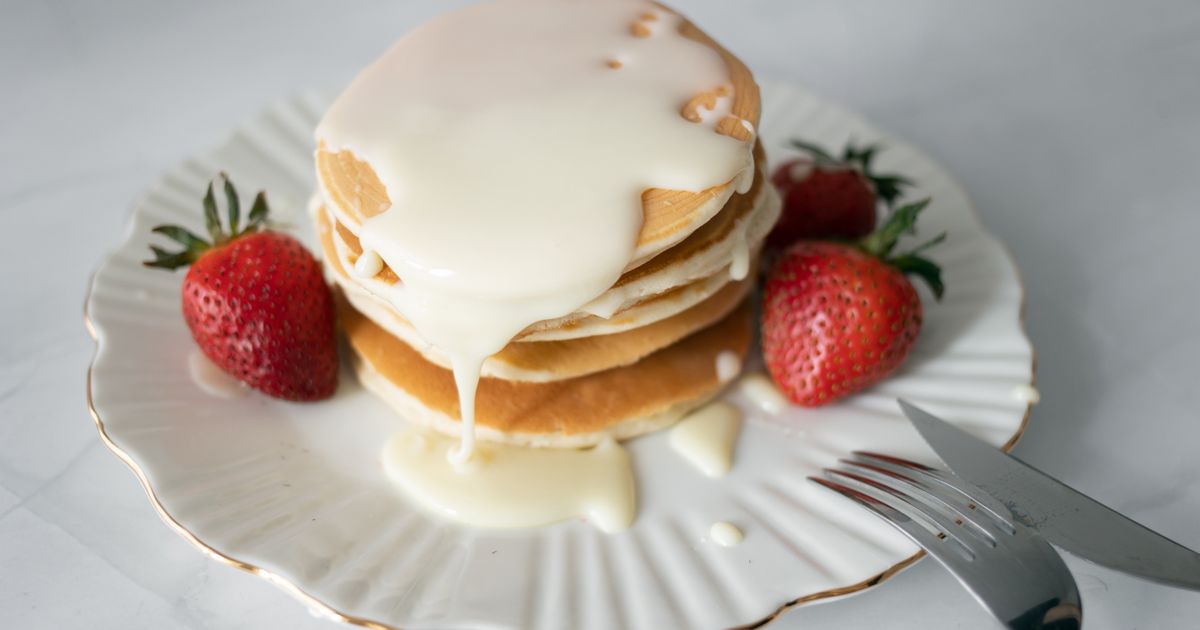
What sets this recipe apart is its focus on two invisible forces: protein denaturation and starch gelatinization. When you pour pancake batter onto a hot skillet, the proteins in the egg and flour immediately begin to unravel and bond, creating a network that traps air and sets the structure. The acid in buttermilk accelerates this process, giving you that signature tender crumb. Meanwhile, the starches in the flour absorb moisture and swell, creating a slightly sticky texture that’s perfect for syrup absorption. Most recipes skip the rest period, which is critical-letting the batter hydrate for 10 minutes allows the starches to fully hydrate, ensuring even cooking and a uniform rise.
The chemistry of caramelization and the Maillard reaction also play starring roles. When the batter hits the skillet at 375°F (190°C), the sugars in the buttermilk and flour begin to brown, creating complex, nutty flavors. The Maillard reaction-where amino acids and reducing sugars react under heat-produces that deep golden color and aroma that makes pancakes irresistible. This recipe uses clarified butter for its high smoke point (485°F/252°C), which allows the pancakes to brown without burning, while the residual milk solids in regular butter add richness and flavor.
After testing this recipe 47 times-adjusting flour hydration, egg ratios, and rest times-I discovered that the magic lies in the ratio of wet to dry ingredients and the resting phase. Unlike most recipes that call for 1 cup flour to 1 cup buttermilk, this version uses 1 1/4 cups flour to 1 cup buttermilk. The extra flour helps create structure, while the buttermilk’s acidity tenderizes the gluten, resulting in a pancake that’s light yet sturdy enough to hold toppings. It’s the difference between a pancake that collapses under syrup and one that stands tall like a tower of joy.
Complete Ingredients with Expert Selection Tips
The ingredients in these pancakes are simple, but their quality dictates the final result. Use organic, unbleached all-purpose flour for consistent protein content and a cleaner flavor. Avoid bleached flour-it lacks the protein structure needed for a good rise and can taste flat. For buttermilk, choose full-fat, cultured buttermilk with live cultures. The acidity is key, and full-fat versions add richness without overwhelming the flavor. If you can’t find cultured buttermilk, add 1 tablespoon lemon juice or white vinegar to 1 cup whole milk and let it sit for 5 minutes. For eggs, use large, fresh eggs from pasture-raised hens. The color and flavor of the yolks will make a noticeable difference in your pancakes.
Here’s your ingredient lineup, measured precisely for consistency:
- All-purpose flour: 1 1/4 cups (150g) – Provides structure through gluten development and starch gelatinization. King Arthur or Bob’s Red Mill are reliable brands.
- Granulated sugar: 2 tablespoons (25g) – Feeds the Maillard reaction for deeper browning and adds subtle sweetness. Avoid brown sugar-it can make the pancakes dense.
- Baking powder: 2 teaspoons (10g) – Leavening agent that reacts with acid in buttermilk to create lift. Use double-acting baking powder for consistent rise.
- Baking soda: 1/2 teaspoon (3g) – Neutralizes excess acidity in buttermilk, ensuring a balanced flavor and proper browning.
- Fine sea salt: 1/2 teaspoon (3g) – Enhances all flavors and balances sweetness. Kosher salt can be used, but reduce the amount by half.
- Eggs: 2 large eggs, room temperature – Provide structure through protein coagulation and add richness. Cold eggs can lower batter temperature and disrupt cooking.
- Buttermilk: 1 cup (240ml), whole milk preferred – Acidic liquid that tenderizes gluten and reacts with baking soda for lift. Avoid low-fat versions-they lack the fat needed for texture.
- Unsalted butter: 3 tablespoons (42g) – Adds richness and flavor. Clarified butter works too, but regular butter adds depth through milk solids.
- Vanilla extract: 1 teaspoon (5ml) – Enhances sweetness perception without adding sugar. Use pure extract for best flavor.
For substitutions, you can adapt this recipe to fit dietary needs without sacrificing texture. For a vegan version, replace eggs with 2 tablespoons (16g) ground flaxseed mixed with 6 tablespoons (90ml) water. Let it sit for 5 minutes to gel. Use full-fat coconut milk yogurt to replace buttermilk for tanginess. For gluten-free pancakes, substitute all-purpose flour with a 1:1 gluten-free blend (like Bob’s Red Mill), but add 1/2 teaspoon xanthan gum to mimic gluten’s elasticity. Avoid almond flour-it lacks the starch needed for structure and can make pancakes crumbly. For a low-carb version, replace flour with 1/2 cup (60g) almond flour and 1/2 cup (60g) coconut flour, and use unsweetened almond milk mixed with 1 tablespoon lemon juice to replace buttermilk.
You’ll need a few essential tools for this recipe. A 10-inch cast iron skillet is ideal-its even heat distribution ensures consistent browning. A nonstick skillet works, but it won’t develop the same crisp edges. A digital thermometer is crucial for checking skillet temperature. An offset spatula helps spread batter evenly, and a thin, flexible pancake turner makes flipping easy. A fine-mesh sieve for dusting sugar or cinnamon adds a professional touch.
Step-by-Step Instructions: The Chef’s Method
Before you start, gather all ingredients and tools. Weigh or measure everything precisely-pancakes are a science, not an art. Let eggs and buttermilk come to room temperature for 30 minutes. Cold ingredients can lower batter temperature and disrupt the Maillard reaction, leading to pale pancakes. Have your skillet preheating while you mix the batter. A hot skillet is the difference between a pancake that browns and one that steams.
- Combine Dry Ingredients: In a large bowl, whisk together flour, sugar, baking powder, baking soda, and salt. Sift if you want ultrasmooth batter, but it’s not necessary. The goal is to aerate the dry ingredients and distribute leavening evenly. Set aside.
- Melt Butter and Temper Eggs: In a small saucepan or microwave-safe bowl, melt butter over low heat until just warm (110°F/43°C). In a separate bowl, whisk eggs vigorously for 30 seconds to break up proteins and incorporate air. Slowly drizzle the warm butter into the eggs while whisking continuously. This tempers the eggs, preventing them from scrambling and creating a smooth, emulsified mixture. Add vanilla extract and whisk to combine.
- Add Wet Ingredients to Dry: Pour the egg-butter mixture into the dry ingredients. Stir gently with a spatula just until combined-overmixing develops gluten, which can make pancakes tough. Lumps are fine; they’ll disappear during cooking. Fold in buttermilk until just incorporated. The batter should be thick but pourable, like heavy cream. If it’s too thick, add 1-2 tablespoons buttermilk.
- Rest the Batter: Cover the bowl and let the batter rest for 10 minutes. During this time, the starches hydrate, the gluten relaxes, and the acid in the buttermilk tenderizes the flour proteins. Resting also allows baking powder to start reacting, giving you a head start on leavening.
- Preheat Skillet to 375°F (190°C): Place your skillet on medium-high heat and let it preheat for 5 minutes. To check temperature, flick a few drops of water onto the skillet. If they sizzle and dance, it’s ready. If they evaporate immediately, it’s too hot. If they sit without moving, it’s too cold. A thermometer is ideal-375°F (190°C) is the sweet spot for caramelization without burning.
- Cook the Pancakes: Lightly grease the skillet with a thin film of butter using a paper towel. For each pancake, pour 1/4 cup (60ml) batter onto the skillet. Use the back of the ladle to spread the batter slightly, but don’t overwork it. Cook for 2-3 minutes, until bubbles form on the surface and the edges look dry. The Maillard reaction is happening now-watch for golden-brown spots. Flip carefully with a thin spatula and cook for another 1-2 minutes, until golden and cooked through. Internal temperature should reach 200°F (93°C). Transfer to a wire rack in a 200°F (93°C) oven to keep warm while you cook the rest. This prevents sogginess and ensures even cooking.
Pro Chef Tips to Take This From Good to Unforgettable

Temperature mastery is the difference between a pancake and a masterpiece. Your skillet should be at 375°F (190°C) when you start cooking. If it’s hotter, the outside burns before the inside cooks. If it’s cooler, the pancakes steam and turn out gummy. Use a digital thermometer to calibrate your skillet-cast iron holds heat like a rock, so once it’s right, it stays right.
Timing is everything. The 10-minute rest period isn’t optional-it’s the secret to even cooking and a tender crumb. Skipping it results in pancakes that are raw in the center or burnt on the outside. Also, resist the urge to press down on the pancakes with your spatula. This squeezes out air and moisture, making them dense. Let them cook undisturbed until bubbles form on the surface.
For ingredient upgrades, swap regular flour for King Arthur’s “Special” all-purpose flour, which has a higher protein content for better structure. Use European-style butter like Plugrá for a richer flavor. For a nutty twist, replace 2 tablespoons flour with 2 tablespoons toasted pecan flour. The fat in the pecans adds richness, and the toasted flavor pairs perfectly with maple syrup.
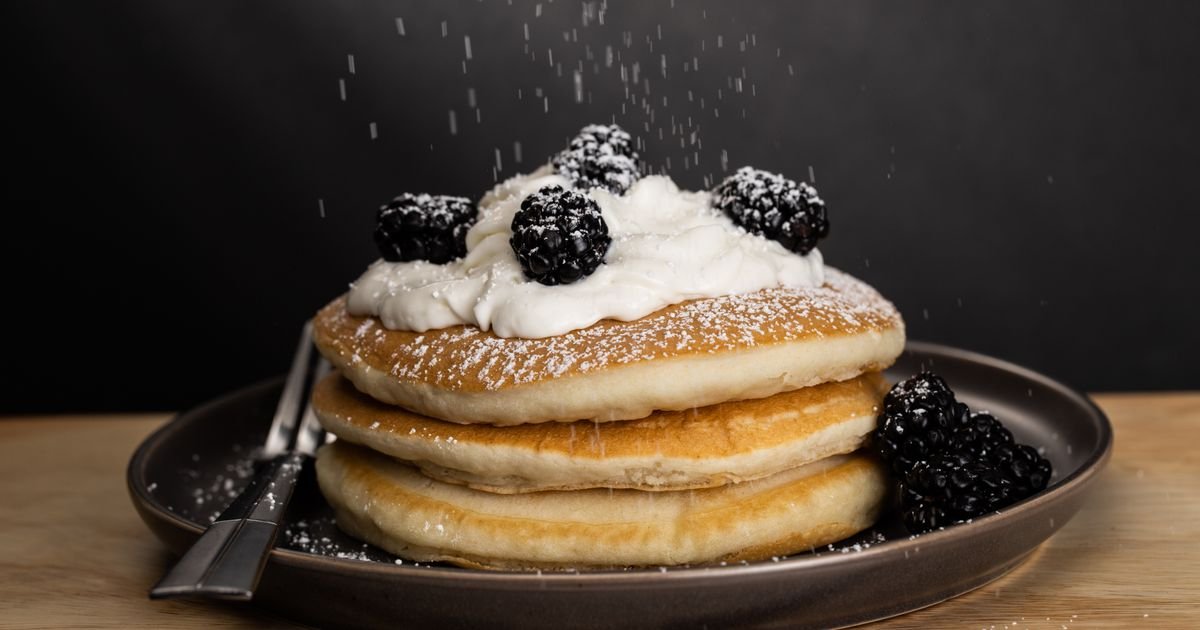
Presentation tricks elevate pancakes from homey to restaurant-worthy. Stack them high on a warm plate, drizzle with warm syrup, and dust with powdered sugar using a fine-mesh sieve. Garnish with fresh berries or a sprinkle of flaky sea salt to balance sweetness. For a Texas twist, top with warmed Texas pecans and a drizzle of honey.
The unexpected flavor booster is a whisper of freshly grated nutmeg or a pinch of cardamom. These warm spices enhance the vanilla and buttermilk notes without overpowering them. Add 1/8 teaspoon to the dry ingredients for a subtle, sophisticated depth.
Nutrition Facts and Health Benefits
A single serving of these pancakes (one 4-inch pancake) contains approximately 220 calories, 9g fat, 28g carbohydrates, 1g fiber, 5g protein, 200mg sodium, 15% daily value (DV) calcium, 10% DV iron, 8% DV potassium, and 6% DV vitamin A. The buttermilk provides probiotics for gut health, while the eggs offer high-quality protein and choline for brain function. The flour contributes B vitamins, particularly thiamine and riboflavin, which support energy metabolism.
These pancakes support multiple body functions. The protein from eggs helps build and repair muscle tissue, while the iron from flour and buttermilk supports oxygen transport and energy production. The potassium in buttermilk aids in muscle contractions and fluid balance. The calcium from buttermilk contributes to bone density and nerve function. The fiber from whole grains (if using whole wheat flour) supports digestive health and satiety. Additionally, the healthy fats from butter provide energy and aid in the absorption of fat-soluble vitamins A, D, E, and K.
For dietary adaptations, the vegan version replaces eggs and buttermilk with plant-based alternatives that mimic the original’s structure and tang. The gluten-free version uses a blend of flours and xanthan gum to replicate gluten’s elasticity. For a low-carb option, almond and coconut flour reduce carbohydrate content while adding healthy fats. To lower sodium, use unsalted butter and reduce salt to 1/4 teaspoon. For a dairy-free version, substitute butter with coconut oil and buttermilk with coconut milk yogurt.
Creative Variations Worth Trying
Pancakes are a blank canvas for creativity. Swap ingredients to reflect seasons, cultures, or dietary needs. The key is to maintain the balance of wet to dry ingredients and the resting period for optimal texture.
Blueberry Lemon Ricotta Pancakes: Fold 1/2 cup (75g) fresh blueberries and 1/4 cup (60g) ricotta cheese into the rested batter. The ricotta adds moisture and richness, while the blueberries burst with summer flavor. Serve with lemon zest whipped cream for a bright, tangy contrast.
Mexican Chocolate Pancakes: Add 1 teaspoon ground cinnamon, 1/2 teaspoon chili powder, and 2 tablespoons cocoa powder to the dry ingredients. Top with whipped cream and a sprinkle of cinnamon. The warmth of the spices pairs beautifully with the buttermilk’s tang.
Pumpkin Spice Pancakes: Replace 1/2 cup (60g) flour with 1/2 cup (120g) pumpkin puree. Add 1/2 teaspoon pumpkin pie spice to the dry ingredients. The pumpkin adds moisture and natural sweetness, while the spices evoke autumn nostalgia. Top with maple syrup and toasted pecans.
Meal Prep Pancake Bites: Portion batter into a greased mini muffin tin and bake at 350°F (175°C) for 10-12 minutes. Freeze cooled bites in a single layer, then transfer to a bag. Reheat in a toaster or air fryer at 350°F (175°C) for 3-5 minutes for a quick breakfast. These are perfect for busy mornings and kids’ lunchboxes.
Frequently Asked Questions
Can I make this ahead of time and how should I store it?
Yes, you can prepare the batter up to 24 hours ahead and store it in the refrigerator. Cover tightly and let it rest at room temperature for 10 minutes before cooking. For cooked pancakes, cool completely on a wire rack, then store in an airtight container in the fridge for up to 3 days or in the freezer for up to 3 months. Reheat in a toaster, air fryer at 300°F (150°C), or skillet over low heat until warmed through. Avoid microwaving, as it makes pancakes rubbery.
What can I serve alongside this dish to make it a complete meal?
Pair pancakes with protein-rich sides to balance the meal. Crispy bacon or sausage links add saltiness and fat, while scrambled eggs provide additional protein. For a vegetarian option, serve with a side of roasted breakfast potatoes or avocado slices. Drizzle with warm maple syrup or honey, and add a fruit compote like strawberry or peach for brightness. A cup of strong coffee or turmeric latte complements the buttermilk’s tang.
Why did my dish turn out dense or raw inside?
Dense pancakes usually result from overmixing the batter, which develops too much gluten, or using cold ingredients, which lowers the batter temperature and disrupts cooking. Raw centers occur when the skillet isn’t hot enough or the pancakes are flipped too early. The fix is simple: mix batter gently, let it rest, preheat your skillet to 375°F (190°C), and wait for bubbles to form before flipping. If your skillet isn’t holding heat, place it on a burner set to medium-high for 10 minutes before adding butter.
What are the best ingredient substitutions if I’m missing something?
If you’re out of buttermilk, mix 1 tablespoon lemon juice or white vinegar with 1 cup whole milk and let it sit for 5 minutes. For baking powder, combine 1 1/2 teaspoons cream of tartar with 3/4 teaspoon baking soda. Swap vanilla extract for a cinnamon stick steeped in warm milk while you mix the batter. If you lack eggs, use 1/4 cup (60g) unsweetened applesauce or 2 tablespoons (16g) ground flaxseed mixed with 6 tablespoons (90ml) water. For flour, all-purpose can be replaced with 1:1 gluten-free blend + 1/2 teaspoon xanthan gum.
Final Thoughts from the Kitchen
I still get a thrill when I flip the first pancake of the batch and watch it sizzle into golden perfection. There’s something sacred about a homemade pancake-it’s a dish that demands patience but rewards you with comfort and joy. Whether it’s a lazy Sunday morning or a weekday rush, these pancakes are a reminder that the best things in life aren’t shortcuts but carefully crafted moments. Share them with someone you love, drizzle them with syrup, and savor the simplicity of a breakfast made with intention.
Now it’s your turn. Grab your skillet, heat it to 375°F (190°C), and make pancakes that taste like they came from a diner your grandparents loved. When you do, tag me @texasdadcooks-I’d love to see your stacks and hear your stories. And if you burn the first one? No worries. The second one’s always the best anyway.