

🍳 In This Article
- The Rich History and Cultural Roots of This Dish
- Why This Recipe Works: The Food Science Behind It
- Complete Ingredient Breakdown
- Step-by-Step Instructions
- Expert Tips from Years of Kitchen Experience
- Nutritional Benefits and Health Insights
- Creative Variations and Dietary Adaptations
- Frequently Asked Questions
- Final Thoughts
There is a specific sound that every home cook chases—the distinct, rhythmic “crunch” of a knife blade sliding across perfectly rendered chicken skin. For years, achieving that sound meant heating up a massive oven for forty-five minutes or braving the splattering mess of a deep fryer. But as a father who has spent decades balancing a busy schedule with a passion for culinary excellence, I’ve found that the air fryer isn’t just a convenience tool; it’s a scientific marvel. When you understand how to harness high-velocity convection heat, you can transform a humble bone-in chicken thigh into a gourmet masterpiece in less time than it takes to watch a sitcom. Today, I’m sharing my blueprint for garlic-herb chicken thighs that are so juicy they practically glow, yet so crispy they rival the best Southern fried chicken, all while fitting perfectly into your “Quick & Easy” weeknight rotation.
The Rich History and Cultural Roots of This Dish
The chicken thigh has long been the unsung hero of the culinary world. While the breast often takes the spotlight in health-conscious circles, the thigh is where the true flavor resides. Historically, the domestication of the chicken (Gallus gallus domesticus) dates back over 7,000 years to Southeast Asia, where the Red Junglefowl was first prized for its resilience. As chicken cultivation spread through the Silk Road into the Middle East and eventually Europe, different cultures developed unique ways to preserve the moisture of the dark meat. In Mediterranean traditions, bone-in cuts were slow-roasted with wild herbs like rosemary and thyme, while in the American South, the “fry-up” became a communal staple. The bone-in thigh, specifically, remained a favorite of chefs because the bone acts as a thermal conductor, cooking the meat from the inside out while the surrounding fat prevents desiccation.
The “Garlic Herb” profile we are using today is a nod to the classic “Poulet de l’Héritage” styles of the French countryside. In these traditional settings, garlic wasn’t just a seasoning; it was a preservative and a medicinal powerhouse. Combining it with woody herbs like thyme and rosemary created a flavor profile that was both rustic and sophisticated. However, the traditional method required a “cocotte” or a heavy cast-iron skillet and a long, slow stint in a wood-fired oven. The evolution of this dish into the modern air fryer version represents a fascinating intersection of ancient flavor profiles and Space Age technology. We are essentially taking 18th-century seasoning wisdom and applying 21st-century thermodynamics.
Interestingly, the rise of the air fryer itself is a relatively recent phenomenon, but the technology—convection heating—has been used in professional bakeries for nearly a century. By miniaturizing this tech for the home kitchen, we’ve democratized the ability to create high-quality “fried” textures without the caloric density of oil immersion. This recipe is more than just a quick meal; it is the culmination of centuries of poultry preparation, refined for the modern parent who refuses to sacrifice quality for speed. When you bite into these thighs, you’re tasting a lineage of cooking that spans from the hills of Provence to the modern Texas kitchen.

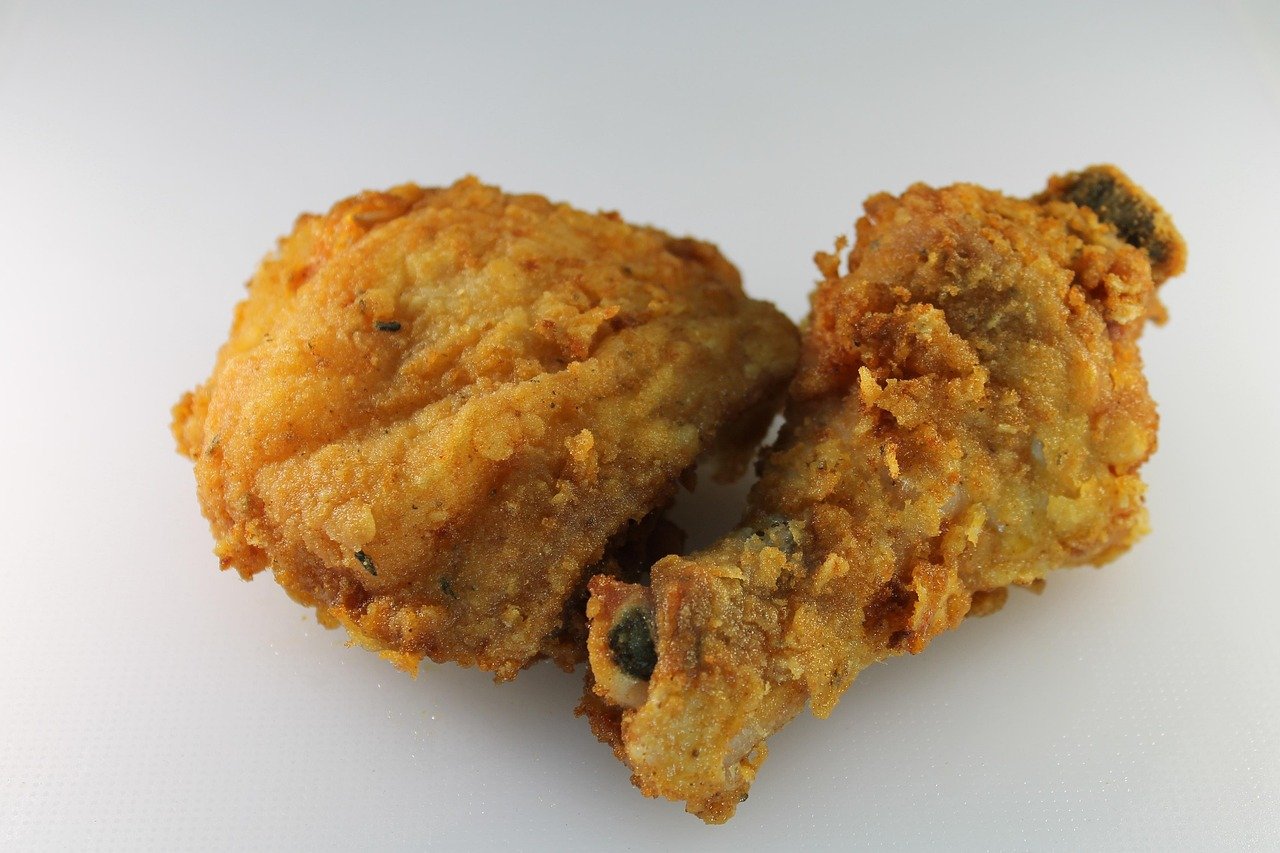
📷 Photo by RitaE on Pixabay — Free to use under the Pixabay License
Why This Recipe Works: The Food Science Behind It
To understand why this recipe is so successful, we have to talk about the Maillard reaction. This is the chemical reaction between amino acids and reducing sugars that gives browned food its distinctive flavor. In an air fryer, the Maillard reaction is supercharged. Because the air fryer is essentially a high-powered convection oven, it blows hot air at a high velocity around the food. This constant movement of air strips away the “cool boundary layer” of moisture that typically surrounds a piece of meat as it cooks. By removing this moisture rapidly, the surface temperature of the chicken skin rises quickly to the 285°F to 330°F (140°C to 165°C) range required for the Maillard reaction to occur, resulting in that deep golden-brown color and complex, savory aroma.
According to Harvard T.H. Chan School of Public Health, evidence-based nutrition research plays an important role in understanding food preparation and nutrition.
Another critical scientific element here is protein denaturation and collagen breakdown. Chicken thighs are rich in connective tissue and collagen compared to chicken breasts. When cooked to the standard “safe” temperature of 165°F (74°C), the meat is safe to eat, but it hasn’t reached its full potential. However, if we push the internal temperature of a thigh to 175°F or even 185°F (80°C to 85°C), the collagen begins to melt into gelatin. This gelatin coats the muscle fibers, creating a mouthfeel that we perceive as “juiciness.” Because the bone-in thigh is protected by a layer of skin and a significant amount of intramuscular fat, it can withstand these higher temperatures without drying out, unlike the lean breast meat.
Finally, we must consider the role of salt in “dry-brining.” Even in a quick 25-minute recipe, applying salt to the skin immediately begins a process of osmosis. The salt draws moisture out of the skin, which then dissolves the salt into a concentrated brine. Eventually, this brine is reabsorbed into the meat, seasoning it deeply and breaking down some of the tight protein structures. This ensures that every fiber of the chicken is seasoned, not just the surface. This combination of rapid convection, collagen-to-gelatin conversion, and osmotic seasoning is what makes the air fryer the ultimate tool for the perfect chicken thigh.
Complete Ingredient Breakdown
For this recipe, we are focusing on ingredients that maximize flavor while minimizing prep time. I always recommend using a digital scale for precision, but standard measurements work well here too. Here is what you will need for 4 servings:
According to World Health Organization (WHO), dietary guidelines and healthy eating plays an important role in understanding food preparation and nutrition.
- 4 Bone-In, Skin-On Chicken Thighs (approx. 800g – 1kg total): The bone is essential for heat distribution, and the skin is the vehicle for our crispy texture. Look for “air-chilled” chicken if possible; it has less water retention, which leads to crispier skin.
- 2 Tablespoons Avocado Oil (30ml): I prefer avocado oil over olive oil for the air fryer because it has a higher smoke point (520°F/270°C). This prevents the oil from breaking down and becoming bitter or smoky during the high-heat cycle.
- 1.5 Teaspoons Kosher Salt (9g): Use Kosher salt rather than table salt. The larger flakes are easier to distribute evenly and provide a better “crunch” factor.
- 1 Teaspoon Garlic Powder (3g): While I love fresh garlic, it tends to burn and turn bitter in the high-intensity air of the fryer. Garlic powder provides a consistent, toasted flavor that permeates the skin more effectively.
- 1 Teaspoon Dried Thyme (1g): Thyme is the quintessential poultry herb. I use dried here because the concentrated oils stand up better to the air fryer’s heat than fresh leaves, which can blow around and scorch.
- 1/2 Teaspoon Smoked Paprika (1.5g): This adds a beautiful mahogany color and a hint of Texas-style smokiness without needing a smoker. It also contains capsaicin, which can slightly boost metabolism.
- 1/2 Teaspoon Freshly Ground Black Pepper (1.5g): Freshly cracked pepper provides a floral heat that pre-ground pepper simply lacks.
- Optional Garnish: Fresh parsley and a squeeze of lemon juice. The acidity of the lemon cuts through the richness of the chicken fat, balancing the palate.
Step-by-Step Instructions
Preparation is the key to speed. In the professional kitchen, we call this “mise en place”—having everything in its place. Before you turn on the fryer, make sure your chicken is patted dry. Moisture is the enemy of the crunch. If the skin is wet, the air fryer has to spend the first ten minutes evaporating that water before the browning can even begin. By starting dry, you jumpstart the Maillard reaction immediately. For more delicious ideas, explore our vegetarian meal ideas collection.
- Step 1 — Prep and Preheat: Remove the chicken thighs from the refrigerator about 15 minutes before cooking to take the chill off. This ensures more even cooking. Preheat your air fryer to 380°F (193°C) for at least 5 minutes. Even though air fryers heat up fast, a preheated basket prevents the chicken from sticking and starts the searing process the moment the meat hits the metal.
- Step 2 — The Drying Phase: Use paper towels to pat the chicken thighs extremely dry on all sides. I often tell my kids, “Treat the chicken like it’s a sponge you’re trying to empty.” Once dry, place the thighs in a large mixing bowl.
- Step 3 — Seasoning Emulsification: Drizzle the avocado oil over the chicken. In a small ramekin, mix the salt, garlic powder, thyme, smoked paprika, and black pepper. Sprinkle the spice mix over the chicken and use your hands (or tongs) to massage the oil and spices into every nook and cranny. Ensure the underside of the thigh is seasoned too; flavor shouldn’t just be skin-deep.
- Step 4 — The First Blast: Place the chicken thighs in the air fryer basket, skin-side DOWN. This may seem counterintuitive, but it allows the fat to render from the bottom while the initial heat sets the structure of the meat. Ensure there is at least an inch of space between each thigh; overcrowding leads to steaming rather than frying. Cook at 380°F (193°C) for 12 minutes.
- Step 5 — The Flip and Crisp: Carefully flip the chicken thighs so they are now skin-side UP. This is the “glory” phase. The rendered fat will now bubble on top of the skin, essentially deep-frying it in its own juices. Cook for another 10 to 13 minutes. You are looking for a deep, golden-amber color and an internal temperature of at least 175°F (80°C).
- Step 6 — The Rest: Remove the chicken from the air fryer and place it on a wire rack or a warm plate. Let it rest for 5 minutes. This is the hardest part, but it’s crucial. Resting allows the muscle fibers to relax and reabsorb the juices. If you cut into it immediately, all that liquid gold will end up on your plate instead of in your mouth.
Expert Tips from Years of Kitchen Experience
After years of testing various air fryer models and chicken sources, I’ve realized that the difference between a “good” dinner and a “legendary” one lies in the details. Most people treat the air fryer as a “set it and forget it” machine, but it rewards those who pay attention to the physics of the basket. The air flows from the top down, meaning the tops of your items will always get the most direct heat. This is why the flip in Step 5 is non-negotiable.
- Temperature Control: Don’t be afraid of 175°F-185°F internal temperatures for thighs. While 165°F is the USDA minimum, dark meat has a lot of connective tissue. At 165°F, it can still feel slightly “rubbery.” At 180°F, the meat becomes “fall-off-the-bone” tender while remaining incredibly moist due to the fat content. Use a high-quality instant-read thermometer to be sure.
- Ingredient Quality: Whenever possible, buy heritage breeds or locally sourced chicken. Mass-produced chicken is often injected with a saline solution (up to 15% by weight). This extra water will leak out in the air fryer, preventing the skin from getting truly crispy and making your spice rub slide off. If you see “contains up to 15% chicken broth” on the label, you’ll need to cook it a few minutes longer to evaporate that extra liquid.
- Timing and Patience: If your skin isn’t “shatter-crisp” at the 22-minute mark, don’t panic. Every air fryer model has a different wattage and fan speed. If needed, give it another 2-3 minutes at 400°F (200°C) for a final “flash crisp.” Just watch it closely, as the transition from golden to burnt happens in seconds at that temperature.
- Seasoning Balance: I love adding a pinch of celery salt or a dash of onion powder to the rub for an extra “umami” kick. The key is to keep the dry-to-wet ratio in check. Too much oil will actually soggy the skin; you just need enough to act as a heat conductor for the spices.
Nutritional Benefits and Health Insights
From a nutritional standpoint, this dish is a powerhouse for those looking for high-quality protein without the processed additives found in many quick meals. A single bone-in chicken thigh (with skin) provides approximately 25-30 grams of protein, which is essential for muscle repair and satiety. It is also a significant source of Vitamin B12, which is crucial for nerve function and the formation of red blood cells. Furthermore, dark meat contains higher levels of zinc and iron compared to white meat, minerals that support the immune system and energy levels.
The use of garlic and thyme adds more than just flavor. Garlic contains allicin, a compound known for its anti-inflammatory and cardiovascular benefits. Thyme is rich in thymol, an antioxidant that has been studied for its antimicrobial properties. By air frying instead of deep frying, we are significantly reducing the intake of oxidized vegetable oils and excess calories. One air-fried thigh contains roughly 250-300 calories, whereas a battered and deep-fried version can easily double that. This recipe is naturally gluten-free, keto-friendly, and paleo-compliant, making it an excellent option for households with diverse dietary needs. For more delicious ideas, explore our delicious dessert recipes collection.
Creative Variations and Dietary Adaptations
One of the reasons I love this recipe is its versatility. Once you master the base technique, you can travel the world with your spice cabinet. Here are a few ways I like to switch it up depending on what’s in my pantry:
- The Mediterranean Twist: Swap the smoked paprika for dried oregano and lemon zest. Serve the finished chicken with a side of tzatziki (Greek yogurt, cucumber, and dill). The cool yogurt against the hot, crispy chicken is a match made in heaven.
- Spicy Nashville Style: After the chicken is done, whisk a tablespoon of the rendered chicken fat from the bottom of the air fryer with 1 teaspoon of cayenne pepper, 1/2 teaspoon of brown sugar, and a dash of chili powder. Brush this “hot oil” over the crispy skin for a fiery kick.
- Asian-Inspired Ginger Garlic: Replace the thyme and paprika with ground ginger and a splash of toasted sesame oil. After cooking, drizzle with a reduction of soy sauce and honey for a sticky, savory glaze.
- The “Everything Bagel” Chicken: Use “everything bagel” seasoning instead of the garlic-herb mix. The sesame seeds and dried onion bits get incredibly toasted and crunchy in the air fryer, providing a unique texture.
- Lower-Fat Adaptation: If you are strictly monitoring fat intake, you can use skinless thighs. However, you must reduce the cook time by about 4-5 minutes and increase the oil rub slightly to prevent the exterior of the meat from becoming leathery.
Frequently Asked Questions
Why is my chicken skin still soggy after 25 minutes?
The most common culprit is moisture. If the chicken wasn’t patted dry with paper towels, or if the air fryer was overcrowded, the meat “steamed” instead of “fried.” Another possibility is that your air fryer wasn’t preheated. Always ensure there is space for air to circulate around each piece of meat. If you have a small basket, cook in two batches rather than cramming them all in at once.
Can I use boneless chicken thighs for this recipe?
Yes, you can, but you need to adjust the timing. Boneless thighs cook much faster because they lack the thermal mass of the bone. Typically, boneless thighs will be done in 15-18 minutes. However, be aware that without the skin, you won’t get the same “crunch.” If using boneless/skinless thighs, I recommend a light dusting of cornstarch or almond flour mixed into the spices to create a faux-crispy exterior.
How do I store and reheat leftovers without losing the crunch?
Store leftovers in an airtight container in the refrigerator for up to 3-4 days. To reheat, avoid the microwave at all costs—it will turn the skin into rubber. Instead, pop the chicken back into the air fryer at 350°F (175°C) for 4-5 minutes. This will re-crisp the skin and warm the meat through without drying it out. It’s almost as good as the day it was made.
Is it safe to cook chicken from frozen in the air fryer?
While technically possible, I don’t recommend it for this specific recipe. Cooking from frozen makes it impossible for the dry rub to adhere properly, and the exterior often overcooks before the center reaches a safe temperature. For the best “Quick & Easy” results, thaw your chicken in the refrigerator overnight or use a quick-thaw cold water bath before starting.
Final Thoughts
Cooking for a family doesn’t have to mean compromising on culinary integrity. These 25-minute air fryer chicken thighs are a testament to the idea that with a little bit of science and the right technique, you can produce a meal that feels like a Sunday feast on a Tuesday night. I’ve made this dish hundreds of times, and every time the family hears that first “crunch,” the room goes quiet. That’s the power of good food. I encourage you to take this recipe, make it your own, and don’t be afraid to experiment with the spices in your cabinet. Cooking is a journey, and the air fryer is just one of the many vehicles we use to get to a delicious destination. Happy cooking, and enjoy every crispy, juicy bite!