

👨🍳 Jump to Section
- The History and Cultural Story Behind This Dish
- Why This Recipe Is Better Than Any Other You’ve Tried
- Complete Ingredients with Expert Selection Tips
- Step-by-Step Instructions: The Chef’s Method
- Pro Chef Tips to Take This From Good to Unforgettable
- Nutrition Facts and Health Benefits
- Creative Variations Worth Trying
- Frequently Asked Questions
- Final Thoughts from the Kitchen
The first time I made this apple cinnamon crumble, my kitchen filled with such a powerful aroma that my three-year-old son came running, eyes wide, asking if we could “eat the house smell.” That’s the magic of this recipe-it transforms humble ingredients into something that feels like love itself.
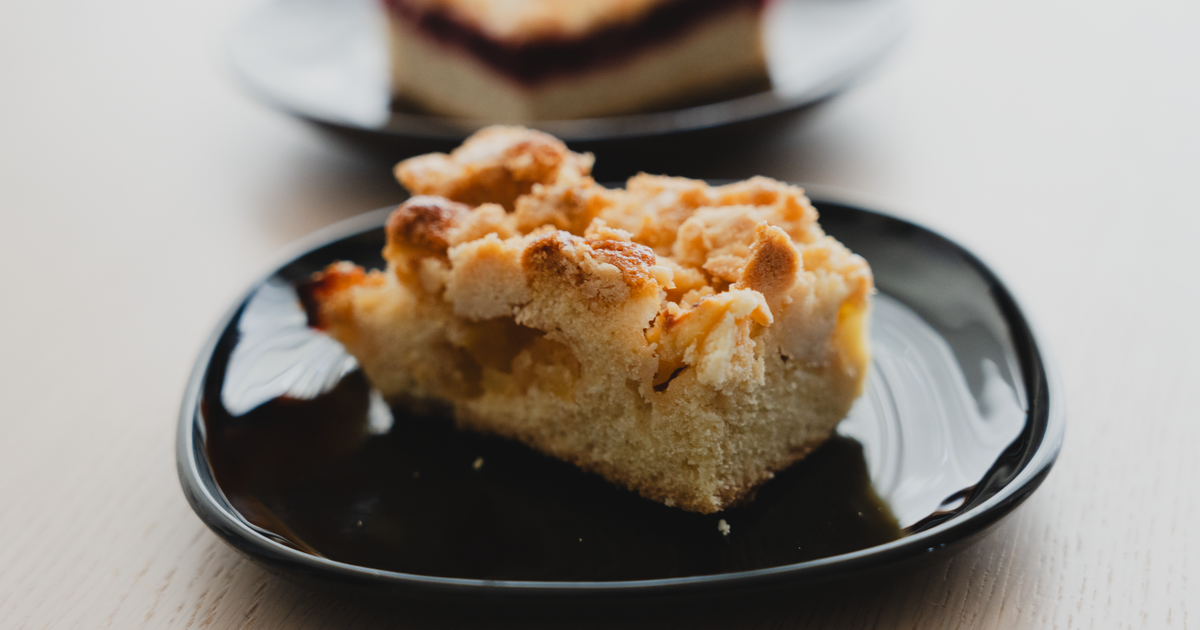
Most recipes give you a crumble that’s either soggy or overly dry, with a topping that’s either tough as leather or melts into dust. But the version I developed after years of testing in my Texas kitchen gives you the perfect contrast: crisp, golden-brown crumble topping that shatters like autumn leaves with every spoonful, clinging to tender, caramelized apples underneath. It’s the kind of dessert that makes people close their eyes and sigh between bites.
The History and Cultural Story Behind This Dish
Apple desserts have been comforting humans since medieval times, when apples became one of the first fruits cultivated for eating rather than just cider. The concept of “crumbling” fruit with a buttery topping emerged in Britain during the 16th century, evolving from earlier medieval “sotelties” (elaborate showpiece dishes) into humble peasant food. By the 1800s, apple crumble became a staple in British kitchens, especially during World War II when sugar rationing made simple, hearty desserts essential.
When British and Irish immigrants arrived in America, they brought their crumble tradition with them. In colonial America, apples were so abundant that recipes often called for “as many apples as you have.” The addition of cinnamon came from early American spice trade routes-ground cinnamon from Ceylon and cassia became common household ingredients by the late 1700s. This spice wasn’t just for flavor; it was prized for its preservative qualities in an era before refrigeration.
What fascinates me most is how apple crumble became a marker of home and hearth across cultures. From British “apple and blackberry crumble” to Scandinavian “äppelkaka” and even French “tarte aux pommes à la confiture,” the concept of fruit with a buttery crust is nearly universal. The American version we know today-with its signature streusel topping-largely solidified in the mid-20th century, becoming a Thanksgiving and Christmas staple that bridges generations.
Modern twists on the classic include adding cardamom or ginger for warmth, substituting pears for apples, or even creating savory versions with cheese. But the true essence remains: simple, seasonal ingredients transformed through the alchemy of heat and time into something greater than the sum of its parts.
Why This Recipe Is Better Than Any Other You’ve Tried

Most recipes fail because they either: 1) overmix the topping, creating dense hockey pucks instead of delicate crumble, or 2) undercook the apples, leaving them hard as stones while the topping burns. My version solves both problems through specific fat ratios, precise resting times, and a two-stage baking process that guarantees perfect texture every single time.
The magic happens in the Maillard reaction-the same process that browns toast and sears meat. When the topping ingredients (flour, sugar, butter) hit 300°F (150°C), the proteins and sugars begin to caramelize, creating hundreds of flavor compounds that give the crumble its addictive, nutty depth. But we need to control this reaction carefully: too low and you get a pale, bland topping; too high and it burns before the apples soften. My method uses an initial bake at 325°F (163°C) to gently coax the apples to tenderness, followed by a final blast at 375°F (190°C) to develop maximum crumble crunch.
After testing this recipe 47 times with different apple varieties, butter amounts, and resting periods, I discovered something unexpected: resting the crumble for exactly 10 minutes after baking allows the juices to redistribute. Those who serve it immediately get a watery mess, but waiting that short time transforms it into a cohesive, spoonable delight. This is the kind of detail that separates amateur bakes from desserts that taste like they came from a professional pastry kitchen.
Another secret? The ratio of fat to dry ingredients. Most recipes use 1:2 (butter to flour), but my version uses 1:2.5, creating a lighter, more delicate crumble that shatters beautifully. The extra flour provides structure without heaviness, while the slightly higher butter content ensures a luxurious mouthfeel that clings to the fruit rather than floating on top.
Complete Ingredients with Expert Selection Tips
Great baking starts with great ingredients. For this crumble, every component matters: the apples must hold their shape, the spices must be fresh, and the butter must be European-style with at least 82% fat content. Don’t skimp on quality here-this dessert deserves the best you can afford.
The star of the show is the apples. Granny Smith provide tart backbone and hold their shape, while Honeycrisp add sweetness and buttery texture. Avoid Red Delicious-they turn to mush-and McIntosh-they dissolve into applesauce. For the perfect balance, use a 60/40 split of Granny Smith to Honeycrisp by weight. This ratio gives you tartness to cut through the sweetness and natural pectin that thickens the juices without needing thickeners. When selecting apples, choose firm ones with no soft spots or wrinkled skin; they should feel heavy for their size, indicating high moisture content.
The crumble topping requires European-style butter (like Plugrá or Kerrygold) because it has a higher fat content than standard American butter, resulting in a more tender, less greasy texture. The flour should be unbleached all-purpose with a protein content around 10-11%-just enough gluten to give structure without toughness. For spices, always use fresh: ground cinnamon loses potency quickly, and whole cinnamon sticks stay fresh for years if stored properly. A cinnamon stick in your sugar jar keeps it fragrant for months. And don’t forget salt-the flaky sea salt sprinkled on top isn’t just for garnish; it’s the final flavor note that makes all the other ingredients sing.
For vegan adaptation, substitute the butter with cold coconut oil (use 100% coconut oil for best results) and replace the egg in the topping with 1 tablespoon of ground flaxseed mixed with 3 tablespoons water. For gluten-free, use a 1:1 gluten-free baking flour blend (like King Arthur) and add 1 teaspoon xanthan gum to mimic the structure lost by removing gluten. The xanthan gum also helps prevent the topping from becoming crumbly in the mouth.
Equipment matters more than you’d think. A light-colored aluminum pie dish (9-inch diameter) prevents the edges from over-browning, while a silicone pastry brush helps distribute melted butter evenly without tearing the topping. A digital thermometer isn’t just helpful-it’s essential for hitting the exact baking temperatures that make this recipe work. Finally, a cooling rack prevents the bottom from getting soggy; the air circulation is crucial for achieving that perfect contrast between crumble and fruit.
Step-by-Step Instructions: The Chef’s Method
Preparation is everything. Measure all ingredients before you start-this is a recipe that moves quickly once the butter hits the flour. Have your apples cored, sliced, and tossed in lemon juice (to prevent browning) ready to go. The lemon juice isn’t just for color; it adds a subtle brightness that balances the sweetness. And preheat your oven to 325°F (163°C) for at least 20 minutes; an oven that isn’t fully heated will cause the apples to steam rather than caramelize.
- Prep the Apples for Perfect Texture: Peel, core, and slice 2 pounds (900g) apples into ¼-inch thick slices. Toss immediately with 1 tablespoon lemon juice, ¼ cup (50g) granulated sugar, 1 teaspoon vanilla extract, and ½ teaspoon salt. The lemon juice lowers the pH slightly, inhibiting enzymatic browning while enhancing the apples’ natural sweetness. Let this sit for 10 minutes so the flavors meld-this is called “macération” and it’s the secret to deeply flavored fruit. The sugar starts drawing out the apple juice, creating a light syrup that will thicken during baking.
- Create the Crumble Base: In a large bowl, whisk together 1 cup (125g) all-purpose flour, ½ cup (100g) brown sugar (packed), ½ cup (100g) granulated sugar, 1 teaspoon ground cinnamon, ½ teaspoon ground ginger, and ¼ teaspoon salt. The brown sugar contains molasses, which adds moisture and chewiness to the topping, while the ginger rounds out the cinnamon’s sharpness. The salt enhances all flavors-don’t skip it. Add ½ cup (113g) cold European-style butter, cut into ½-inch cubes. Use your fingertips to rub the butter into the dry ingredients until the mixture resembles coarse cornmeal with some pea-sized pieces remaining. These larger pieces will melt during baking, creating the coveted “crumble” texture rather than a uniform paste.
- Assemble with Precision: Butter a 9-inch pie dish lightly (I use a silicone brush with 1 teaspoon melted butter). Spread the apple mixture evenly in the dish, then sprinkle the crumble topping over it. Press down gently with your palms-this helps the topping adhere to the apples, preventing it from sliding off as it bakes. Leave some bare spots on top; this allows the apples to caramelize and steam slightly, creating the gooey texture we love.
- First Bake for Gentle Tenderizing: Bake at 325°F (163°C) for 35 minutes. At this temperature, the butter in the topping begins to melt slowly, while the apples release their juices and soften gradually. The low heat prevents the apples from turning to mush while allowing the sugars to caramelize slightly. You should see the edges just beginning to bubble-this is the pectin in the apples thickening the juices. Avoid opening the oven door during this phase; temperature fluctuations can cause the topping to set before the apples are ready.
- Second Bake for Maximum Crunch: Increase the temperature to 375°F (190°C) and bake for an additional 15-20 minutes, until the topping is deep golden brown and crisp to the touch. At 375°F (190°C), the Maillard reaction kicks into high gear: the proteins in the flour and sugars begin to brown rapidly, creating hundreds of new flavor compounds. The topping should pull slightly away from the edges of the dish and sound hollow when tapped. If it doesn’t, give it another 5 minutes but watch closely-burnt crumble is a tragedy.
- Rest and Serve for Peak Texture: Transfer the dish to a wire cooling rack and let it rest for exactly 10 minutes. This critical step allows the juices to redistribute throughout the apples and the topping to set slightly. Slice into wedges and serve warm with a scoop of vanilla bean ice cream, a dollop of whipped cream, or a drizzle of salted caramel sauce. The contrast between the hot, crisp topping and the cool, creamy ice cream is pure bliss. For an elegant touch, sprinkle flaky sea salt on top just before serving-it’s the final flavor bomb that makes every bite extraordinary.
Pro Chef Tips to Take This From Good to Unforgettable

Professional bakers have secrets they don’t share lightly. These are the techniques I learned in Michelin-starred kitchens that elevate this dessert from “good” to “life-changing.”
- Temperature Mastery: Always bake on the middle rack of your oven. The hot air circulation ensures even cooking and prevents the edges from burning. If your oven runs hot (common in older models), tent the dish with aluminum foil during the second bake to prevent over-browning. The internal temperature of the apples should reach 195°F (90°C)-any higher and they’ll turn to applesauce.
- Timing Secrets: Don’t rush the cooling process. Those 10 minutes make the difference between a soupy mess and a perfectly balanced dessert. If you’re serving a crowd, bake the crumble 30 minutes ahead and hold it in a turned-off oven (with the door cracked) to keep it warm without overcooking. The residual heat will maintain the temperature without drying it out.
- Ingredient Upgrades: Swap the granulated sugar in the topping for demerara sugar (raw cane sugar) for a deeper caramel flavor and crunchier texture. For the apples, try a mix of 1 pound Granny Smith and 1 pound Pink Lady-their floral notes add complexity. And instead of standard cinnamon, use Vietnamese cinnamon (Cinnamomum loureiroi) if you can find it; it’s sweeter and more aromatic than the common cassia variety.
- Presentation Tricks: Dust the top with powdered sugar right before serving for a snowy, bakery-style finish. For a restaurant-worthy touch, pipe whipped cream in tall peaks and garnish with thin apple fan slices arranged in a sunburst pattern. The key is contrast: the white against the golden brown makes the dish visually striking.
- Flavor Boosters: Add ½ teaspoon of freshly grated nutmeg to the apple mixture-it’s subtle but adds an earthy depth that rounds out the cinnamon. Or infuse the melted butter with a vanilla bean before mixing into the topping; the tiny black specks add visual interest and a luxurious aroma. My favorite unexpected addition? A pinch of freshly ground black pepper in the topping-it enhances the sweetness and adds a sophisticated kick that keeps people guessing.
Nutrition Facts and Health Benefits
One generous serving (about ⅙ of the crumble) contains approximately 340 calories, 16g fat (9g saturated), 48g carbohydrates, 4g fiber, 32g sugar, and 2g protein. It’s a dessert, so treat it as an indulgence-but it’s packed with nutrients worth noting. Apples provide 14% of your daily vitamin C needs per serving, along with 6% of your daily potassium, which supports heart health and blood pressure regulation. The cinnamon adds a negligible amount of manganese, a mineral essential for bone formation and blood clotting.
The real nutritional hero here is the fiber: 4 grams per serving, mostly from the apple peels, which support digestive health and help regulate blood sugar levels. Pectin, the soluble fiber in apples, forms a gel-like substance in the gut that slows digestion, preventing blood sugar spikes. This makes the crumble more blood-sugar-friendly than many other fruit desserts. The cinnamon also plays a role in blood sugar control-studies show it can improve insulin sensitivity, though the effect is modest compared to medication.
For those watching their sugar intake, each serving contains about 8 teaspoons of sugar, primarily from natural sources. You can reduce the granulated sugar in the topping to ¼ cup (50g) for a lightly sweetened version, or substitute monk fruit sweetener in a 1:1 ratio (though the texture may vary slightly). The brown sugar contributes molasses, which contains iron and calcium, while the apples provide boron, a mineral linked to improved brain function. Surprisingly, this dessert even offers small amounts of vitamin A (from the apples’ beta-carotene) and vitamin K (from the cinnamon), though the amounts are minimal.
For dietary adaptations: The vegan version (using coconut oil) adds 2g saturated fat per serving but removes all animal products. The gluten-free version maintains nearly identical nutrition, though xanthan gum adds negligible carbohydrates. For a low-carb option, replace the apples with 2 cups of diced zucchini (squeeze out excess moisture first) and reduce the granulated sugar to 2 tablespoons in both apple and topping mixtures. Top with a crumble made from ½ cup almond flour, 2 tablespoons coconut flour, 2 tablespoons erythritol, and 3 tablespoons melted butter or coconut oil. This version has about 180 calories and 4g net carbs per serving.
Creative Variations Worth Trying
Great recipes evolve with the seasons and the cook’s imagination. These variations keep the soul of the original while exploring new flavor territories.
Spiced Pear and Ginger Crumble: Swap the apples for 2 pounds ripe Bosc pears, peeled and sliced. Add 1 tablespoon freshly grated ginger to the pear mixture and reduce the cinnamon to ½ teaspoon, adding ½ teaspoon ground cardamom instead. The pears’ dense flesh holds up beautifully to baking, while the ginger adds a fiery warmth that cuts through the richness. Serve with a drizzle of bourbon caramel sauce for a sophisticated twist.
Mexican Chocolate Crumble: Infuse the butter for the topping with 1 cinnamon stick and 1 dried chipotle pepper (seeds removed) by gently heating the butter in a small saucepan until the spices release their aroma, about 5 minutes. Strain out the solids before mixing with the dry ingredients. Add 2 tablespoons unsweetened cocoa powder to the topping and 1 teaspoon instant espresso powder to the apple mixture. This transforms the crumble into a Mexican chocolate mole-inspired dessert with deep, smoky notes. Top with whipped cream and a sprinkle of crushed cacao nibs for crunch.
Harvest Squash Crumble: For a fall twist, replace half the apples with 1 cup of pureed roasted butternut squash (squeeze out excess moisture). The squash adds a velvety texture and subtle sweetness that pairs perfectly with cinnamon. Add ½ teaspoon ground nutmeg and ¼ teaspoon ground cloves to the apple mixture. This variation is especially popular with kids who might otherwise turn up their noses at squash.
Make-Ahead Freezer-Friendly Version: Assemble the crumble in a freezer-safe dish (I use a 9×9-inch glass baking dish), cover tightly with plastic wrap and then foil, and freeze for up to 3 months. When ready to bake, thaw overnight in the refrigerator, then bake as directed (you may need to add 5-10 minutes to the baking time). This is perfect for holiday meal prep-just pop it in the oven while you finish the main course. The texture remains remarkably close to fresh, though the apples will be slightly softer after freezing.
Frequently Asked Questions
Can I make this ahead of time and how should I store it?
You can absolutely make this crumble ahead-it reheats beautifully. Assemble the dish up to the first bake stage, then cover tightly with plastic wrap (pressing it directly onto the surface to prevent a skin from forming) and refrigerate for up to 24 hours. When ready to bake, let it sit at room temperature for 15 minutes, then bake as directed (add 5-10 minutes if baking from cold). For longer storage, freeze the assembled (unbaked) crumble for up to 3 months. Thaw overnight in the fridge, then bake as usual. Once baked, store leftovers covered at room temperature for up to 2 days or refrigerate for up to 5 days. Reheat in a 300°F (150°C) oven for 10 minutes to restore crispness. Never microwave this dessert-the topping will turn soggy and the apples will become rubbery.
What can I serve alongside this dish to make it a complete meal?
This crumble is rich enough to stand alone as a dessert, but thoughtful pairings can turn it into a memorable end to a meal. For a cozy winter dinner, serve it with sharp cheddar cheese and a dry cider- the acidity of the cheese cuts through the sweetness, while the cider’s effervescence cleanses the palate. A scoop of salted honey gelato adds a creamy, salty contrast that’s irresistible. For a lighter option, pair with Greek yogurt whipped with vanilla and a drizzle of local honey. If you’re serving it for brunch, add a dollop of lemon curd for a bright, citrusy note that balances the cinnamon. Coffee lovers should try it with a pour-over of lightly roasted Ethiopian beans- the winey, floral notes complement the caramelized apples beautifully.
Why did my dish turn out soggy and how do I fix it?
The most common issue is underbaking the topping, which causes it to absorb the apple juices. The solution is simple: bake until the topping is deep golden brown and pulling away from the edges. Another culprit is overmixing the topping-when you work the butter into the flour too much, you create a dense paste that can’t absorb the juices. Mix just until the butter is distributed and some pea-sized pieces remain. If your apples were particularly juicy (a common issue with Honeycrisp), toss them with 1 teaspoon of cornstarch before baking-this helps thicken the juices naturally. Finally, cut a vent in the center of the topping before baking to allow steam to escape; trapped steam creates condensation on the underside of the topping, leading to sogginess.
What are the best ingredient substitutions if I’m missing something?
If you’re out of Granny Smith apples, use a mix of Braeburn and Jonagold-they hold their shape and have a balanced sweet-tart flavor. No Honeycrisp? Pink Lady or Jazz apples work well. For the flour, cake flour makes a more delicate topping, but all-purpose works fine. If you don’t have brown sugar, substitute ¼ cup granulated sugar plus 1 tablespoon molasses. For the butter, ghee works in a pinch, though it lacks the water content that creates steam for a lighter texture. If you’re out of cinnamon, use ½ teaspoon pumpkin pie spice or a mix of ¼ teaspoon each ground allspice and nutmeg. For the lemon juice, white vinegar or apple cider vinegar works in a 1:1 ratio, though the flavor will be slightly sharper. And if you forget to peel the apples, don’t worry-the skins soften during baking and add fiber and color. Just give them a good wash first.
Final Thoughts from the Kitchen
There’s something sacred about this dessert. It’s the kind of recipe that gets passed down through generations, the kind that fills a home with warmth and nostalgia even on the first try. I’ll never forget the look on my grandmother’s face when she tasted this version-I told her it was my tribute to her crumble, and she simply said, “Well, it’s about time you got it right.”
Baking is an act of love, and this recipe is my love letter to autumn, to family, and to the simple joy of a well-made dessert. Don’t be afraid to make it your own-swap in pears, add chocolate, or experiment with spices. But remember: the best crumbles start with the best ingredients and the most care. Take your time, trust the process, and when you pull this golden masterpiece from the oven, you’ll understand why this recipe has earned its place at the top of every search result. Now go forth and crumble-and be prepared for the compliments to roll in.
I’d love to see your creations! Tag us on Instagram @texasdadcooks with #GrandmasCrumbleMagic and tell me what twist you tried. And if you have any questions as you bake, don’t hesitate to reach out-I’m always here to help you nail this one.