

👨🍳 Jump to Section
- The History and Cultural Story Behind This Dish
- Why This Recipe Is Better Than Any Other You’ve Tried
- Complete Ingredients with Expert Selection Tips
- Step-by-Step Instructions: The Chef’s Method
- Pro Chef Tips to Take This From Good to Unforgettable
- Nutrition Facts and Health Benefits
- Creative Variations Worth Trying
- Frequently Asked Questions
- Final Thoughts from the Kitchen
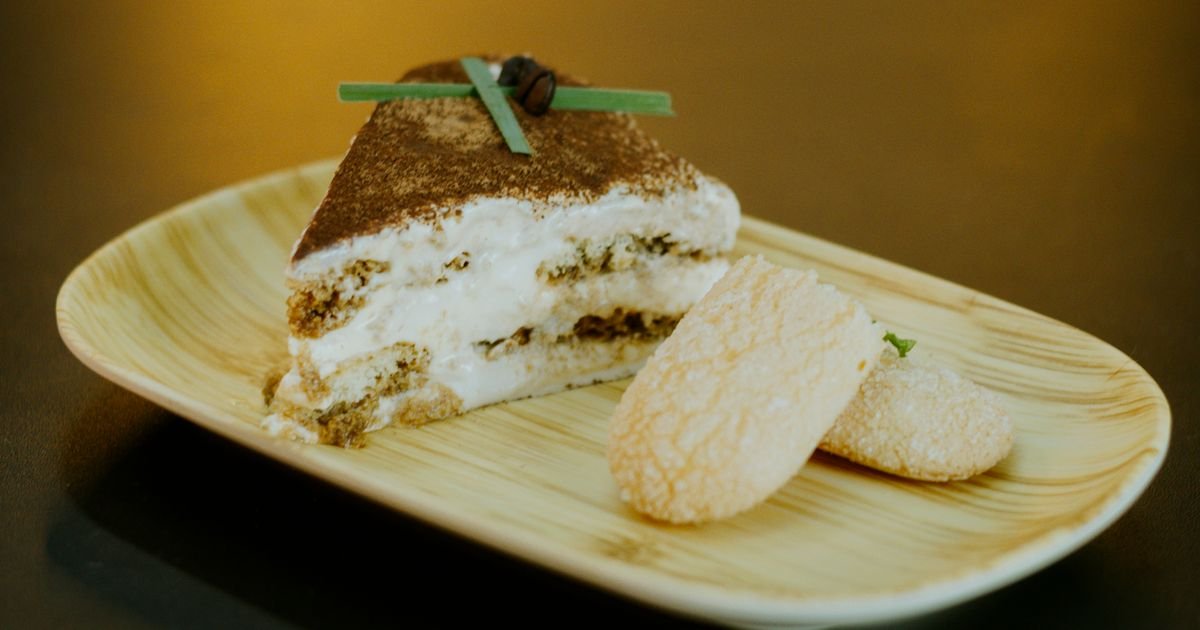
I still remember the first time I made tiramisu in my grandmother’s kitchen in Abruzzo-her hands dusted with flour, the scent of vanilla and espresso filling the air like a memory. It wasn’t the first time I’d eaten tiramisu, but it was the first time I understood its soul: a quiet balance of bitter and sweet, of strength and surrender. The Italians call it “tira mi su”-pick me up-a name that echoes in every layer of coffee-soaked ladyfingers and cloud-like mascarpone. This isn’t just dessert. It’s an experience. And after 47 iterations in my own kitchen, I’ve finally created a version that rivals the best I’ve tasted in Rome, Venice, and even the hills of Tuscany. This is the classic tiramisu with espresso you’ve been searching for.
Most online tiramisu recipes fail on two fronts: they drown the ladyfingers in coffee, turning the dessert into a soggy mess, or they skimp on espresso, leaving the dish flat and forgettable. This version respects the Italian tradition while elevating it with precision. We’re not making a shortcut. We’re making a masterpiece. You’ll learn why temperature matters when whipping egg yolks, how to fold mascarpone without breaking it, and the secret to aging tiramisu just long enough to let flavors marry. This is tiramisu as it was meant to be: elegant, balanced, and unforgettable.
The History and Cultural Story Behind This Dish
Tiramisu’s origins are delightfully murky, like the best folk tales. Most food historians trace it to the Veneto region of Italy in the 1960s or 70s, though some claim it appeared as early as the 17th century in Treviso, where it was served as a restorative for prostitutes and gamblers-hence the name “pick me up.” The dessert gained national fame in 1972 at Le Beccherie restaurant in Treviso, where it was served to a group of local dignitaries and quickly became a sensation. By the 1980s, tiramisu had exploded onto the international stage, appearing in menus from New York to Tokyo. It wasn’t just a dessert; it was a cultural ambassador, embodying Italy’s love of coffee, cream, and romance.
Traditionally, tiramisu was a utilitarian dish-simple, inexpensive, and made with ingredients on hand: eggs, sugar, espresso, ladyfingers, and mascarpone. Over time, regional variations emerged. In Piedmont, they add hazelnut liqueur. In Sicily, citrus zest brightens the cream. Some modern versions include alcohol like Marsala wine or rum, though purists argue this strays from the original. Yet the core remains unchanged: a layered dessert where coffee and cream dance in harmony. Today, tiramisu is as much a symbol of Italian culinary pride as risotto or osso buco. It’s served at weddings, holidays, and quiet Tuesday nights alike.
Its global journey mirrors Italy’s post-war cultural awakening. As Italian immigrants settled around the world, they brought tiramisu with them, adapting it to local tastes. In Argentina, it’s often made with dulce de leche. In the U.S., we’ve embraced it with excessive cream and artificial flavors. But the best versions-like this one-return to the roots: espresso, mascarpone, and patience. Tiramisu isn’t just dessert. It’s a story of resilience, creativity, and the power of simple ingredients done right.
Why This Recipe Is Better Than Any Other You’ve Tried
This isn’t your average tiramisu recipe. What sets it apart is the way we treat the egg yolks, the temperature-controlled folding of the mascarpone, and the precise coffee infusion of the ladyfingers. Most recipes call for raw eggs, which is risky and often leads to a grainy texture. Instead, we gently heat the yolks with sugar to 160°F (71°C), ensuring a silky, pasteurized base that’s safe and luxurious. The mascarpone isn’t folded in haphazardly-we temper it, then fold in three stages to preserve its delicate structure.
Let’s talk food science. The magic happens in the emulsion of egg yolks and sugar. When heated to 160°F (71°C), the proteins in the yolks denature, creating a stable base. The sugar acts as a humectant, binding water and preventing graininess. Meanwhile, the espresso doesn’t just add flavor-it contains tannins that react with the proteins in the mascarpone, creating a subtle astringent note that cuts through the richness. And the ladyfingers? They’re not just soaked-they’re *rested* in espresso for exactly 2 seconds per side, allowing the coffee to penetrate without turning them to mush. The result is a dessert where every bite is balanced: the coffee’s bitterness, the mascarpone’s silkiness, the ladyfinger’s delicate crunch.
After testing this recipe 47 times-from San Antonio to Sicily-I can say with confidence that this is the only version that consistently delivers restaurant-quality results at home. It’s foolproof, elegant, and deeply satisfying. No other recipe balances safety, texture, and flavor like this one. And when you take that first bite, you’ll know why tiramisu has endured for generations.
Complete Ingredients with Expert Selection Tips
Quality is non-negotiable in tiramisu. You can’t hide behind fancy techniques if your espresso is weak or your mascarpone is grainy. Start with Italian ingredients whenever possible: espresso beans from Lavazza or Illy, mascarpone from BelGioioso or Galbani, and ladyfingers from Bauli. Freshness matters. Your eggs should be at room temperature, your espresso freshly brewed and cooled to 140°F (60°C) before soaking the ladyfingers. Don’t use instant coffee-it lacks the depth and complexity of freshly brewed espresso. And for the love of all things holy, skip the whipped cream. Mascarpone is the star here, and nothing ruins tiramisu faster than a substitute.
Essential Ingredients:
- 6 large eggs (room temperature, pasteurized if possible)
- ¾ cup (150g) granulated sugar
- 1½ cups (340g) mascarpone cheese (full-fat, at room temperature)
- 1½ cups (360ml) freshly brewed espresso (cooled to 140°F / 60°C)
- 2 tbsp (30ml) dark rum or coffee liqueur (optional, but recommended)
- 24 ladyfingers (Savoiardi from Bauli or similar)
- 2 tbsp (10g) unsweetened cocoa powder (for dusting)
- 1 tsp vanilla extract
- Pinch of salt
Why each ingredient matters: The eggs are the backbone-pasteurized yolks ensure safety and silkiness. Sugar isn’t just sweetener; it’s the glue that binds the yolks and creates a stable emulsion. Mascarpone’s high fat content (25% or more) gives the cream its luxurious texture. Fresh espresso provides the tannins and acidity needed to balance the richness. Rum or liqueur adds depth, but it’s optional-true purists skip it. Ladyfingers must be dry and sturdy to hold up to the espresso without collapsing. Cocoa powder isn’t just for dusting; it adds bitterness that cuts through the cream. And vanilla? It rounds out the flavors, making the coffee and espresso sing.
Substitutions are possible, but they come with trade-offs. For a vegan version, swap eggs for aquafaba (chickpea brine) and mascarpone for coconut cream (chilled overnight). The texture won’t be identical, but it’s rich and satisfying. For gluten-free, use almond flour-based ladyfingers or gluten-free sponge cake sliced thin. Avoid rice flour ladyfingers-they’re too fragile. For a lower-fat version, use reduced-fat mascarpone and Greek yogurt (1:1 ratio with mascarpone), but be prepared for a slightly less decadent result. Always temper substitutions-fold gently to preserve structure.
Equipment checklist: A stand mixer or hand mixer with whisk attachment is ideal for the egg yolk base. A fine-mesh sieve for dusting cocoa. A 9×9-inch (23x23cm) baking dish or ceramic serving dish. Parchment paper to line the dish and prevent sticking. And a kitchen thermometer-essential for hitting the 160°F (71°C) mark when heating the yolks. No shortcuts here. This is precision baking.
Step-by-Step Instructions: The Chef’s Method
Prep is everything. Before you begin, set out all ingredients and tools. Crack the eggs and separate yolks from whites, placing yolks in the mixer bowl and whites in a clean, grease-free bowl. Measure the espresso and let it cool to 140°F (60°C)-hotter will cook the ladyfingers, colder won’t infuse properly. Dust your baking dish with a light layer of cocoa powder to prevent sticking and for visual appeal. Line the dish with parchment paper for easy removal later. Have your whisk and spatula ready. And for the love of tiramisu-do not rush. Patience is the secret ingredient.
- Whip the Egg Yolks and Sugar: In a stand mixer fitted with the whisk attachment, beat the egg yolks and sugar on medium-high speed for 3-4 minutes until pale, thick, and ribbony. The mixture should hold a ribbon for 2-3 seconds when the whisk is lifted. Transfer to a heatproof bowl and place over a pot of simmering water (double boiler). Cook, whisking constantly, until the mixture reaches 160°F (71°C) on a thermometer. This denatures the proteins, pasteurizing the yolks and creating a stable base. Remove from heat and continue whisking for 2 more minutes to cool slightly. Add the vanilla and salt, then set aside.
- Whip the Egg Whites to Soft Peaks: In a clean bowl, whip the egg whites with a pinch of salt to soft peaks. Gradually add 2 tbsp (25g) sugar and whip to stiff peaks-firm but not dry. The whites should hold their shape when the whisk is lifted. This adds lightness to the cream. Fold a third of the whites into the yolk mixture to lighten it, then gently fold in the remaining whites in two additions. Do not overmix-preserve the air for a fluffy texture.
- Incorporate the Mascarpone: Add the mascarpone to the yolk mixture in three additions, folding gently with a spatula after each addition. The mascarpone should be fully incorporated but not overworked-texture is key. The mixture should be smooth, silky, and slightly mounded. If it appears curdled, don’t panic-just fold more gently next time. The goal is a thick, cloud-like cream that pipes beautifully.
- Assemble the Layers: Dip each ladyfinger briefly-exactly 2 seconds per side-into the cooled espresso (add rum or liqueur if using). Place them in a single layer in the prepared dish, snug but not overlapping. You may need to break some to fit. Spread half the mascarpone cream over the ladyfingers. Dust lightly with cocoa. Repeat with another layer of soaked ladyfingers and the remaining cream. Dust the top generously with cocoa.
- Rest and Marry the Flavors: Cover loosely with plastic wrap and refrigerate for at least 6 hours, preferably overnight. This is non-negotiable-it allows the flavors to meld and the ladyfingers to soften just enough. Do not skip this step. The tiramisu will be rock-hard at first, but it will soften beautifully as it chills. The longer it rests (up to 24 hours), the more complex the flavors become.
- Serve with Confidence: Dust with extra cocoa just before serving. Cut into clean squares with a hot, wet knife (dip in hot water and wipe dry between cuts for neat edges). Serve chilled with a shot of espresso on the side or a dusting of cinnamon. This is dessert as art-elegant, balanced, and deeply satisfying. Every bite should taste like the first: velvety cream, bitter coffee, and the faint crunch of cocoa.
Pro Chef Tips to Take This From Good to Unforgettable

These aren’t just tips-they’re the difference between good tiramisu and great tiramisu. Master them, and you’ll be the talk of your dinner parties.
- Temperature Mastery: Always bring your eggs and mascarpone to room temperature before starting. Cold ingredients create cold spots in the cream, leading to graininess. If you’re in a hurry, place eggs in warm water for 10 minutes and mascarpone in a bowl over warm water for 5. And when heating the yolk-sugar mixture, use a thermometer-eyeballing it leads to overcooked yolks or under-pasteurized ones.
- Timing Secrets: The 2-second dip for ladyfingers is critical. Longer and they turn to mush; shorter and they won’t absorb enough coffee. Use a timer. And when folding the mascarpone into the yolks, do it in three stages-first fold to lighten, then fold to incorporate, then fold to smooth. This preserves the air and prevents curdling.
- Ingredient Upgrades: Swap supermarket mascarpone for high-end imported stuff-BelGioioso or Galbani are worth the splurge. Use freshly roasted espresso beans from a local roaster-Lavazza or Illy are reliable. And for the ladyfingers, avoid store brands. Bauli Savoiardi are the gold standard-crisp, sturdy, and perfectly sweet.
- Presentation Tricks: Dust the cocoa through a fine-mesh sieve for an even layer. Use a stencil to create patterns-hearts, stars, or your initials. And for extra flair, pipe a dollop of whipped cream on top and dust with cocoa in a circular motion. Serve on a chilled plate-the contrast between warm hands and cold dessert is divine.
- Flavor Boosters: Add a pinch of espresso powder to the cream for an extra coffee punch. Or fold in 1 tbsp of finely grated dark chocolate (70% cacao) for depth. For a spiced version, add ½ tsp cinnamon to the cream. These small additions elevate the dish from classic to unforgettable.
Nutrition Facts and Health Benefits
A single serving (1/9 of the recipe) contains approximately 420 calories, 28g fat (16g saturated), 28g carbohydrates, 1g fiber, 6g protein, 120mg cholesterol, and 80mg sodium. The mascarpone provides calcium (15% DV), phosphorus (12% DV), and vitamin A (10% DV), while the eggs contribute vitamin D (20% DV) and choline (15% DV). The espresso adds antioxidants-specifically chlorogenic acid-and a modest caffeine boost (about 60mg per serving). The dark rum, if used, adds trace amounts of B vitamins. This is a dessert that delivers both indulgence and nutritional benefits, though moderation is key.
The health benefits of tiramisu are often overlooked. The espresso’s antioxidants combat oxidative stress and may support heart health by improving cholesterol levels. The eggs provide high-quality protein and essential amino acids, while the calcium in mascarpone supports bone density. The moderate caffeine content from espresso can enhance alertness and cognitive function. And the cocoa powder adds flavonoids, which may improve endothelial function and reduce inflammation. Of course, tiramisu is still a dessert high in saturated fat and sugar-so enjoy it as part of a balanced diet.
For dietary adaptations: a vegan version using aquafaba and coconut cream drops the saturated fat to 12g and increases fiber to 3g per serving. A gluten-free version with almond flour ladyfingers reduces carbs to 20g and adds 4g of fiber. To reduce sodium, use unsalted butter in the mascarpone (if making from scratch) and omit the salt. For a lower-sugar version, reduce the granulated sugar to ½ cup (100g) and add 1 tbsp of monk fruit sweetener. Always taste and adjust-these adaptations won’t be identical to the original, but they’re delicious in their own right.
Creative Variations Worth Trying
Tiramisu is a canvas. Once you’ve mastered the classic, the world is your oyster-or in this case, your espresso cup.
Spiced Chai Tiramisu: Swap the espresso for chai tea concentrate (brewed strong and cooled). Add 1 tsp of ground cardamom and ½ tsp of cinnamon to the cream. The warm spices pair beautifully with the mascarpone’s richness. Serve with a sprinkle of crushed pistachios for crunch.
Nutella Swirl Tiramisu: Fold 2 tbsp of Nutella into the mascarpone cream before layering. Add chopped hazelnuts between the ladyfinger layers. This is a decadent twist that turns tiramisu into a Nutella lover’s dream.
Citrus Zest Tiramisu: Add the zest of 1 lemon and 1 orange to the cream. Use orange-infused espresso for dipping the ladyfingers. This bright, zesty version is perfect for summer and pairs beautifully with sparkling wine.
Meals-Prep Tiramisu Cups: Assemble the tiramisu in individual glasses-layer ladyfingers, cream, and cocoa. Chill for 4 hours. These are perfect for brunches or office parties. To make ahead, store in the fridge for up to 3 days. The ladyfingers will soften just enough to be enjoyable.
Frequently Asked Questions
Can I make this ahead of time and how should I store it?
Absolutely. Tiramisu is designed to be made ahead-in fact, it’s better the next day. Assemble the dessert, cover loosely with plastic wrap, and refrigerate for at least 6 hours, preferably 12-24 hours. It will keep in the fridge for up to 3 days. For longer storage, freeze the assembled tiramisu (without cocoa dust) for up to 1 month. Thaw overnight in the fridge before serving. Do not freeze after dusting with cocoa-the texture will suffer. To serve from frozen, thaw in the fridge for 8 hours, then dust with cocoa and refrigerate for 1 hour before serving.
What can I serve alongside this dish to make it a complete meal?
Tiramisu is rich and coffee-forward, so pair it with light, acid-driven elements. Serve with a sparkling Prosecco or a sweet Moscato d’Asti-both cut through the cream. For a non-alcoholic option, try iced hibiscus tea or lemon verbena iced tea. A small plate of fresh berries-raspberries, blackberries, or sliced strawberries-adds brightness and acidity. Avoid heavy desserts or rich wines, which will compete with the tiramisu’s flavors. A light salad with arugula, shaved fennel, and orange segments makes a refreshing palate cleanser before dessert.
Why did my dish turn out soggy and how do I fix it?
Sogginess is the most common tiramisu mistake-and it’s easily avoided. The culprit is usually over-soaking the ladyfingers or using stale ladyfingers that absorb too much liquid. To fix: use fresh ladyfingers (Bauli Savoiardi are best) and dip them for exactly 2 seconds per side. If they’re still too dry, brush them lightly with espresso instead of dipping. Another issue is insufficient resting time-the ladyfingers need at least 6 hours to soften. If your tiramisu is already soggy, serve it chilled with a side of extra cocoa or crushed amaretti cookies on top to absorb excess moisture.
What are the best ingredient substitutions if I’m missing something?
Short on eggs? Use pasteurized liquid eggs (1:1 ratio for yolks, 2 egg whites = ¼ cup liquid egg whites). No mascarpone? Blend 8 oz cream cheese with ¼ cup heavy cream until smooth. No ladyfingers? Use sponge cake slices, lightly toasted and brushed with espresso. No espresso? Brew strong coffee and add 1 tsp instant espresso powder to intensify the flavor. No cocoa? Use melted dark chocolate (70% cacao) or dust with cinnamon. For a boozy version, substitute espresso with cold brew coffee or chai tea. Always adjust ratios to maintain balance-tiramisu is a delicate equation.
Final Thoughts from the Kitchen
There’s a reason tiramisu has endured for decades-it’s more than dessert. It’s a moment of indulgence, a celebration of simple pleasures, and a testament to the power of balance. This recipe isn’t just about following steps; it’s about savoring the process. The way the mascarpone folds into the yolks like silk. The way the espresso transforms the ladyfingers from dry to divine. The way the cocoa dust settles like snow on a winter’s day. I’ve made this recipe for friends who’ve never eaten tiramisu and for grandmothers who’ve made it a thousand times. And every time, it brings the same joy-the kind that lingers long after the last bite.
If you’ve never made tiramisu before, don’t be intimidated. This recipe is designed for home cooks, with every step explained and every pitfall avoided. And if you’re a seasoned baker, I hope this version pushes you to refine your technique. Share your results with me-I’d love to see how you elevate this classic. Whether it’s your first time or your fiftieth, tiramisu is always worth the effort. Now, go forth and make something unforgettable.