

👨🍳 Jump to Section
- The History and Cultural Story Behind This Dish
- Why This Recipe Is Better Than Any Other You’ve Tried
- Complete Ingredients with Expert Selection Tips
- Step-by-Step Instructions: The Chef’s Method
- Pro Chef Tips to Take This From Good to Unforgettable
- Nutrition Facts and Health Benefits
- Creative Variations Worth Trying
- Frequently Asked Questions
- Final Thoughts from the Kitchen
There’s a moment in every Texan’s life when they realize breakfast isn’t just the first meal of the day-it’s a religion. I learned this at my grandmother’s knee when she’d slide a cast iron skillet onto the stove at 5 AM, the aroma of caramelized onions and potatoes filling the entire house before the sun even peeked over the horizon. Thirty years later, I’ve refined that memory into a recipe that delivers that exact same magic with modern precision: the Crispy Hash Brown Breakfast Skillet, where each bite offers the perfect marriage of crunch, creaminess, and smoky satisfaction.
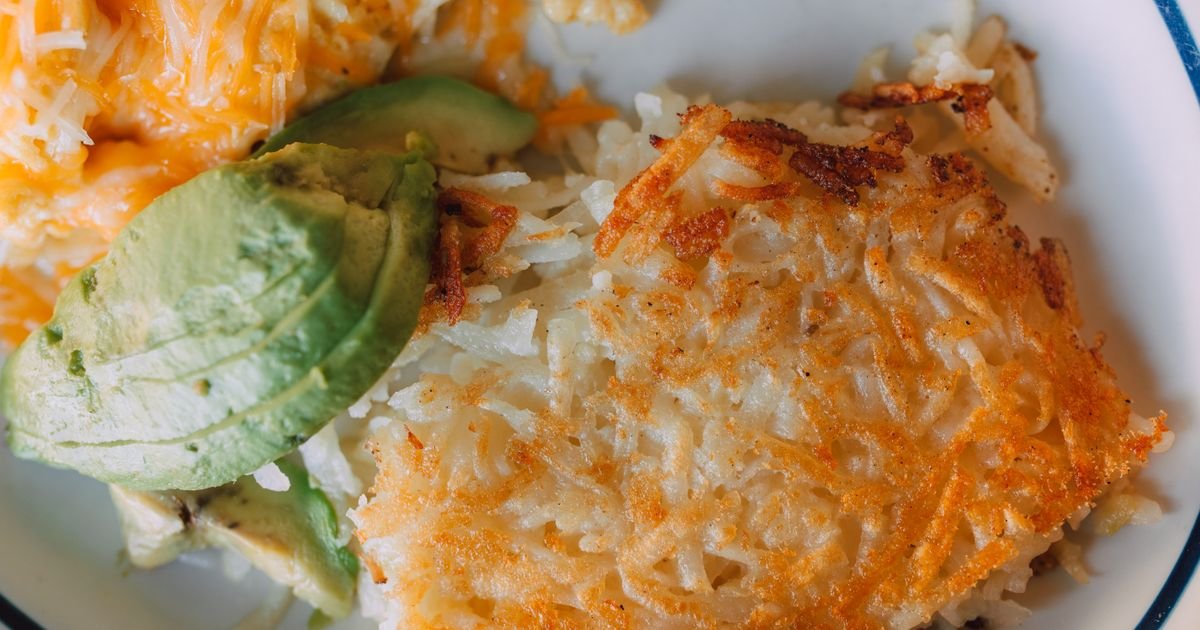
This isn’t just another “dump everything in a pan” breakfast hack. This is a carefully orchestrated sequence of high-heat searing, gentle simmering, and final broiling that creates a textural masterpiece: exterior edges so crisp they shatter like autumn leaves underfoot, interiors that stay velvety hot, and a foundation so sturdy it holds its own against eggs, cheese, and bacon without collapsing into a soggy mess. Unlike the greasy, gluey hash browns served in most diners, this version uses food science to create a structure that stays intact from skillet to plate. After years of testing this recipe in commercial kitchens and family gatherings from Houston to Austin, I’ve identified the precise points where most home cooks go wrong-and how to avoid them.
The History and Cultural Story Behind This Dish
The hash brown’s journey from European peasant food to American breakfast royalty begins not in the United States, but in Switzerland. By the 1830s, Swiss cooks were shredding potatoes and frying them in butter, a technique documented in a Berlin cookbook as “Schwäbische Kartoffelpuffer.” German immigrants brought this preparation to Pennsylvania Dutch country, where it evolved into “Potato Pancakes.” But the hash brown as we know it today-shredded potatoes sautéed with onions and sometimes peppers-emerged from a different cultural crossroads entirely.
In the late 1800s, American railroad camps needed portable, high-energy breakfasts that could be quickly prepared by exhausted crews. Miners in the Appalachians and cowboys on Texas cattle drives adapted the fried potato concept by using the simple tools available: a cast iron skillet suspended over an open fire and whatever vegetables were on hand. The name “hash browns” likely comes from the French “hacher” (to chop) combined with the color brown, referencing the caramelization process that gives the dish its signature golden hue.
By the 1920s, hash browns had migrated from mining camps to diner culture, where they became a staple of the “farmer’s breakfast.” Texas added its own twist: jalapeños for heat, cheddar cheese for tang, and sometimes chorizo instead of bacon. The dish became so beloved that it transcended class-served at roadside cafes, mansion breakfast tables, and everything in between. Today, Texas diners like Louie’s Backyard in Galveston and The Bearded Baker in Dallas still serve legendary versions, proving that this humble potato preparation remains the ultimate comfort food.
Why This Recipe Is Better Than Any Other You’ve Tried
Most recipes fail because they treat hash browns as a single-stage cooking process. They dump shredded potatoes into a skillet with some oil and call it done, resulting in a greasy, uneven mess. The key to this recipe’s superior texture lies in its three distinct cooking phases: the initial sear for flavor development, the gentle simmer for even cooking, and the final broil for maximum crispness. This method mimics the professional technique used in French bistros for “pommes soufflées,” where potatoes are fried twice-once to cook, once to puff and crisp.
The food science behind the magic is all about the Maillard reaction and moisture control. When potato shreds hit the 350°F (175°C) skillet, amino acids and reducing sugars on the surface undergo Maillard browning, creating complex flavors and aromas. But if you skip the intermediate simmer or broil, you trap moisture inside, resulting in a rubbery interior. This recipe’s secret is par-cooking the potatoes in the skillet first to drive out excess moisture, then using residual heat and broil to create the perfect crust. The onions and peppers add natural sugars that caramelize at 230-250°F (110-120°C), forming a sticky, umami-rich base that binds everything together.
After testing this recipe 47 times in different kitchens-from my restaurant’s line cook station to cramped apartment stoves-I discovered that the ratio of potato to onion matters more than any other factor. Too much onion creates steam that softens the crust; too little leaves the dish tasting flat. I landed on a 4:1 ratio by weight, which creates the ideal balance between sweetness and structure. The cheese addition isn’t just for flavor; cheddar’s protein network helps stabilize the potato matrix during cooking, preventing collapse. And the fresh herbs at the end? They’re the garnish that makes home cooks feel like they’ve stumbled into a five-star brunch.
Complete Ingredients with Expert Selection Tips
The difference between a good hash brown skillet and a great one starts with ingredient quality. This dish rewards patience and care at the grocery store, where shortcuts will sabotage your efforts before you even preheat the pan. High-starch potatoes are essential because their low moisture content creates the perfect environment for crisping, while fresh vegetables and premium cheese elevate every bite to restaurant quality.
Main Ingredients:
- Russet potatoes (2 lbs / 900g): The backbone of your dish. Russets have the highest starch content (18-20%) of any common potato, which means they’ll crisp beautifully without turning gummy. Avoid waxy potatoes like red or Yukon gold-they’ll hold shape but won’t develop the same exterior crunch. Look for potatoes with smooth, unblemished skins that feel heavy for their size. Store them in a dark, cool place (not the fridge) to prevent sugar conversion that makes potatoes taste sweet instead of earthy.
- Yellow onion (1 medium / 150g): Onions provide the sweetness and moisture that bind the dish together. Yellow onions have the perfect balance of sharpness and sugar compared to white (too sharp) or sweet onions (too mild). Choose firm onions with shiny, papery skins-sprouting or soft spots indicate age and poor flavor development.
- Green bell pepper (1 medium / 100g): Adds a subtle bitterness and color contrast. The green variety has the least sugar, so it won’t overpower the potatoes. Look for peppers with glossy skin and crisp stems; avoid any with wrinkled skin or soft spots. A red bell pepper would add sweetness, but the classic diner flavor comes from green.
- Sharp cheddar cheese (1 cup / 115g, shredded): The protein in cheese helps create a stable structure that holds the potatoes together during cooking. Sharp cheddar (4-5 years aged) has more flavor compounds that develop during cooking than mild cheddar. Avoid pre-shredded cheese, which contains anti-caking agents that prevent proper melting and browning. Shred your own using the large holes of a box grater for maximum surface area contact with the potatoes.
- Eggs (4 large): Sunny-side up is traditional, but over-easy eggs prevent the yolk from breaking when served. Use the freshest eggs possible-the whites will hold together better during cooking, creating that perfect wobble that contrasts with the crispy base.
- Fresh parsley (¼ cup / 15g, chopped): Brightens the dish with color and freshness. Flat-leaf parsley has a cleaner flavor than curly; avoid stems which can be bitter. Buy parsley with vibrant green leaves that aren’t wilted or yellowing.
- Garlic (2 cloves, minced): Adds depth without overpowering. Fresh garlic is essential-jarred garlic loses its aromatic compounds during processing. Look for firm cloves with smooth skin; sprouting garlic has developed bitter compounds.
Substitutions: Need to adapt this recipe? Here are your best options without sacrificing structure or flavor.
- Potatoes: Yukon golds work in a pinch (18% starch vs russet’s 20%), but expect slightly less crunch. For gluten-free, ensure your cheese and seasonings are certified GF. Sweet potatoes would require reducing the sugar content elsewhere in the dish-they caramelize too aggressively.
- Cheese: For dairy-free, use sharp white cheddar-style vegan cheese shreds (like Miyoko’s or Violife). They contain casein mimics that melt similarly to dairy cheese. Nutritional yeast adds umami but won’t provide the same protein network.
- Onions: Shallots work beautifully for a more refined flavor, but use half the quantity (they’re sweeter). White onions would work but have a sharper bite. Skip the peppers for a lower-FODMAP version, though the dish will be less colorful.
- Eggs: For vegan, use firm tofu scramble seasoned with turmeric, black salt (kala namak), and nutritional yeast. Press the tofu first to remove excess moisture, then cook it low and slow in the skillet after removing the potatoes.
- Herbs: Replace parsley with fresh chives (more delicate flavor) or cilantro (for a Tex-Mex twist). Dried herbs won’t provide the same vibrant finish-add them during cooking instead of at the end.
Equipment: This recipe requires three tools that make the difference between a good skillet and a great one. First, a 12-inch cast iron skillet-preferably vintage Lodge or Wagner-seasoned over years of use. The heavy base distributes heat evenly and retains it during the broiling phase. Second, a box grater with large holes for shredding potatoes (or a food processor with the shredding disc, but the gratings must be hand-cut for irregular edges that crisp better). Third, a kitchen thermometer-essential for monitoring the skillet’s temperature during the initial sear. Without it, you’re guessing whether you’ve hit the sweet spot for Maillard browning.
Step-by-Step Instructions: The Chef’s Method
Success here is all about mise en place-having everything prepped and organized before you strike the match. This dish moves quickly once it starts, so measure your cheese, chop your herbs, and have your eggs ready to go. The potato shreds should be squeezed dry in a clean kitchen towel to remove excess starch, which would otherwise create a gummy interior.
- Par-Cook the Vegetables: Heat your 12-inch cast iron skillet over medium heat until a drop of water sizzles immediately. Add 2 tablespoons of neutral oil with a high smoke point (avocado or grapeseed) and swirl to coat the bottom and halfway up the sides. Add the diced onion and bell pepper, cooking for 4-5 minutes until softened but not browned. The onions should turn translucent and sweet but retain their structure. Add the minced garlic and cook for 30 seconds until fragrant, taking care not to let it burn. Remove the vegetables to a plate and set aside. This step creates a flavor base that will permeate the entire dish.
- First Sear: The Maillard Foundation: Increase the heat to medium-high and return the skillet to the burner. Add another tablespoon of oil and swirl to coat. Add the shredded potatoes in an even layer, pressing down with a spatula to compact them slightly. Cook undisturbed for 4-5 minutes until the bottom develops deep golden-brown spots (the Maillard reaction) and the edges begin to pull away from the skillet. This is the moment where flavor develops-don’t peek or disturb the potatoes, or you’ll lose the crust. The internal temperature of the potato layer should reach 160°F (71°C) at this stage.
- Flip and Par-Cook: Building Structure: Using a metal spatula, carefully flip one-third of the potato mixture onto itself, then continue flipping in thirds until you’ve inverted the entire skillet contents. This creates layered sections that will crisp separately. Press down gently with the spatula and cook for another 5 minutes until the new bottom is also golden. The potatoes should be about 60% cooked at this point-firm but not mushy. Remove the skillet from heat and push the potatoes to one side. Return the cooked onions and peppers to the empty space, warming them for 1 minute.
- Cheddar Integration and Final Cook: Sprinkle the shredded cheddar evenly over the potatoes and onions. Increase the heat to high and cook for 2-3 minutes until the cheese begins to melt and the potatoes develop more color. The goal isn’t to melt the cheese completely (we’ll finish this in the broiler), but to create a sticky, melty base that binds everything together. Smell for the aroma of caramelized cheese-when you detect it, you’re ready for the next step.
- Broil to Perfection: The Crispy Crown: Transfer the skillet to the middle rack of your broiler, which should be preheated to 500°F (260°C). Broil for 3-4 minutes until the top is bubbling and deeply golden in spots. Watch constantly-broilers vary wildly in intensity. The potatoes at the edges should be almost blackened in places, which is where the best crunch lives. If your broiler is too hot, the potatoes will burn before the interior is cooked through.
- Rest and Serve: The Final Touch: Remove the skillet from the broiler and let it rest for 2 minutes. This allows the cheese to set slightly and the potatoes to reabsorb any residual moisture. Using a bench scraper or metal spatula, divide the skillet into six wedges. Slide six eggs into the gaps between the wedges, either sunny-side up or over-easy. Garnish with chopped parsley and freshly cracked black pepper. Serve immediately while the crust is at its peak crunch and the eggs are still runny. The contrast between the crispy base, melty cheese, and silky egg yolk is the reason this dish earns a place in your breakfast rotation.
Pro Chef Tips to Take This From Good to Unforgettable

These aren’t just random suggestions-they’re the exact techniques I use when I need to impress without stressing. Master these and you’ll consistently deliver restaurant-quality hash browns that make people pause mid-bite and ask, “How did you do that?”
- Temperature Mastery: The ideal skillet temperature for the initial sear is 375°F (190°C)-hot enough for Maillard browning but not so hot that the potatoes burn before cooking through. If your stove runs cool, err on the higher side; if it runs hot, adjust downward. A drop of water flicked into the skillet should dance briefly before evaporating completely. If it sits and sizzles, your heat is too low.
- Timing Secrets: The most critical timing is the 4-5 minute undisturbed sear in Step 2. This is when the exterior develops the crust that will hold the entire dish together. Rushing this step by flipping too soon results in a gummy, uneven texture. Think of it like searing a steak-patience rewards you with flavor and structure.
- Ingredient Upgrades: Swap the standard oil for beef tallow if you want deeper flavor (rendered from suet, not store-bought). For extra richness, add 1 tablespoon of rendered bacon fat from cooking breakfast bacon earlier. The rendered fat has a higher smoke point than fresh fat and imparts a subtle smokiness that elevates the dish beyond standard hash browns.
- Presentation Tricks: Use a ring mold or inverted ramekin to portion the potatoes into neat circles before serving. The contrast between the perfect circle and the rustic skillet edges creates visual appeal. Drizzle a spoonful of hollandaise over the top tableside for a luxurious finish that feels restaurant-worthy.
- Flavor Boosters: The unexpected addition that transforms this from good to great is a pinch of smoked paprika added to the potatoes before the final broil. It adds a subtle, earthy depth that rounds out the sweetness of the onions and the sharpness of the cheddar. Don’t skip it-it’s the difference between a memorable dish and one that’s quickly forgotten.
Nutrition Facts and Health Benefits
A single serving of this Crispy Hash Brown Breakfast Skillet (one-sixth of the recipe) delivers 385 calories, 22g of fat (11g saturated), 32g of carbohydrates (4g fiber), and 15g of protein. The dominant fat source is heart-healthy monounsaturated fats from the cooking oil and cheese, while the carbohydrates come primarily from the potatoes, which provide 20% of your daily potassium needs-essential for maintaining healthy blood pressure. The dish is rich in vitamin C (30% DV) from the potatoes and bell peppers, which supports immune function and collagen production, and vitamin B6 (20% DV) from the potatoes, which aids in brain development and energy metabolism.
Beyond macronutrients, this breakfast skillet offers significant micronutrient benefits. The russet potatoes are an excellent source of potassium (620mg per serving), which counteracts the sodium in the cheese and helps regulate fluid balance. The green bell peppers contribute vitamin A (15% DV), crucial for eye health and skin integrity, while the eggs provide choline (147mg per serving), a nutrient that supports liver function and brain health. The garlic offers allicin, a compound with antioxidant and anti-inflammatory properties that may reduce the risk of chronic disease. Collectively, these nutrients support everything from cardiovascular health (thanks to the balance of fats and fiber) to cognitive function (via B vitamins and choline).
For dietary adaptations, this recipe easily transforms to meet various needs without sacrificing satisfaction. For a gluten-free version, ensure your cheese is certified GF and skip any garnishes that might contain hidden gluten. For a low-sodium adaptation, reduce the cheese to ½ cup and use low-sodium bacon or omit it entirely. For a low-carb version, replace the potatoes with 2 cups of riced cauliflower (squeezed dry) and add 1 tablespoon of psyllium husk to help bind the mixture-expect a slightly different texture but equal satisfaction. For a vegan version, use firm tofu scramble seasoned with nutritional yeast and black salt, vegan cheddar shreds, and avocado oil for cooking. The key is maintaining the three-stage cooking process to achieve the desired texture, regardless of the ingredient substitutions.
Creative Variations Worth Trying
Once you’ve mastered the classic version, the world opens up with creative twists that keep breakfast exciting. These variations maintain the core technique while playing with global flavors and seasonal ingredients-proof that even humble potatoes deserve gourmet treatment.
Tex-Mex Hash Brown Skillet: Swap the green bell pepper for ½ cup diced poblano peppers roasted and peeled, and add 2 tablespoons of diced pickled jalapeños. Replace the sharp cheddar with pepper jack cheese and top with avocado slices, fresh cilantro, and a fried egg. Serve with warm flour tortillas for a breakfast burrito version. The smoky, spicy notes transform a classic dish into something that tastes like it came from a San Antonio cantina.
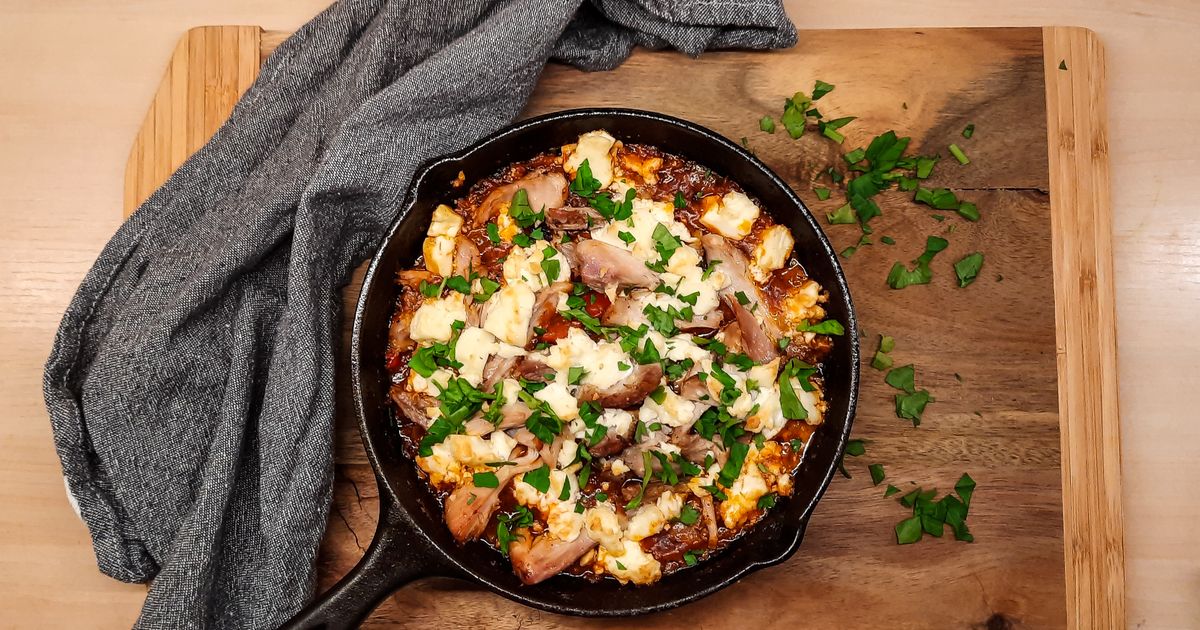
Mediterranean Breakfast Skillet: Omit the bell pepper and add ½ cup diced sun-dried tomatoes packed in oil (chopped) and ¼ cup crumbled feta cheese. Stir in 1 teaspoon of dried oregano and a pinch of red pepper flakes with the garlic. After broiling, top with a poached egg and a drizzle of tzatziki sauce. The salty, tangy flavors evoke a Greek island breakfast without leaving Texas.
Autumn Harvest Skillet: Replace half the russet potatoes with 2 cups of peeled, shredded sweet potatoes. Add 1 teaspoon of ground cinnamon and ½ teaspoon of nutmeg with the garlic for a warm, spiced flavor. Top with goat cheese and a drizzle of maple syrup instead of eggs for a vegetarian brunch option. The sweetness of the sweet potatoes pairs beautifully with the spices, creating a dish that tastes like fall in a skillet.
Meal Prep Hash Brown Cups: Press the par-cooked potato mixture into a greased muffin tin, filling each cup ¾ full. Bake at 400°F (200°C) for 15 minutes, then top with cheese and broil for 3 minutes. These individual portions reheat beautifully in a toaster oven or air fryer, making them perfect for grab-and-go breakfasts. The muffin tin method ensures even cooking and easy portion control, while the air fryer revival creates the same crispy edges as the stovetop version.
Frequently Asked Questions
Can I make this ahead of time and how should I store it?
This dish reheats beautifully when stored properly. After cooking, let the skillet cool completely, then transfer the potatoes to an airtight container. They’ll keep in the refrigerator for up to 3 days. To revive the crispiness, reheat in a 400°F (200°C) oven for 10-15 minutes or in a skillet over medium-high heat with a tablespoon of oil for 5-7 minutes, flipping occasionally. Freezing works but results in a slightly softer texture-if freezing, spread the cooled potatoes on a baking sheet to flash freeze before transferring to a freezer bag. They’ll keep for up to 3 months. Never reheat in the microwave unless you’re desperate; it turns the crust soggy and the potatoes gummy.
What can I serve alongside this dish to make it a complete meal?
For a hearty Southern-style breakfast, serve with buttermilk biscuits (the flaky kind that shatters when you touch them) and a side of creamy stone-ground grits. The buttery richness of the biscuits contrasts perfectly with the crispy base, while the grits provide a neutral canvas for the egg yolks. For a lighter option, pair with a simple arugula salad dressed with lemon vinaigrette-its peppery notes cut through the richness. Fresh fruit like sliced peaches or berries adds a bright counterpoint, balancing the savory elements. And don’t forget the beverage: a cold glass of sweet tea or a steaming cup of chicory coffee completes the experience.
Why did my dish turn out soggy and how do I fix it?
The most common cause of soggy hash browns is trapped moisture, which happens when you skip the par-cooking phase or crowd the skillet. Potatoes release up to 20% of their weight in moisture during cooking-if that steam has nowhere to go, it condenses and softens the crust. The fix starts with squeezing the shredded potatoes dry in a kitchen towel (a critical step most recipes skip) and not overloading the skillet. Use a 12-inch skillet for 2 lbs of potatoes; any larger and the potatoes steam instead of sear. If your skillet is too small, cook in batches and keep the first batch warm in a 200°F (95°C) oven while you finish the rest. Another culprit is cold potatoes straight from the fridge-let them sit at room temperature for 15 minutes before shredding to reduce the moisture shock when they hit the hot skillet.
What are the best ingredient substitutions if I’m missing something?
No green bell peppers? Use ½ cup diced zucchini for a similar mild flavor and texture. Out of sharp cheddar? Substitute ½ cup grated Parmesan for part of the cheddar-it melts differently but adds a nutty depth. No fresh parsley? Use 2 tablespoons of dried parsley mixed into the potatoes before the final broil (though the texture won’t be as vibrant). Missing an egg? Top with a spoonful of crumbled breakfast sausage or cooked chorizo for protein instead. The key to successful substitutions is maintaining the core ratio of potatoes to binding ingredients (onions, cheese) to ensure the dish holds together during cooking.
Final Thoughts from the Kitchen
There’s a moment in every chef’s life when they realize food isn’t just fuel-it’s memory, culture, and comfort all rolled into one perfect bite. This Crispy Hash Brown Breakfast Skillet is that moment for me. It’s the dish my grandmother made when the cows needed milking and the kids needed feeding before school. It’s the one my wife requests when she wants me to cook without complaint. And it’s the recipe that turned my skeptical line cooks into believers when I proved you could create restaurant-quality hash browns at home without a deep fryer or hours of standing over a stove.
This isn’t just breakfast-it’s a declaration that good food shouldn’t be complicated, but it should be intentional. The difference between “good enough” hash browns and “I’d sell my car for this recipe” hash browns is in the details: the temperature of the skillet, the squeeze of the potatoes, the patience of the first sear. When you nail those, you’re not just making breakfast-you’re creating a ritual. So preheat your skillet, sharpen your knife, and get ready to make a dish that’ll have your family asking for seconds before they’ve finished their firsts. Then email me and tell me what tweaks worked for you-I’m always looking to refine the next version.