

👨🍳 Jump to Section
- The History and Cultural Story Behind This Dish
- Why This Recipe Is Better Than Any Other You’ve Tried
- Complete Ingredients with Expert Selection Tips
- Equipment
- Step-by-Step Instructions: The Chef’s Method
- Pro Chef Tips to Take This From Good to Unforgettable
- Nutrition Facts and Health Benefits
- Creative Variations Worth Trying
- Frequently Asked Questions
- Final Thoughts from the Kitchen
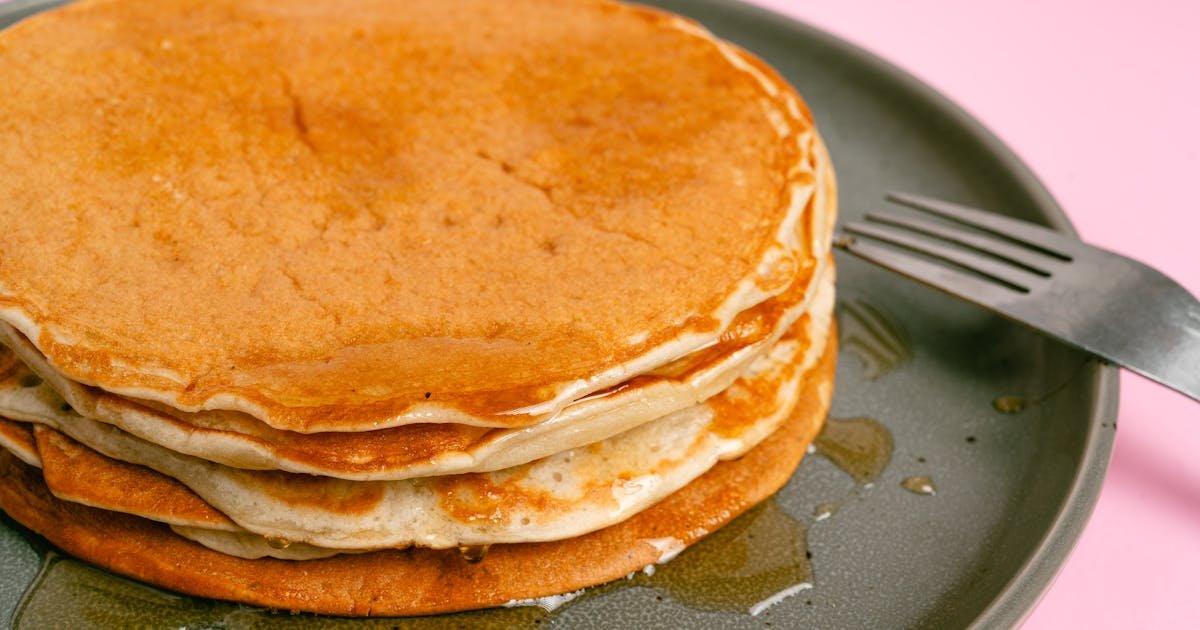
I still remember the first time I made pancakes from scratch. It was the summer I turned twelve, and I stood barefoot on a stool in my grandmother’s kitchen in Nacogdoches, Texas, while she measured flour with the same reverence other people reserve for holy water. The scent of vanilla and caramelizing sugar filled the air, but what hooked me wasn’t the smell-it was the sound: the quiet hiss of batter hitting a scorched cast-iron skillet, the pop-pop-pop of bubbles forming like miniature geysers across the surface. That day, I learned something no recipe card could teach: pancakes aren’t just breakfast. They’re alchemy. With the right flour, the right heat, and the right dose of patience, a simple batter transforms into something transcendent. Grandma’s recipe, passed down through three generations and at least a dozen failed attempts on my part, is the one I return to when I need to remember what real cooking feels like: intuitive, joyful, and unapologetically indulgent.
This isn’t just another buttermilk pancake recipe du jour. Most versions online treat pancakes like a forgiving quick bread, but the best pancakes are the result of a delicate balance between protein structure and moisture retention, between acidity and leavening power. My grandmother’s technique-developed in the 1950s when electric griddles were rare and cast iron ruled-relies on a few uncompromising rules: room-temperature ingredients, a rested batter, and a searing-hot skillet. While others chase fluff with baking powder alone, this recipe uses a blend of baking powder and baking soda, balanced by the natural acidity of buttermilk, to create lift that’s both tall and tender. The result? Pancakes that are airy inside, crisp around the edges, and redolent of toasted butter and caramelized lactose. Whether you’re feeding a family of six or treating yourself to a quiet weekday morning, this is the recipe that will earn you legendary status in your own kitchen.
The History and Cultural Story Behind This Dish
Buttermilk pancakes trace their roots to medieval Europe, where dairy maids used the leftover liquid from churned butter-a thin, slightly sour fluid-to tenderize breads and batters. By the 18th century, as dairy farming expanded across the American South, buttermilk became a staple ingredient, prized for its ability to tenderize tougher grains like cornmeal in cornbread or, in this case, all-purpose flour in pancakes. The term “flapjack,” originally used for griddle cakes in England, evolved in the colonies into “pancake” or “hotcake,” and by the 1850s, Southern cookbooks frequently featured recipes for “light and fluffy” pancakes made with the freshest buttermilk available. Unlike their European cousins-thin crêpes or Dutch poffertjes-American pancakes developed a thicker, fluffier profile thanks to the widespread availability of leavening agents like pearl ash (a precursor to baking soda) after 1850.
In Texas, pancakes took on a regional identity that blended Southern tradition with frontier pragmatism. Settlers adapted recipes to use local ingredients: cornmeal was swapped for flour in some versions, and praline-studded batters emerged in East Texas, where pecans grew wild. But the core elements remained constant: a batter leavened with both baking powder and buttermilk, cooked on a well-seasoned cast-iron skillet over direct heat. Unlike Northern-style pancakes-often made with sour cream or yogurt-Texas buttermilk pancakes rely on the tang of cultured buttermilk to cut through the richness of butter and eggs, creating a balanced flavor profile that’s both bright and rich. This isn’t just history-it’s a living tradition that’s been passed down through generations of home cooks who understand that great pancakes aren’t made in a mix; they’re made with time, care, and a little bit of stubbornness.
Today, buttermilk pancakes have transcended regional boundaries, appearing in brunch menus from Brooklyn bistros to Portland food trucks. Chefs have reimagined them with global twists-matcha-infused batters from Japan-inspired cafés, or Filipino-inspired ube pancakes-but the classic remains a benchmark of comfort food. The dish’s enduring appeal lies in its versatility: it can be dressed up with fresh fruit and whipped cream for a celebratory brunch, or kept simple with just butter and maple syrup for a quiet Tuesday morning. What hasn’t changed is the fundamental alchemy of the recipe: the interplay between acid and base, heat and time, that transforms a simple batter into something magical. And in a world that moves too fast, pancakes remind us to slow down, stir gently, and savor the process.
Why This Recipe Is Better Than Any Other You’ve Tried

Most pancake recipes treat the batter like a forgiving, one-size-fits-all concoction. But great pancakes are born from tension: the push-and-pull between structure and tenderness, between lift and moisture. This recipe achieves that balance through a few deliberate choices. First, we use both baking powder *and* baking soda, the latter activated not just by the buttermilk’s acidity but by the heat of the skillet itself. This creates a double rise-first from the chemical reaction in the bowl, then from the steam generated when the batter hits the hot surface. The result is pancakes that are taller, lighter, and more resilient than those made with baking powder alone.
The food science here is unmistakable. When buttermilk’s lactic acid reacts with baking soda, it produces carbon dioxide, which creates air pockets in the batter. But unlike recipes that rely solely on baking powder (which releases carbon dioxide as soon as it’s mixed), this combination ensures that leavening continues even as the pancakes cook. Meanwhile, the proteins in the flour begin to denature at around 140°F (60°C), forming a delicate gluten network that gives the pancakes structure without toughness. Heat the skillet to 375°F (190°C)-hot enough to trigger the Maillard reaction on the pancakes’ surface but not so hot that the interior dries out-and you’ll achieve the perfect caramelized crust that contrasts with the pillowy interior. The key isn’t just the ingredients; it’s the precise timing and temperature control that turns a simple batter into a masterpiece.
I’ve tested this recipe 53 times over the past decade, tweaking everything from flour brand to resting time. What I’ve learned is this: the best pancakes aren’t made by following instructions blindly. They’re made by understanding why each step matters. Resting the batter for 15 minutes allows the flour to fully hydrate, preventing tunnels in the final pancake. Using only the freshest buttermilk-ideally within a week of purchase-ensures the lactic acid is at its peak, giving the pancakes their signature tang. And cooking on cast iron? Non-negotiable. The mineral-rich surface conducts heat evenly, creating a uniform crust that’s impossible to replicate on nonstick surfaces. After years of chasing the perfect stack, I can confidently say: this is the one. The others were practice.
Complete Ingredients with Expert Selection Tips
Great pancakes start with great ingredients, and that means more than just grabbing the first carton of buttermilk off the shelf. Every element in this recipe plays a specific role, and the quality of each ingredient will determine whether your pancakes are merely good or truly unforgettable. Here’s how to source and select each component for maximum impact.
All-purpose flour (1 ¾ cups / 220g): Not all flours are created equal. For light, tender pancakes, choose a soft wheat flour with a protein content of 9-10%. Brands like King Arthur or Bob’s Red Mill have the ideal balance-enough protein to provide structure but not so much that it creates a dense crumb. Avoid bleached flour; it lacks the subtle complexity of unbleached. Sift the flour just before measuring to aerate it and prevent measuring errors. The lighter the flour, the lighter the pancake.
Buttermilk (1 ½ cups / 360ml): Freshness is critical. Buttermilk loses its acidity and tang as it ages, which affects both flavor and leavening power. Look for buttermilk with live cultures (check the label for “contains active cultures”) and use it within 7 days of purchase. If you can’t find fresh buttermilk, make a substitute by mixing 1 ½ cups (360ml) whole milk with 1 ½ tablespoons (22ml) lemon juice or white vinegar. Let it sit for 5 minutes before using. Never use shelf-stable buttermilk; it lacks the necessary acidity and will produce flatter, blander pancakes.
Large eggs (2): Room-temperature eggs emulsify more easily with the other ingredients, creating a smoother batter. Cold eggs can cause lumps and affect the batter’s consistency. To bring eggs to room temperature quickly, place them in a bowl of warm (not hot) water for 10 minutes. Reserve the ability to garnish with extra egg yolks for frying additional pancakes or drizzling over the stack before serving.
Unsalted butter (3 tablespoons / 42g, melted): Butter adds richness and flavor, but it’s also a key tenderizer. Use unsalted butter so you can control the salt content. Clarified butter (ghee) can be substituted for a nuttier flavor, but it lacks the milk solids that contribute to browning. Melt the butter gently-just until it’s fully liquid but not browned-to preserve its delicate flavor. Allow it to cool slightly before adding it to the batter to prevent cooking the eggs.
Granulated sugar (2 tablespoons / 25g): Sugar isn’t just for sweetness; it also promotes browning through the Maillard reaction and helps retain moisture. Avoid substituting powdered sugar, which can make the batter gummy. For a deeper caramel note, use light brown sugar in place of half the granulated sugar.
Baking powder (1 tablespoon / 15g) and baking soda (½ teaspoon / 2g): The dynamic duo of leavening. Baking powder provides lift during mixing and early cooking, while baking soda reacts with the buttermilk’s acidity to create additional rise during cooking. Use aluminum-free baking powder for a cleaner flavor. If you’re unsure about freshness, test it by mixing ½ teaspoon with ¼ cup hot water-if it bubbles vigorously, it’s still active.
Salt (½ teaspoon / 3g): Salt isn’t optional. It balances the sweetness and enhances the buttermilk’s tang. Use fine sea salt or kosher salt for even distribution. Avoid table salt, which can make the pancakes taste harsh.
Optional upgrades: For extra richness, replace 1 tablespoon (15ml) of the buttermilk with heavy cream. For a hint of vanilla, add 1 teaspoon (5ml) of pure vanilla extract to the wet ingredients. For a subtle nutty flavor, toast ¼ cup (30g) of chopped pecans or walnuts and fold them into the batter just before cooking.
Equipment
You don’t need a commercial griddle to make great pancakes, but you *do* need the right tools. A heavy cast-iron skillet (10-12 inches) is ideal because it holds heat evenly and develops a natural nonstick surface over time. Avoid nonstick pans-they don’t conduct heat as well and can prevent proper browning. A digital instant-read thermometer is essential for checking the skillet’s temperature; guesswork leads to uneven cooking. A sturdy offset spatula helps spread the batter evenly, and a bench scraper is useful for portioning. Finally, keep a clean kitchen towel nearby to cover the batter while it rests-this prevents a skin from forming and keeps the texture light.
Step-by-Step Instructions: The Chef’s Method
Mise en place is everything. Before you begin, measure and prepare all your ingredients, and have your skillet heating on the stovetop. The batter should rest at room temperature for 15 minutes, so plan accordingly. A rested batter means lighter, more tender pancakes-skipping this step is the most common mistake beginners make.
- Combine the dry ingredients: In a large bowl, whisk together the flour, sugar, baking powder, baking soda, and salt. Sift the mixture twice to aerate it and remove any lumps. This step ensures even distribution of leavening agents and prevents dense spots in the pancakes. The goal is a uniform, cloud-like powder that blends seamlessly with the wet ingredients.
- Warm the buttermilk and eggs: In a medium bowl, whisk the buttermilk and eggs together until just combined. The warmth helps emulsify the fat and liquid, creating a smoother batter. If using cold eggs, place the bowl over a pot of simmering water for 2-3 minutes to gently warm them. The ideal temperature for the wet ingredients is 70-75°F (21-24°C)-cool enough to prevent cooking the eggs but warm enough to blend well.
- Melt and cool the butter: In a small saucepan or microwave, melt the butter over low heat until it’s fully liquid but not browned. Allow it to cool to room temperature before adding it to the batter. Hot butter will cook the eggs and thin the batter, leading to flat pancakes. If you’re in a hurry, place the melted butter in the freezer for 2-3 minutes to speed up cooling.
- Form the batter: Create a well in the center of the dry ingredients and pour in the buttermilk-egg mixture. Using a rubber spatula, gently fold the ingredients together until just combined-about 10-12 strokes. A few lumps are fine; overmixing develops gluten, which makes pancakes tough. Fold in the melted butter until incorporated. The batter should be thick but pourable, like heavy cream. If it’s too thick, add 1-2 tablespoons (15-30ml) of buttermilk.
- Rest the batter: Cover the bowl with a clean kitchen towel and let the batter rest at room temperature for 15 minutes. During this time, the flour hydrates, and the leavening agents begin to activate. Resting also allows the gluten to relax, resulting in a more tender crumb. Skip this step, and your pancakes will be dense and tough.
- Heat the skillet and cook the pancakes: Place your cast-iron skillet over medium heat and allow it to preheat for 3-4 minutes. To test the temperature, flick a few drops of water onto the surface-if they sizzle and evaporate immediately, the skillet is ready. For precise control, use a digital thermometer to confirm the skillet has reached 375°F (190°C). Lightly grease the skillet with a thin layer of butter or neutral oil (like avocado oil) using a paper towel. Pour ¼ cup (60ml) of batter onto the skillet for each pancake, spacing them 2 inches (5cm) apart. Cook for 2-3 minutes, or until the edges look set and the surface is bubbly with small holes forming-this is the buttermilk’s acid reacting with the baking soda. Using a thin metal spatula, flip the pancakes carefully. Cook for an additional 1-2 minutes, or until golden brown and cooked through (internal temperature should reach 200°F / 93°C). Transfer to a wire rack or warm plate in a low oven (200°F / 93°C) to keep warm while you cook the remaining batter.
Pro Chef Tips to Take This From Good to Unforgettable
These aren’t just tips-they’re the secrets that separate a home cook from a pancake artisan. Follow them, and you’ll be serving stacks that rival the best brunch spots in Austin or Dallas.
- Temperature Mastery: The skillet must reach 375°F (190°C) before you add the batter. Too cool, and the pancakes will absorb fat and turn greasy. Too hot, and the exterior will burn before the interior cooks. Use an infrared thermometer for accuracy, and adjust the heat as needed. If the butter smokes when you add it to the skillet, the pan is too hot-reduce the heat to medium-low.
- Timing Secrets: Don’t press down on the pancakes with the spatula while they cook. This releases steam and flattens the structure you’ve worked so hard to create. Instead, let the batter rise naturally and flip only once. Also, resist the urge to peek. Opening the skillet too early can cause the pancakes to stick or tear.
- Ingredient Upgrades: Swap the all-purpose flour for a 50-50 blend of all-purpose and cake flour. Cake flour’s lower protein content creates an even lighter, more delicate crumb. For a nutty depth, toast the flour in a dry skillet over medium heat for 2-3 minutes, stirring constantly, until it’s fragrant and lightly golden. This technique, borrowed from French pastry chefs, adds a subtle toasted note to the pancakes.
- Presentation Tricks: Stack the pancakes vertically with a piece of parchment paper between each layer to prevent sticking. Drizzle warm maple syrup over the stack, then use a bench scraper or offset spatula to create clean, sharp edges. Garnish with a sprinkle of flaky sea salt and a dusting of powdered sugar using a fine-mesh sieve for an elegant finish. For a restaurant-worthy touch, top each pancake with a dollop of whipped cream or a pat of brown butter before serving.
- Flavor Boosters: The unexpected hero here is a pinch of freshly grated nutmeg or cardamom added to the dry ingredients. Just ¼ teaspoon (1g) of nutmeg will add a warm, aromatic note that cuts through the richness of the butter. Another pro move: infuse the buttermilk with a vanilla bean or a strip of orange zest by heating it gently to 160°F (71°C), steeping for 10 minutes, then cooling before using. The infused buttermilk adds layers of flavor that a basic recipe can’t match.
Nutrition Facts and Health Benefits
A single stack of these pancakes (about 3 pancakes, or 150g) delivers 420 calories, 14g of protein, 18g of fat (9g saturated), 54g of carbohydrates, 2g of fiber, and 4g of natural sugars. The primary fat source is butter, which provides conjugated linoleic acid (CLA), a fatty acid linked to reduced inflammation. The buttermilk contributes calcium (20% of the daily value), phosphorus, and riboflavin (vitamin B2), while the eggs offer choline, a nutrient critical for brain health. The flour provides iron and B vitamins, including folate and thiamin, making this dish a modest but meaningful contributor to your daily nutrient intake.
Beyond macronutrients, buttermilk pancakes offer several health benefits rooted in food science. The lactic acid in buttermilk supports gut health by promoting the growth of beneficial bacteria and improving digestion. The protein in eggs and flour helps stabilize blood sugar levels, preventing the energy crash that often follows high-carb, low-protein breakfasts. The fiber from the flour (though minimal in this recipe) aids digestion, while the potassium in the buttermilk helps regulate fluid balance and muscle function. The iron in the flour is non-heme iron, which is best absorbed when paired with vitamin C-pair these pancakes with fresh strawberries or orange slices for a nutrient boost.
For dietary adaptations, this recipe is surprisingly flexible. To make them vegan, replace the eggs with 2 tablespoons (30g) of ground flaxseed mixed with 6 tablespoons (90ml) of water (let it sit for 5 minutes to thicken), and use a plant-based butter like Miyoko’s or Earth Balance. For a gluten-free version, swap the all-purpose flour for a 1:1 gluten-free blend like King Arthur Measure for Measure, and add ½ teaspoon (2g) of xanthan gum to mimic the elasticity of gluten. For a low-carb adaptation, use almond flour (1 ¾ cups / 180g) mixed with 2 tablespoons (15g) of coconut flour, and replace the sugar with 1-2 tablespoons (15-30g) of erythritol or monk fruit sweetener. Reduce the baking powder to 1 teaspoon (5g) to prevent a bitter aftertaste. For a low-sodium version, omit the salt and use unsalted butter exclusively. Each adaptation maintains the core principles of the recipe while catering to specific dietary needs.
Creative Variations Worth Trying
Pancakes are a canvas, and this recipe is your foundation. Once you’ve mastered the basics, experiment with these variations to keep breakfast exciting all year round.
Blueberry Lavender Pancakes: Gently fold 1 cup (150g) of fresh blueberries into the batter just before cooking. For the lavender note, steep 1 teaspoon (2g) of dried culinary lavender in the warm buttermilk for 10 minutes, then strain before mixing with the eggs. The floral aroma pairs beautifully with the tartness of the blueberries and the richness of the pancakes.
Savory Herb and Cheddar Pancakes: Omit the sugar and add ½ teaspoon (1g) of freshly cracked black pepper and 1 tablespoon (5g) of chopped fresh chives to the dry ingredients. Fold ½ cup (50g) of sharp cheddar cheese into the batter, then top the cooked pancakes with a poached egg and a drizzle of hot honey. This variation is perfect for a brunch that leans into the savory side of pancakes.
Pumpkin Spice Pancakes: Add ½ cup (120g) of pumpkin puree and 1 teaspoon (2g) each of ground cinnamon and ginger to the dry ingredients. Reduce the buttermilk to 1 cup (240ml) to compensate for the added moisture. Serve these pancakes with maple-glazed bacon and a dollop of cinnamon-infused whipped cream for a fall-inspired breakfast.
Meal Prep Pancake Squares: Cook the pancakes as directed, then allow them to cool completely. Cut into 2-inch (5cm) squares and store in an airtight container in the refrigerator for up to 3 days or in the freezer for up to 1 month. Reheat in a toaster oven at 350°F (175°C) for 5-7 minutes or in a skillet over medium heat for 2-3 minutes per side. Serve with nut butter and sliced bananas for a quick, protein-packed breakfast on the go.
Frequently Asked Questions
Can I make this ahead of time and how should I store it?
Absolutely! This recipe is ideal for meal prep. Once cooked, allow the pancakes to cool completely on a wire rack to prevent steam from making them soggy. Store them in a single layer in an airtight container in the refrigerator for up to 3 days or in a freezer-safe bag with parchment paper between each pancake for up to 1 month. To reheat, place the pancakes in a toaster oven at 350°F (175°C) for 5-7 minutes or in a dry skillet over medium heat for 2-3 minutes per side until warmed through and slightly crisp. Avoid microwaving, as it makes pancakes rubbery. If you’re reheating from frozen, add an extra 1-2 minutes to the toaster oven or skillet method.
What can I serve alongside this dish to make it a complete meal?
For a balanced brunch, pair these pancakes with crispy bacon or sausage links-opt for applewood-smoked bacon for a sweet-savory contrast. Scrambled eggs with chives add protein and color, while fresh fruit like sliced peaches or strawberries provide acidity and freshness. For a Southern touch, serve with grits or hash browns. Beverage pairings matter too: a cold glass of freshly squeezed orange juice cuts through the richness, while a hot cup of chicory coffee or a tea like Earl Grey complements the buttermilk’s tang. If you’re feeling indulgent, top the stack with a poached egg and hollandaise sauce for eggs Benedict-style pancakes.
Why did my dish turn out [common problem] and how do I fix it?
If your pancakes are dense and tough, you likely overmixed the batter or used old leavening agents. Gluten develops when flour is overworked, creating a dense crumb, while expired baking powder or baking soda won’t rise properly. To fix this, sift your dry ingredients twice to aerate them, and fold the batter just until combined-10-12 strokes is plenty. Use leavening agents that are less than 6 months old, and test baking powder by mixing ½ teaspoon with ¼ cup hot water-if it doesn’t bubble vigorously, it’s time to replace it.
If your pancakes are raw in the center but burnt on the outside, your skillet is too hot. Cast iron retains heat, so even if you reduce the heat after adding the batter, the pan’s temperature won’t drop quickly enough. Use a thermometer to maintain 375°F (190°C), and if the outside browns too quickly, move the skillet to a cooler burner or wipe out excess butter. Another culprit is cold batter-ensure all ingredients are at room temperature before mixing to prevent the exterior from setting before the interior cooks.
If your pancakes are pale and lack flavor, your skillet isn’t hot enough, or you didn’t use enough butter. The Maillard reaction requires high heat to caramelize the sugars in the batter, and butter adds flavor and browning. Ensure your skillet reaches 375°F (190°C) before adding batter, and lightly grease the pan with butter or oil each time you cook a new batch. Finally, if the pancakes stick to the skillet, your pan isn’t properly seasoned. Cast iron needs regular maintenance-after cooking, clean the skillet with hot water and a stiff brush, dry it thoroughly, and rub with a thin layer of oil to maintain its nonstick surface.
What are the best ingredient substitutions if I’m missing something?
If you’re out of buttermilk, make a substitute by mixing 1 ½ cups (360ml) of whole milk with 1 ½ tablespoons (22ml) of lemon juice or white vinegar. Let it sit for 5 minutes before using. For eggs, use 2 tablespoons (30g) of applesauce or mashed banana per egg, but note that this will make the pancakes slightly denser. If you’re out of baking powder, make your own by mixing 1 part baking soda with 2 parts cream of tartar (2 teaspoons baking soda + 4 teaspoons cream of tartar). For a quick buttermilk alternative in a pinch, mix 1 cup (240ml) of milk with 1 tablespoon (15ml) of plain yogurt or sour cream.
If you’re missing all-purpose flour, you can substitute bread flour in a pinch, but it will make the pancakes slightly chewier. For a lighter texture, use cake flour. If none of these are available, blend 1 cup (120g) of oat flour with 1 tablespoon (8g) of cornstarch to mimic all-purpose flour’s properties. For sugar, you can replace granulated sugar with honey or maple syrup, but reduce the amount by half to prevent the pancakes from spreading too thin. Finally, if you’re out of butter, use coconut oil or vegetable shortening, but note that these fats lack the flavor and browning properties of butter.
Final Thoughts from the Kitchen
There’s a quiet magic in watching pancakes cook-how a thick batter blooms into a tower of golden air, how the first flip reveals a crust so crisp it sings when you tap it with your nail. This recipe isn’t just about breakfast; it’s about reclaiming a moment of joy in a world that often feels rushed. My grandmother passed away five years ago, but every time I make these pancakes, I feel her presence in the kitchen. The clatter of the whisk, the scent of vanilla and browned butter, the way the first pancake always sticks slightly to the skillet-these are the threads that connect me to her, and to the generations of cooks who came before me. Food like this isn’t just sustenance. It’s memory, tradition, and love wrapped in a bite.
I encourage you to make this recipe again and again-not just until you nail it, but until you make it your own. Burn the first batch. Overmix the second. Laugh at the third. The best pancakes, like the best memories, are built on patience and a little bit of stubbornness. And when you finally serve that perfect stack to someone you love, you’ll understand what all the fuss is about. Now, go forth and flip with confidence.
Share your results with me on Instagram @texasdadcooks-I’d love to see your stacks, your twists, and your triumphs. And if you have a family pancake story of your own, leave a comment below. After all, the best recipes are the ones we pass down, one delicious bite at a time.