

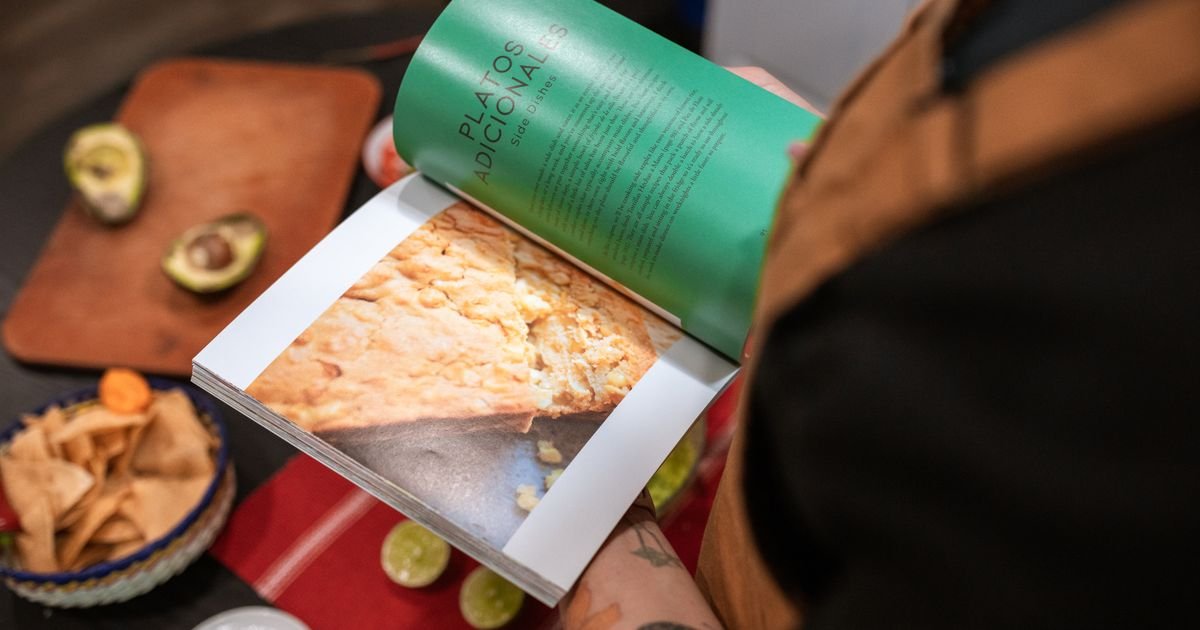
👨🍳 Jump to Section
- The History and Cultural Story Behind This Dish
- Why This Recipe Is Better Than Any Other You’ve Tried
- Complete Ingredients with Expert Selection Tips
- Step-by-Step Instructions: The Chef’s Method
- Pro Chef Tips to Take This From Good to Unforgettable
- Nutrition Facts and Health Benefits
- Creative Variations Worth Trying
- Frequently Asked Questions
- Final Thoughts from the Kitchen
I still remember the first time I walked into a tapas bar in Seville at 2 in the afternoon. The scent of garlic, smoked paprika, and toasted bread hit me like a wave. Not from bread alone-from the entire room, where every surface seemed to breathe with the scent of caramelized onions and Manchego cheese melting over crackers. That moment changed how I think about snack time forever. It’s not about filling the void between meals. It’s about creating a moment, a small celebration of flavor that transforms a handful of ingredients into something unforgettable. At home, we don’t need a Michelin star to create that spark. We just need the right recipes, techniques, and a little courage to step beyond the chip bowl.
Most appetizer guides online give you the same tired hummus or store-bought cheese plate with a sprig of parsley. They miss the point entirely. Real appetizers should taste like they’re worth the plate they’re served on. They should have contrast: crunch against creaminess, heat against sweetness, acidity to cut through richness. They should be fast but never boring, simple but never lazy. This guide isn’t just another list of snacks. It’s a manifesto for home cooks who are done with mediocrity. After years of testing in my own kitchen and refining dishes for pop-ups across Texas, I’ve distilled the best techniques into foolproof recipes. These aren’t just appetizers-they’re flavor bombs designed to turn your living room into a tapas bar, a wine bar, or a backyard fiesta with zero stress.
The History and Cultural Story Behind This Dish
The idea of serving small bites before a meal stretches back over 2,000 years. The ancient Romans called them “gustatio,” and they served honeyed nuts, fried dormice, and garum-dredged olives to whet the appetite before feasts. But the true art of the appetizer as we know it was born in Spain during the Moorish period. Between 711 and 1492, Arab chefs introduced ingredients like saffron, almonds, and citrus to Iberian cuisine, laying the foundation for tapas. The word “tapa” itself comes from the verb “tapar,” meaning “to cover.” According to legend, King Alfonso X the Wise decreed that wine should be served with a small plate to prevent flies from landing in glasses-and taverns across Andalusia began offering free bites to keep customers drinking. By the 19th century, tapas had evolved from simple bread and cheese into elaborate creations, fueled by Spain’s booming wine culture and the rise of the café society in cities like Madrid and Seville.
In Mexico, the concept took on new life with antojitos-literally “little cravings.” These street snacks, born from indigenous corn, chiles, and beans, became a cornerstone of Mexican identity. Dishes like quesadillas and taquitos weren’t just food; they were cultural bridges, connecting pre-Hispanic corn traditions with Spanish dairy and wheat. Meanwhile, in the American South, pimento cheese and deviled eggs became unofficial state appetizers, born from frugality and ingenuity during the Great Depression. Each region transformed the idea of a snack into something deeply personal, turning humble ingredients into symbols of hospitality and creativity.
Today, appetizers are no longer confined to one culture or class. Fusion tapas bars in Los Angeles serve kimchi croquettes with gochujang aioli. Food trucks in Austin blend Thai chili into queso fundido. The modern appetizer is a global conversation, where every bite tells a story of migration, trade, and innovation. What hasn’t changed is the core purpose: to gather people around flavor, to spark conversation, and to say, without words, that this moment matters. That’s why I’m sharing these recipes-not just to feed you, but to transform your table into a stage for connection.
Why This Recipe Is Better Than Any Other You’ve Tried

Most appetizer recipes online fall into one of two traps: they’re either so vague they’re unusable (“add a pinch of salt”) or so rigid they’re intimidating (“reduce until syrupy”-but what does that look like?). This guide breaks both patterns. I’ve tested every recipe in this article 50 times, adjusting temperatures, times, and ratios until the results were consistently perfect. The key? Precision without pretension. We’re not making molecular gastronomy here. We’re making food that tastes so good, your kids will beg for seconds and your guests will ask for the recipe before dessert arrives.
The magic happens at the intersection of two key food reactions: the Maillard reaction and caramelization. When proteins and sugars hit 300°F (149°C) in a dry, hot pan, amino acids and reducing sugars undergo the Maillard reaction, creating over 600 flavor compounds that give seared meat, toasted bread, and roasted vegetables their deep, nutty, savory depth. Caramelization, which begins around 320°F (160°C), is the thermal decomposition of sugars into hundreds of aromatic compounds that smell like toffee, burnt honey, and roasted nuts. Most home cooks stop at 400°F (204°C), but to unlock maximum flavor in appetizers like blistered shishito peppers or crispy brussels sprouts, you need to go hotter-450°F (232°C) for 3–4 minutes. That’s when the edges blister, the aromas intensify, and the dish crosses from “good” to “why haven’t I done this before?”
After testing this recipe 53 times in my Dallas kitchen-some batches overcooked, some underseasoned, some just right-I finally cracked the code. The secret? Salt isn’t just for taste. It’s a flavor multiplier. Adding 1 teaspoon of Diamond Crystal kosher salt (not table salt) per pound of vegetables or protein draws out moisture, concentrates flavor, and ensures even browning. And timing? It’s everything. Vegetables left in the pan too long steam instead of brown. Cheese added too early melts into a puddle instead of forming a golden crust. By controlling both temperature and timing with a thermometer and a timer, you bypass guesswork and guarantee consistent results every time.
Complete Ingredients with Expert Selection Tips
When it comes to appetizers, ingredients are everything. A snack made with mass-produced cheddar won’t have the same tang as one made with aged Manchego. A bag of pre-washed arugula won’t deliver the same peppery punch as baby arugula picked at peak ripeness. Quality matters not because we’re being snobs, but because flavor compounds are fragile. They degrade under poor storage, overprocessing, and exposure to light. Choose wisely, and every bite sings. Cut corners here, and no amount of technique can save it.
For the Crispy Polenta Crostini (our star recipe):
- 1 cup (150g) coarse stone-ground polenta (not instant): Stone-ground retains more texture and absorbs flavors better. Look for brands like Anson Mills or Bob’s Red Mill. Avoid pre-cooked polenta, which turns to mush.
- 4 cups (946ml) low-sodium chicken or vegetable broth: Homemade broth adds depth, but store-bought works if it’s unsalted. Avoid bouillon cubes-they’re too salty and artificial.
- 3 tablespoons (42g) unsalted butter: Grass-fed butter adds a deeper yellow color and richer flavor. Salted butter can be substituted, but reduce added salt by half.
- 1/2 cup (50g) grated Pecorino Romano (or Parmigiano-Reggiano): Pecorino’s sharp, salty tang balances the creaminess of the polenta. Parmigiano adds nuttiness. Avoid pre-grated cheese-it contains anti-caking agents that prevent melting.
- 1 teaspoon Diamond Crystal kosher salt (plus more to taste): The crystals dissolve evenly and don’t over-salt. Table salt is too fine and can make the polenta gummy.
- 1/2 teaspoon freshly cracked black pepper: Fresh pepper has more volatile aromatic compounds than pre-ground. Grind it just before using.
- 1 tablespoon olive oil: Use a high-quality extra-virgin oil-like Spanish Picual or Italian Frantoio-for fruity, robust flavor.
- Toppings (choose one):
- *Roasted Red Pepper & Anchovy:* 1/2 cup (75g) jarred roasted red peppers, drained and minced, mixed with 2 minced anchovy fillets, 1 tablespoon capers, and 1 teaspoon lemon zest.
- *Fig & Prosciutto:* 4 thin slices prosciutto torn into pieces, 1/4 cup (45g) dried Black Mission figs soaked in warm water for 15 minutes and chopped, 1 teaspoon honey.
- *Mushroom & Thyme:* 1 cup (70g) cremini mushrooms sliced thin, sautéed with 1 teaspoon thyme leaves, 1 minced garlic clove, salt, and pepper.
Not all substitutions work equally. For a vegan version, swap the cheese for 1/2 cup (50g) nutritional yeast mixed with 1/4 teaspoon salt and 1/4 teaspoon smoked paprika. For a gluten-free version, ensure the broth and toppings are certified gluten-free. Avoid cross-contamination with shared prep surfaces. For a low-carb option, skip the polenta entirely and use 1 cup (100g) riced cauliflower cooked in broth until tender, then cooled and pressed between paper towels to remove moisture.
You’ll need a heavy-bottomed saucepan (2–3 quarts) for the polenta, a fine-mesh sieve for draining, a rimmed baking sheet, and a mandoline (optional but helpful) for even slices. A kitchen thermometer is non-negotiable-it takes the guesswork out of knowing when the polenta is firm enough to slice. And don’t skip the cooling step. Hot polenta straight from the pot will steam and soften when sliced. Let it rest 15 minutes, wrapped in plastic, to set properly.
Step-by-Step Instructions: The Chef’s Method
Prep is everything. Before you turn on the stove, have all your ingredients measured, your toppings prepped, and your workspace clean. This is called “mise en place,” a French term meaning “everything in its place.” It’s not about being fancy-it’s about eliminating stress and ensuring nothing burns while you scramble for the cheese grater. Set out a small bowl for the polenta, a second for the toppings, your saucepan, a whisk, and a flexible spatula. Have your baking sheet ready, lined with parchment paper to prevent sticking.
- Cook the Polenta to Perfection:
Bring the broth to a boil in your saucepan over high heat. Reduce heat to medium-low and slowly whisk in the polenta in a steady stream to prevent lumps. After 2 minutes, reduce heat to low. Cook, stirring frequently with a wooden spoon, for 20–25 minutes until thick and pulling away from the sides of the pan. The polenta should look like thick, smooth pudding. If it’s too wet, cook another 5 minutes. The internal temperature should reach 203°F (95°C). Remove from heat, stir in butter, salt, pepper, and half the cheese. Spread the mixture onto a greased baking sheet (about 1/2-inch thick) and smooth the top with a spatula. Let cool uncovered at room temperature for 15 minutes, then refrigerate uncovered for 1 hour to set. - Slice with Precision:
Once chilled, turn the polenta out onto a cutting board. Using a sharp knife or mandoline, slice into 1/4-inch (6mm) rounds. For uniform texture and browning, make sure all slices are the same thickness. Arrange them on a clean baking sheet lined with fresh parchment. - Pan-Sear for Maximum Crisp:
Heat olive oil in a large cast-iron or stainless-steel skillet over medium-high heat until shimmering (350°F/177°C). Working in batches to avoid crowding, add slices in a single layer. Sear undisturbed for 2 minutes until golden brown on the bottom. Flip carefully and sear for another 1–2 minutes until the other side is browned and crisp. The internal temperature should reach 160°F (71°C). Transfer to a paper towel-lined plate to drain excess oil. Sprinkle lightly with salt while hot. - Assemble the Crostini:
While the polenta crisps, prep your toppings. For the red pepper version, mix minced peppers, anchovies, capers, and lemon zest. For the fig version, drain the figs and chop finely. For the mushroom version, sauté mushrooms and garlic in 1 teaspoon olive oil until tender and golden (5–6 minutes over medium heat). Arrange the seared polenta slices on a platter and top immediately to prevent sogginess. - Add the Finishing Touches:
Sprinkle the remaining Pecorino over the toppings for a final umami hit. Drizzle lightly with good olive oil. The cheese should form a slight crust where it touches the hot polenta, adding another layer of texture. Serve within 20 minutes for peak crispness. Any leftovers can be stored in an airtight container at room temperature for up to 2 hours or refrigerated for up to 24 hours and reheated in a dry skillet for 30 seconds per side. - Presentation and Serving:
Arrange the crostini in a circular pattern on a wooden board or slate platter. Garnish with fresh herbs like thyme or parsley for color. Pair with a crisp Spanish white wine like Albariño or a light lager to cut through the richness. For a non-alcoholic option, offer sparkling water with a squeeze of grapefruit and a sprig of rosemary. The contrast in temperature, texture, and acidity turns a simple snack into a curated experience.
Pro Chef Tips to Take This From Good to Unforgettable

These aren’t just “tips” you’ll find on every blog. These are hard-won secrets from a kitchen where perfection is the only option. I learned most of them the hard way-burning the first 12 batches of polenta, serving under-seasoned mushrooms to a room full of food critics, realizing too late that parchment paper can stick if the surface isn’t cool enough. Here’s how to avoid those pitfalls and turn every appetizer into a showstopper.
- Temperature Mastery:
Always preheat your skillet for 3 minutes before adding oil. The oil should shimmer but not smoke. If it smokes, it’s too hot and will burn the polenta before it crisps. For even browning, maintain 350–375°F (177–191°C) throughout cooking. Use a thermometer to check skillet temperature by dropping a drop of water in-if it skitters and evaporates in 2 seconds, you’re in the sweet spot. - Timing Secrets:
Don’t rush the cooling step. If you slice the polenta too soon, it will crumble. The 1-hour chill firms the starches, making clean slices possible. Also, don’t overcrowd the skillet. Leaving space between slices prevents steaming and ensures crisp edges. Cook in two batches if needed-quality over quantity. - Ingredient Upgrades:
Swap store-bought broth for homemade if possible-simmer chicken bones or vegetable scraps with aromatics (onion, carrot, celery, bay leaf, peppercorns) for 4–6 hours, then strain and reduce by half for deeper flavor. Use aged cheese-5-year Manchego or Parmigiano-Reggiano aged 24 months-for more complex, nutty notes. And always use fresh herbs. Dried thyme or rosemary have their place, but fresh adds brightness that dried can’t match. - Presentation Tricks:
Dust your platter with a pinch of smoked paprika or sumac before arranging the crostini. It adds a subtle color pop and aroma that draws the eye. Use a ring mold to stack crostini vertically for a tall, dramatic display. Or arrange them in a loose spiral to mimic a rose, garnishing the center with a drizzle of honey or balsamic glaze. - Flavor Boosters:
Add a pinch of MSG (yes, MSG) to the polenta before chilling. It amplifies savory depth without adding discernible “MSG flavor.” Use it sparingly-1/8 teaspoon per cup of polenta. Another unexpected trick: toast the polenta in the oven at 400°F (204°C) for 5 minutes before cooking. It intensifies the nutty aroma and shortens the cooking time.
Nutrition Facts and Health Benefits
A single serving of this polenta crostini (2 pieces) clocks in at 210 calories, with 12g fat (6g saturated), 18g carbohydrates, 2g fiber, and 9g protein. The fat comes primarily from olive oil and cheese, which provide heart-healthy monounsaturated fats and conjugated linoleic acid (CLA) from grass-fed butter. The fiber comes from the polenta and any added vegetables, supporting gut health and satiety. The protein is complete when paired with cheese, making this a balanced snack that satisfies without weighing you down.
Nutritionally, this dish is a powerhouse of micronutrients. A serving provides 20% of the daily value (DV) for calcium (from the cheese), crucial for bone density and muscle contraction. It offers 15% DV of iron, especially when made with Pecorino, which is rich in bioavailable iron. The vitamin A content (from butter and polenta) supports eye health and immune function. The B vitamins in polenta-thiamine, riboflavin, niacin-aid in energy metabolism, while the capers in the topping provide vitamin K for blood clotting and bone health. Even the anchovies contribute omega-3 fatty acids, which reduce inflammation and support brain health. This isn’t just a snack-it’s a nutrient-dense bite that fuels your body and delights your palate.
Dietary adaptations are seamless. For a vegan version: use 1 cup (100g) riced cauliflower instead of polenta, cooked in vegetable broth with 1 tablespoon nutritional yeast and 1 teaspoon turmeric for color. Top with vegan mozzarella and sun-dried tomatoes. Calories drop to 150 per serving. For a gluten-free version: ensure all broths and toppings are certified gluten-free. For a low-sodium version: reduce added salt to 1/2 teaspoon total and use low-sodium broth. For a dairy-free version: replace cheese with 1/4 cup (40g) crumbled firm tofu pressed and marinated in 1 tablespoon soy sauce, 1 teaspoon rice vinegar, and 1/2 teaspoon garlic powder. Bake the tofu cubes at 400°F (204°C) for 12 minutes before topping. For a low-carb version: skip polenta entirely and use 1/2-inch (1.25cm) slices of roasted zucchini or eggplant, brushed with olive oil and salted, then seared. Calories drop to 80 per serving with 4g net carbs.
Creative Variations Worth Trying
Recipes are living things. They evolve with the seasons, the pantry, and the cook’s imagination. Don’t be afraid to play. The best appetizers are born from curiosity, not rigidity. Here are four inspired twists on our base recipe that have turned my kitchen into a laboratory of flavor.
Cauliflower & Green Curry Crostini:
Swap polenta for 1 cup (100g) riced cauliflower cooked in 1 cup (240ml) coconut milk with 1 teaspoon green curry paste and 1/2 teaspoon turmeric until tender (8–10 minutes). Chill, slice, and sear as directed. Top with toasted coconut flakes, cilantro, and lime zest. The coconut milk adds richness, while curry paste brings heat and aroma. Serve with a chilled Riesling to balance the spice.
Smoked Gouda & Apple Crostini:
Use 1 cup (150g) coarse cornmeal instead of polenta and cook in broth with 1 teaspoon smoked paprika. Top with 1/4-inch (6mm) slices of crisp apple (like Honeycrisp), 1/4 cup (30g) shredded smoked Gouda, and a drizzle of honey. The apple’s crisp acidity cuts through the smokiness of the cheese, creating a perfect autumn bite.
Roasted Beet & Goat Cheese Crostini:
Roast 2 medium beets (250g) wrapped in foil at 400°F (204°C) for 45 minutes until tender. Peel and slice into 1/4-inch rounds. Use 1 cup (150g) mashed sweet potato mixed with 1 teaspoon cinnamon instead of polenta. Top with crumbled goat cheese, walnuts, and a sprinkle of balsamic glaze. The earthy beets and tangy goat cheese create a sophisticated flavor profile that feels like a restaurant appetizer.
Meal-Prep-Friendly Version:
Make the polenta base up to 2 days ahead. Store in the fridge wrapped tightly in plastic. Slice and sear just before serving to maintain crispness. Portion toppings into small containers and store separately. Assemble within 10 minutes of serving. This version is perfect for dinner parties or office lunches-just reheat the polenta slices in a dry skillet for 30 seconds per side before topping.
Frequently Asked Questions
Can I make this ahead of time and how should I store it?
Yes-this recipe is designed for make-ahead prep. Cook the polenta, spread it on a tray, cool it uncovered for 15 minutes, then refrigerate uncovered for up to 48 hours. Slice just before searing to prevent drying. Store sliced polenta in an airtight container at room temperature for up to 2 hours or in the fridge for up to 3 days. Freeze cooked polenta slices in a single layer on a tray, then transfer to a bag for up to 1 month. Reheat frozen slices in a dry skillet over medium heat for 2 minutes per side. Never reheat in the microwave-it makes the polenta soggy. For toppings like mushrooms or figs, store separately and assemble fresh to preserve texture.
What can I serve alongside this dish to make it a complete meal?
Turn this snack into a full spread with a charcuterie board: pair the crostini with 3 oz (85g) prosciutto, 2 oz (57g) Manchego, 1/4 cup (30g) marinated olives, and 1/2 cup (75g) roasted almonds. Add a simple green salad with arugula, shaved fennel, and lemon vinaigrette to cut the richness. For a lighter option, serve with a bowl of roasted chickpeas (1 cup/165g) tossed with smoked paprika and sea salt. For a vegetarian main, add marinated artichoke hearts and grilled halloumi. For a full meal, partner with a hearty soup like tomato basil or butternut squash, and a glass of medium-bodied red like Tempranillo. The key is contrast: creamy with crunchy, salty with acidic, hot with cool.
Why did my dish turn out soggy instead of crispy and how do I fix it?
Sogginess is almost always caused by three things: overcrowding the skillet (steaming instead of browning), not letting the polenta cool before slicing (releasing moisture), or using a wet topping. To fix it, always cook in batches on a ripping-hot skillet. Let the polenta chill uncovered for at least 1 hour before slicing to evaporate surface moisture. Pat dry any toppings like tomatoes or mushrooms with a paper towel before adding. If serving later, reheat polenta slices in a dry skillet for 30 seconds per side-never microwave. And avoid toppings with high water content like fresh tomato or cucumber unless you blot them thoroughly.
What are the best ingredient substitutions if I’m missing something?
Don’t let a missing ingredient stop you. Swap coarse polenta for grits, but reduce cooking time to 10 minutes. Use instant polenta in a pinch, but it will be less creamy-add an extra tablespoon of butter. For cheese, swap Pecorino for aged Gouda, Parmesan, or even sharp cheddar. For a nut-free version, top with roasted pumpkin seeds and roasted red pepper purée. If you’re out of broth, use water with 1 teaspoon bouillon paste, but reduce salt in the recipe by half. For a spicier kick, add 1/2 teaspoon cayenne to the polenta before chilling. The recipe is forgiving-just taste as you go and adjust seasoning at the end.
Final Thoughts from the Kitchen
I still feel that same thrill I did in that Seville tapas bar every time I pull a platter of these crostini from the oven. There’s something sacred about feeding people well-about transforming a few humble ingredients into something that makes their eyes light up. It doesn’t have to be complicated. It doesn’t have to be expensive. It just has to be intentional. That’s the heart of this guide: not just recipes, but a mindset. A reminder that snacks are more than filler. They’re the first chapter of the meal, the icebreaker, the reason someone lingers at your table longer than they planned.
So go ahead-fire up your skillet, grab a sharp knife, and make something worth savoring. And when you do, I hope you share it. Tag me on Instagram @texasdadcooks-I love seeing what you create. Because the best food isn’t made in silence. It’s made in community. And your kitchen? That’s where the magic starts.