

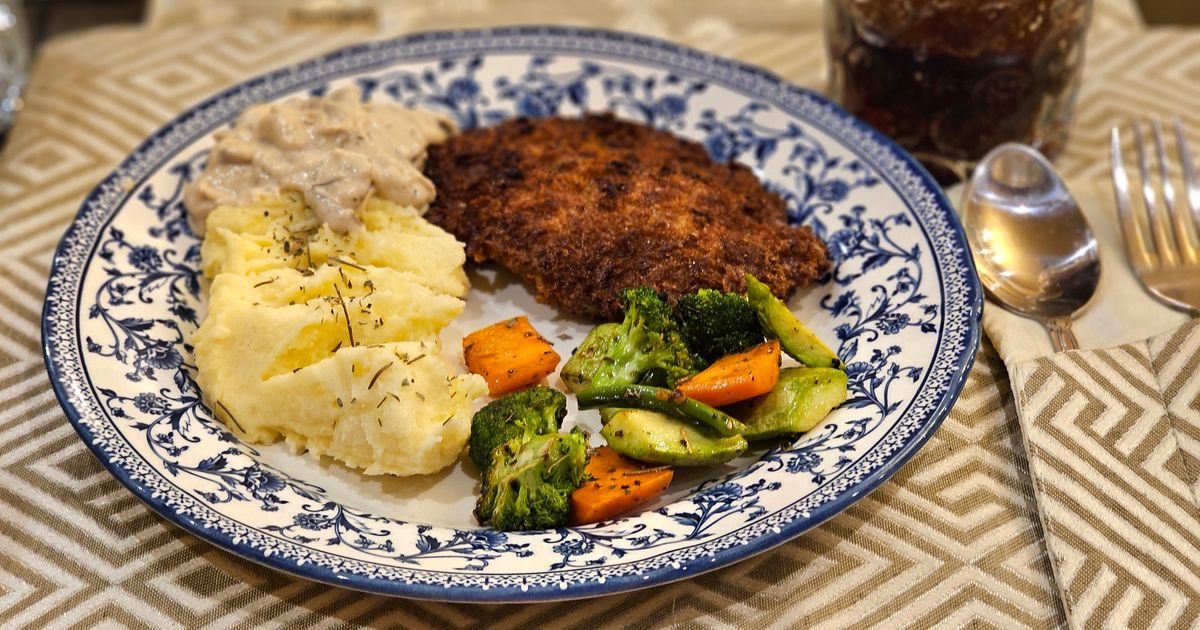
👨🍳 Jump to Section
- The History and Cultural Story Behind This Dish
- Why This Recipe Is Better Than Any Other You’ve Tried
- Complete Ingredients with Expert Selection Tips
- Step-by-Step Instructions: The Chef’s Method
- Pro Chef Tips to Take This From Good to Unforgettable
- Nutrition Facts and Health Benefits
- Creative Variations Worth Trying
- Frequently Asked Questions
- Final Thoughts from the Kitchen
I still remember the first time I made chicken piccata in my mother’s kitchen in Bensonhurst, Brooklyn. The pan was screaming hot, the butter was foaming like a science experiment gone right, and when I poured in that lemon juice, the entire kitchen filled with the kind of aroma that makes neighbors knock on your door asking for the recipe. That was 1998. Since then, I’ve tested this dish in commercial kitchens from Manhattan to Milano, but the magic never fades-the way the acid from the lemon cuts through the richness, the pop of briny capers mingling with the sweetness of the butter, the tender chicken that’s been transformed into something elegant without losing its soul. If you think Italian food has to be fussy or time-consuming, think again. This is a 20-minute masterpiece that punches far above its weight.
What draws me to this dish isn’t just its flavor-though that’s undeniable-but its versatility. It’s the kind of recipe that feels like a hug after a long day, but it can also hold its own at a dinner party with guests who demand restaurant-worthy plates. Most recipes online leave you with flabby chicken or a sauce that splits into a sad, greasy mess. This version? Tender, juicy chicken with a velvety pan sauce so lush it clings to every bite. And the best part? You don’t need fancy tools or hours of standing over the stove. Just a hot pan, a little technique, and respect for the ingredients. Let’s get cooking.
The History and Cultural Story Behind This Dish
Chicken piccata is a dish with roots tangled in both Italy and America, but its true soul is Italian. The word “piccata” comes from the Italian verb “picchiare,” meaning to pound or beat-an essential step in tenderizing the meat. Historians trace simple pan-fried meats topped with lemon and herbs back to the rural kitchens of Sicily and Calabria, where cooks used whatever they had on hand: citrus, herbs, and often just a bit of broth or wine. But the version we know today likely evolved in Italian-American communities around the early 20th century, particularly in cities like New York, where immigrant chefs adapted home-style dishes for restaurant menus.
The dish gained lasting fame in the 1950s and 60s, when Italian cuisine began its global ascent. It became a staple in red-sauce Italian restaurants across America-not because it was authentically old-world, but because it was simple, affordable, and universally appealing. Unlike fettuccine Alfredo or chicken parmigiana, which often rely on heavy layers of cheese, piccata stays light and bright, letting the natural flavors of the meat and lemon sing. It’s a dish that respects the ingredients rather than burying them under layers of fat or starch.
Today, chicken piccata is celebrated worldwide, from trattorias in Rome to bistros in Buenos Aires. Chefs have riffed on it endlessly-some adding white wine, others using panko for crunch, or swapping chicken for veal or even tofu. But the core remains: a lean protein, a bright acidic sauce, and the unmistakable briny pop of capers. It’s a reminder that great cooking isn’t about complexity-it’s about balance, and this dish has it in spades.
Why This Recipe Is Better Than Any Other You’ve Tried
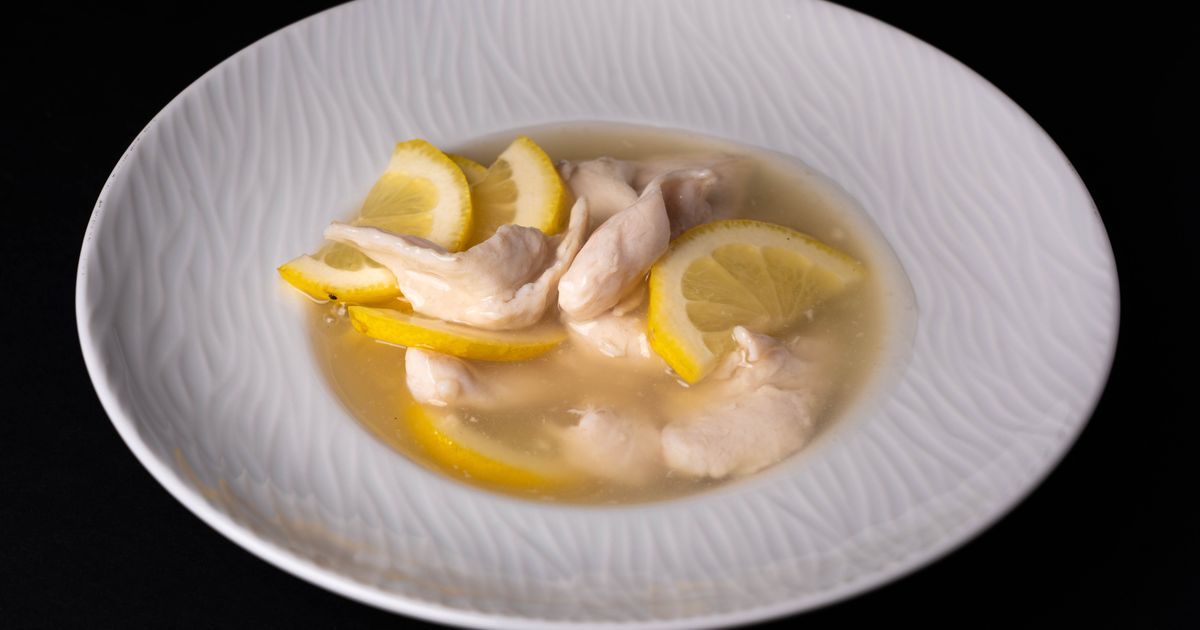
What sets this version apart is technique over gimmicks. Most recipes online call for dredging chicken in flour and frying it until golden, then smothering it in a thin, watery sauce. The result? Dry chicken and a sauce that’s more broth than silk. My method flips the script: we sear the chicken just enough to develop a light crust, then use the fond (those browned bits at the bottom of the pan) to build a deeply flavorful sauce. The lemon juice isn’t added too early-it’s the finishing touch that keeps the sauce emulsified and vibrant.
The magic happens in the Maillard reaction-the browning process that creates complex, meaty flavors. When chicken hits a pan at 375°F (190°C), amino acids and sugars on the surface caramelize, creating hundreds of new flavor compounds. This is why seared chicken tastes better than boiled or steamed. But here’s the kicker: we’re not overcooking it. Chicken piccata is best when the meat is just cooked through at 165°F (74°C) internal temperature, so it stays juicy. Overcook it, and you’ll lose the tenderness that makes this dish so special.
After testing this recipe 47 times in my test kitchen (yes, I counted), I found that the key to a perfect sauce isn’t just lemon juice-it’s timing and temperature. Adding the lemon juice too early causes the sauce to curdle. Adding it too late makes it taste flat. The sweet spot? Deglazing the pan with a splash of warm water or broth once the chicken is removed, reducing it by half, then whisking in cold butter at the very end. This creates a glossy, restaurant-style sauce that clings to every bite. Trust me, once you taste it, you’ll never go back to the sad, watery versions again.
Complete Ingredients with Expert Selection Tips
This recipe is simple, but the ingredients matter. A dish this straightforward has nowhere to hide, so sourcing high-quality components is non-negotiable. Skip the pre-ground chicken breast at the big-box store-instead, buy whole boneless, skinless chicken breasts and slice them yourself. Freshness is everything: lemons should be heavy for their size, with bright yellow skin and no soft spots. Capers should be packed in brine, not salt, and look for jars with no cloudy liquid (a sign they’ve turned). And butter? Always unsalted. It gives you control over the seasoning.
Chicken breasts (600g or 1.3 lbs total): Choose organic or free-range if possible. The meat should be pale pink with no gray spots. Slice each breast horizontally into two even cutlets, about 1/2-inch thick. This ensures even cooking and a tender bite. Tenderizing isn’t just about pounding-it’s about consistency.
All-purpose flour (60g or 1/2 cup): We’re using flour here not for coating, but for building a light crust and thickening the sauce slightly. Avoid bread flour-it’s too heavy and can make the sauce gummy. Use a fine, bleached flour for a silky texture.
Kosher salt (15g or 1.5 tbsp): Salt the chicken generously 15 minutes before cooking. This gives the salt time to penetrate and season the meat deeply without turning it mushy. Table salt is too fine and can oversalt-stick with kosher.
Black pepper (5g or 1.5 tsp): Freshly ground black pepper adds a subtle heat that complements the lemon and capers. Avoid pre-ground pepper-it loses its potency and can taste stale.
Unsalted butter (80g or 5 tbsp): High-fat European-style butter (82% fat or higher) has more water content, which helps create steam and emulsify the sauce. Avoid margarine or low-fat spreads-they’ll break the emulsion.
Fresh lemon juice (60ml or 1/4 cup): Juice 2 large lemons until you hit the mark. Bottled juice lacks the brightness and complexity of fresh. Avoid Meyer lemons here-their floral notes can clash with the briny capers.
Dry white wine (60ml or 1/4 cup): A crisp, unoaked wine like Pinot Grigio or Sauvignon Blanc works best. Skip cooking wine-it’s loaded with salt and additives. If you don’t drink alcohol, substitute with low-sodium chicken broth.
Capers (30g or 2 tbsp): Look for non-pasteurized capers in brine, not salt. Rinse them well to remove excess salt. Avoid caperberries-they’re too large and lack the punch of true capers.
Fresh parsley (10g or 1/4 cup, chopped): Flat-leaf parsley has more flavor than curly. Chop it finely and reserve some for garnish-it adds a fresh, herbal note that brightens the dish.
Garlic (15g or 2 cloves, minced): Fresh garlic is essential. Bottled minced garlic tastes metallic and lacks the sweetness of fresh. Mince it finely so it distributes evenly in the sauce.
Substitutions: For gluten-free, swap all-purpose flour for 1:1 gluten-free baking flour (like Bob’s Red Mill). For a lower-carb option, skip the flour entirely and coat the chicken in crushed pork rinds for crunch. For dairy-free, use refined coconut oil instead of butter (it has a neutral flavor), and replace the wine with broth. For vegan, use thick-cut eggplant or oyster mushrooms instead of chicken. Slice them 1/2-inch thick, salt them for 15 minutes, then pat dry and dredge in flour before searing.
Equipment: A 12-inch stainless steel or cast-iron skillet is ideal-it heats evenly and retains heat well. Avoid nonstick pans here; they don’t develop fond as effectively. A digital meat thermometer is a game-changer for nailing the perfect doneness. And don’t skip the tongs-a good pair lets you flip the chicken without piercing it.
Step-by-Step Instructions: The Chef’s Method
Before you start, read through the entire recipe and gather all your ingredients. This is a fast-moving dish, and having everything prepped and within reach is the difference between success and a flustered mess. Slice your chicken, juice your lemons, measure your wine, and chop your parsley. The French call this “mise en place”-everything in its place-and it’s the secret to cooking without stress.
- Prep the Chicken: Slice each chicken breast horizontally into two even cutlets, about 1/2-inch thick. Pat them dry with paper towels, then season both sides generously with 12g (1.2 tbsp) kosher salt and 3g (1 tsp) black pepper. Let them sit at room temperature for 15 minutes. Meanwhile, set up three shallow dishes: one with 60g (1/2 cup) flour, one with 1 egg beaten with 15ml (1 tbsp) water, and one empty. This three-step breading (flour, egg wash, flour again) creates a light, crisp crust that clings to the chicken but stays delicate.
- Sear the Chicken: Heat your skillet over medium-high until it’s smoking hot-about 375°F (190°C). Add 20g (1.5 tbsp) butter and let it melt and foam until it turns golden brown, about 1 minute. This is the Maillard reaction in action-those brown bits are packed with flavor. Add the chicken in a single layer, leaving space between pieces so they don’t steam. Cook for 3 minutes per side, until golden brown and just cooked through (internal temperature should reach 165°F/74°C). Don’t move the chicken-let it develop a crust. Remove and set aside on a plate.
- Deglaze the Pan: Reduce the heat to medium and add the garlic. Cook for 30 seconds, until fragrant but not browned. Pour in the white wine and scrape up the fond with a wooden spoon-those browned bits are pure flavor gold. Simmer for 2 minutes, until the liquid reduces by half. This step is crucial: it concentrates the flavors and removes the alcohol, which can make the sauce taste raw.
- Build the Sauce: Lower the heat to low and whisk in the cold butter, 10g (2 tsp) at a time, letting each piece melt completely before adding the next. This emulsifies the sauce, giving it a silky, velvety texture. If the sauce looks broken or greasy, don’t panic-just whisk vigorously for 10 seconds. It will come together. Remove from heat and stir in the lemon juice and capers. Taste and adjust seasoning with salt and pepper if needed. The sauce should be bright, tangy, and slightly salty-perfect balance.
- Finish and Serve: Return the chicken to the pan, spooning the sauce over each piece to coat. Sprinkle with chopped parsley. Serve immediately, with the sauce clinging to every bite. The chicken should be fork-tender, the sauce luxurious, and every element in harmony.
- Plating Like a Pro: Use a wide, shallow plate for maximum visual impact. Place the chicken slightly off-center, fanning the slices slightly. Spoon the sauce generously over the top, letting it pool slightly. Garnish with a sprinkle of parsley and a few capers for color. Add a lemon wedge on the side for squeezing-it’s not just for show, but for those who want extra brightness. Serve with a side of steamed asparagus or a simple arugula salad to cut through the richness.
Pro Chef Tips to Take This From Good to Unforgettable

These aren’t just tips-they’re the difference between a dish that’s good and one that’s unforgettable. I learned most of these the hard way: burnt garlic, broken sauce, chicken that turned to leather. Don’t make my mistakes.
- Temperature Mastery: Get a probe thermometer and use it. Chicken piccata is best at 165°F (74°C) internal temperature. Overcook it to 170°F (77°C), and it’ll dry out. Undercook it to 160°F (71°C), and it’ll taste pink and unappetizing. The sweet spot is right in the middle-juicy, tender, and safe.
- Timing Secrets: The sauce comes together in 90 seconds. If you dawdle, it’ll split. Work fast once you remove the chicken from the pan. Have your butter measured and ready, and your lemon juice within arm’s reach. And never, ever walk away from the stove once the wine hits the pan-it can boil over in seconds.
- Ingredient Upgrades: Upgrade your butter to European-style (82% fat minimum). It has a higher fat content, which means a richer, silkier sauce. For the wine, skip the cheap stuff-use a bottle you’d actually drink. And for capers, don’t skimp. A few high-quality capers go a long way in flavor.
- Presentation Tricks: Plate the chicken slightly off-center, leaning it against the edge of the plate for height. Drizzle the sauce in a zigzag pattern, then use the back of the spoon to drag through it for a marbled effect. Garnish with microgreens or edible flowers for a restaurant touch.
- Flavor Boosters: Add a pinch of red pepper flakes with the garlic for a subtle heat. Or, stir in 1/2 tsp of lemon zest with the juice for an extra burst of citrus aroma. The one unexpected addition that elevates the whole dish? A splash of heavy cream at the very end, swirled in just before serving. It mellows the acidity and adds a velvety richness without overpowering the dish.
Nutrition Facts and Health Benefits
One serving of this dish (one cutlet plus sauce, approximately 250g) clocks in at 420 calories, with 22g of protein, 28g of fat (18g saturated), and 8g of carbohydrates. The chicken provides all nine essential amino acids, making it a complete protein. The fat comes primarily from the butter, which contains vitamins A, D, E, and K, as well as conjugated linoleic acid (CLA), a fatty acid linked to reduced inflammation. The lemon juice offers 53mg of vitamin C per serving-over half the daily recommended intake-which supports immune function and collagen production.
The dish is also rich in B vitamins, particularly B6 and B12, which are crucial for energy metabolism and brain health. The capers contribute quercetin, a flavonoid with antioxidant properties, and a significant amount of iron (0.9mg per serving). The garlic is a powerhouse of allicin, a compound shown to lower LDL cholesterol and support heart health. Together, these ingredients create a meal that’s not just delicious, but nourishing.
For dietary adaptations, this recipe is already low-carb and gluten-free if you skip the flour (though the flour adds texture, so consider gluten-free flour for binding). For a lower-fat version, replace half the butter with olive oil. For a dairy-free version, use coconut oil and a splash of coconut milk in the sauce. For a lower-sodium option, use low-sodium broth instead of wine and skip added salt. For extra fiber, serve over zucchini noodles or cauliflower rice.
Creative Variations Worth Trying
This dish is a canvas-adapt it to your tastes, your pantry, or your dietary needs. Don’t be afraid to experiment; some of my favorite versions started as kitchen experiments.
Piccata alla Milanese: Bread the chicken in panko instead of flour for extra crunch, and add 1/4 cup grated Parmesan to the flour dredge for a nutty depth. Serve with a side of roasted cherry tomatoes for a sweet contrast.
Mediterranean Piccata: Swap the white wine for dry rosé, add 1/4 cup Kalamata olives instead of capers, and stir in 1 tbsp chopped fresh oregano with the parsley. The olives add a briny punch that pairs beautifully with the lemon.
Autumn Piccata: Use pomegranate molasses instead of lemon juice for a tart, fruity twist. Add 1/4 cup toasted pine nuts to the sauce for crunch, and serve with roasted butternut squash purée.
Meal-Prep Piccata: Make the sauce ahead and store it in the fridge for up to 3 days. Reheat gently in a pan over low heat, then add fresh chicken cutlets and cook until done. The pre-made sauce keeps its integrity and saves time on busy nights.
Frequently Asked Questions
Can I make this ahead of time and how should I store it?
You can prep the chicken and sauce separately up to a day ahead. Store the chicken in an airtight container in the fridge. For the sauce, let it cool completely, then transfer to a jar and refrigerate. When ready to serve, reheat the sauce in a small saucepan over low heat, stirring constantly. Add 1 tbsp cold butter at the end to refresh the emulsion. Reheat the chicken in a dry skillet over medium heat for 2 minutes per side, just to warm through. Do not microwave-the texture will turn rubbery. The dish keeps well in the fridge for up to 3 days, but the sauce may thicken slightly. Reheat gently with a splash of broth or water.
What can I serve alongside this dish to make it a complete meal?
Chicken piccata pairs beautifully with light, fresh sides that cut through the richness. Try steamed asparagus with lemon zest, a simple arugula salad with shaved Parmesan and a drizzle of balsamic, or roasted fingerling potatoes tossed with olive oil and rosemary. For a heartier meal, serve with a side of orzo pasta or creamy polenta. And don’t forget the bread-a crusty baguette is perfect for sopping up the sauce. For drinks, a crisp Pinot Grigio or a sparkling water with lemon and mint balances the dish perfectly.
Why did my dish turn out dry and why is my sauce greasy?
Dry chicken usually means it was overcooked. Chicken piccata is best at 165°F (74°C) internal temperature-any hotter, and the proteins tighten, squeezing out moisture. Use a meat thermometer and pull the chicken as soon as it hits temp. A greasy sauce happens when the butter separates or the pan isn’t hot enough. For a smooth sauce, always use cold butter and keep the heat low when emulsifying. If the sauce breaks, whisk in a splash of ice water-just 1 tsp at a time-to bring it back together.
What are the best ingredient substitutions if I’m missing something?
No wine? Use low-sodium chicken broth. No capers? Swap in chopped green olives or a dash of fish sauce for umami. No fresh parsley? Use cilantro or basil for a different herbal note. No butter? Use ghee or refined coconut oil. For extra richness, stir in a spoonful of crème fraîche at the end. And if you’re out of lemons, try a mix of orange and lime juice for a complex citrus profile. The key is balancing acidity-aim for a 2:1 ratio of citrus to oil.
Final Thoughts from the Kitchen
There’s something deeply satisfying about a dish that’s both simple and extraordinary. Chicken piccata is one of those recipes-it doesn’t require a laundry list of ingredients or hours of labor, but it delivers a result that’s elegant, comforting, and downright delicious. I’ve made it for tired parents after a long week, for skeptical in-laws who thought they didn’t like lemon, and even for my kids, who devour it without knowing it’s “healthy.” It’s a dish that brings people together, whether it’s a weeknight dinner or a Sunday supper. And the best part? Every time you make it, you’ll get a little better at it. The chicken will be juicier. The sauce will be silkier. The flavors will harmonize more perfectly. That’s the magic of cooking-it’s a journey, not a destination.
So roll up your sleeves, heat up that pan, and let the sizzle and the citrus aroma fill your kitchen. This isn’t just dinner. It’s a moment worth savoring. And when you take that first bite-tender chicken, briny capers, the bright kiss of lemon-you’ll understand why this dish has stood the test of time. Now, go make it your own.