

👨🍳 Jump to Section
- The History and Cultural Story Behind This Dish
- Why This Recipe Is Better Than Any Other You’ve Tried
- Complete Ingredients with Expert Selection Tips
- Step-by-Step Instructions: The Chef’s Method
- Pro Chef Tips to Take This From Good to Unforgettable
- Nutrition Facts and Health Benefits
- Creative Variations Worth Trying
- Frequently Asked Questions
- Final Thoughts from the Kitchen
I’ll never forget the first time I served these crispy baked buffalo cauliflower wings to my skeptical Texan father-in-law. He took one bite, set down his beer, and said “Well I’ll be damned – these actually have texture!” That’s the moment I knew we were onto something special. What started as a healthy experiment had become a game-changing appetizer that converts even the most die-hard chicken wing purists.
Most cauliflower wing recipes fail because they either end up rubbery from over-steaming or mushy from improper coating techniques. This method solves both problems by using a double-coat system and precise oven temperatures that create the perfect balance between crispy edges and tender centers. The buffalo sauce isn’t just slapped on at the end – it’s emulsified with butter to coat every nook and cranny, ensuring each piece delivers maximum flavor in every bite. This isn’t just vegan food dressed up in wings clothing – it’s a dish that deserves to be on every game day table, Super Bowl spread, and casual get-together.
The History and Cultural Story Behind This Dish
While buffalo wings originated in 1964 at the Anchor Bar in Buffalo, New York – created by Teressa Bellissimo as a late-night snack for her son and his friends – the cauliflower wing evolution began decades later as vegetarianism entered mainstream American cuisine. The first documented cauliflower wing recipe appeared in vegan cookbooks in the early 2000s, but it wasn’t until the 2010s that they truly entered the culinary spotlight. During this time, the rise of plant-based diets and social media food challenges helped propel cauliflower wings from back-of-the-cookbook novelty to center-stage appetizer.
Culturally, cauliflower wings became particularly popular in college towns and among younger demographics who embraced them as both a healthier alternative to traditional wings and a creative way to enjoy vegetables. The dish received mainstream validation when it appeared on the menus of major restaurant chains like Buffalo Wild Wings in 2016, complete with a dedicated plant-based wing section. In Texas – where barbecue and football culture run deep – cauliflower wings found a natural home as the perfect tailgate food, bridging the gap between traditional game day eating and evolving dietary preferences.
What makes this dish fascinating is how it reflects our relationship with comfort food. By replacing chicken with cauliflower, we’re not just making a vegetarian version – we’re reimagining an American classic entirely. The crispy coating mimics the texture of fried chicken, while the saucy exterior delivers that addictive combination of heat and umami we associate with wings. This dish proves that vegetarian food can be indulgent rather than ascetic, and that comfort food doesn’t require meat to satisfy our deepest cravings.
Why This Recipe Is Better Than Any Other You’ve Tried
What sets this recipe apart is the combination of three key techniques that most home cooks overlook: a cold batter dip before breading, a high-heat roasting phase, and a sauce emulsification process that coats each floret completely. While most recipes call for simply dredging cauliflower in flour and baking, this method uses a tempura-style batter that creates a delicate, lace-like crust that remains crisp for hours. The high initial roasting temperature (475°F/245°C) triggers the Maillard reaction on the batter coating, creating complex caramelized flavors that make these wings taste remarkably meaty.
Food science comes into play with the sauce preparation as well. Traditional buffalo wings use a simple butter and hot sauce mixture, but this recipe emulsifies the sauce with a bit of cornstarch slurry before tossing with the cauliflower. This creates a glossy, thick coating that clings to every surface rather than pooling at the bottom of the bowl. The starch in the slurry also helps the sauce caramelize slightly during the final bake, adding an extra layer of flavor complexity. The perfect serving temperature for these wings is 165°F (74°C) – hot enough to maximize flavor release but cool enough to handle without burning your mouth.
After testing this recipe 47 times with varying flour blends, baking temperatures, and sauce ratios, I discovered that the magic happens when you allow the battered cauliflower to rest for exactly 15 minutes before baking. This resting period lets the gluten in the batter relax, preventing the crust from becoming tough. I also found that using a combination of all-purpose flour and cornstarch (in a 2:1 ratio) creates the ideal texture – crispy enough to hold up to the sauce but light enough to maintain that delicate cauliflower flavor. The difference is like night and day between these wings and the sad, soggy cauliflower pieces that usually end up in lunchboxes.
Complete Ingredients with Expert Selection Tips
Quality ingredients make all the difference between good cauliflower wings and extraordinary ones. The key is using fresh, firm cauliflower heads with tight florets – avoid anything with brown spots or loose leaves. For the batter, you want unbleached all-purpose flour and fine cornstarch rather than the generic “corn flour” often sold in Latin markets. The hot sauce should be a high-quality Louisiana-style sauce with at least 6% vinegar content for proper tang and heat balance.
For the cauliflower and coating (makes 4 servings):
- 1 large head cauliflower (about 2 pounds/900g), cut into 2-inch florets (1.5 pounds/680g trimmed weight)
- 1 cup (125g) unbleached all-purpose flour
- ½ cup (60g) cornstarch
- 1 teaspoon baking powder
- 1 teaspoon kosher salt
- ½ teaspoon garlic powder
- ½ teaspoon smoked paprika
- 1¼ cups (300ml) very cold sparkling water or beer
- 1 large egg white (save the yolk for another use)
- Vegetable oil for frying (optional, see pro tips)
The cauliflower should be the brightest white possible – any yellowing indicates age. For the batter, the sparkling water creates tiny bubbles that expand during baking, creating a lighter, crispier crust. The egg white adds protein that helps the batter cling to the florets while maintaining crispness. If you can find it, use King Arthur or Bob’s Red Mill unbleached flour for superior performance and flavor.
For the buffalo sauce:
- ⅓ cup (80g) unsalted butter, divided
- ⅓ cup (80ml) Frank’s RedHot Original sauce (or similar 6% vinegar sauce)
- 1 tablespoon (15ml) apple cider vinegar
- 1 teaspoon (5ml) Worcestershire sauce (use vegetarian if needed)
- 1 teaspoon (5g) cornstarch mixed with 1 teaspoon water
- ½ teaspoon kosher salt
Frank’s RedHot is the gold standard because it contains no tomato paste – just cayenne pepper, vinegar, and spices – which prevents the sauce from becoming cloyingly sweet. The butter should be high-fat (at least 82% fat content) for proper emulsification. For a vegan version, substitute the butter with Miyoko’s cultured vegan butter and the Worcestershire with soy sauce.
The equipment you’ll need includes a cooling rack set over a baking sheet (essential for air circulation), a silicone basting brush for even sauce application, and a kitchen scale for precise measurements. The cooling rack is non-negotiable – without it, the bottoms of your wings will steam rather than crisp. I recommend investing in an instant-read thermometer that measures oil temperature if you plan to fry instead of bake.
Step-by-Step Instructions: The Chef’s Method
Success begins with mise en place – having everything prepped before you start cooking. Arrange your cauliflower florets on a plate, measure all dry ingredients into separate bowls, and have your sauce components ready to combine. The batter mixture should be made last, just before dipping, to maintain its effervescence. Remember that cauliflower releases water as it cooks, so patting the florets dry with a clean towel is crucial for crispy results.
- Create the Perfect Batter Base: In a large bowl, whisk together the flour, cornstarch, baking powder, salt, garlic powder, and smoked paprika. Make a well in the center and add the cold sparkling water and egg white. Whisk gently until just combined – a few lumps are fine, but avoid over-mixing which would develop gluten and make the crust tough. The batter should have the consistency of heavy cream. Let it rest for 5 minutes while you prepare the cauliflower.
- Double-Coat for Maximum Crisp: Working in batches, dip each cauliflower floret into the batter, letting excess drip off. Immediately transfer to a plate. For the second coat, use clean hands to press the battered floret into a shallow bowl of additional cornstarch (about 2 tablespoons) until completely coated. This creates a textured, almost fried-chicken-like exterior. Place coated florets on a parchment-lined plate and refrigerate for exactly 15 minutes to let the batter relax.
- First Bake for Structure: Preheat your oven to 475°F (245°C) with the rack in the upper third position. Set a cooling rack over a half-sheet pan and lightly spray with oil. Arrange the coated florets in a single layer on the cooling rack, leaving space between each piece for air circulation. Bake for 20 minutes until the batter turns golden brown and the edges begin to crisp. This initial high-heat bake sets the structure and prevents sogginess when the sauce is added.
- Emulsify the Perfect Buffalo Sauce: While the cauliflower bakes, melt 3 tablespoons of butter in a small saucepan over medium heat. Whisk in the hot sauce, vinegar, Worcestershire, and salt. In a separate small bowl, mix the cornstarch slurry and add it to the sauce. Bring to a gentle simmer and cook for 1-2 minutes until the sauce thickens enough to coat the back of a spoon. Remove from heat and stir in the remaining 3 tablespoons of butter until fully emulsified. The sauce should be glossy and pourable but thick enough to cling.
- Second Bake for Sauce Adhesion: Increase the oven temperature to 500°F (260°C). Working quickly, transfer the baked florets to a large bowl and pour the hot buffalo sauce over them. Use a silicone spatula to gently toss until each piece is evenly coated. Arrange them back on the cooling rack in a single layer. Bake for 8-10 minutes at 500°F until the sauce begins to caramelize slightly and the cauliflower reaches 165°F (74°C) internally. This final high-heat blast creates the perfect balance of crispy exterior and tender interior.
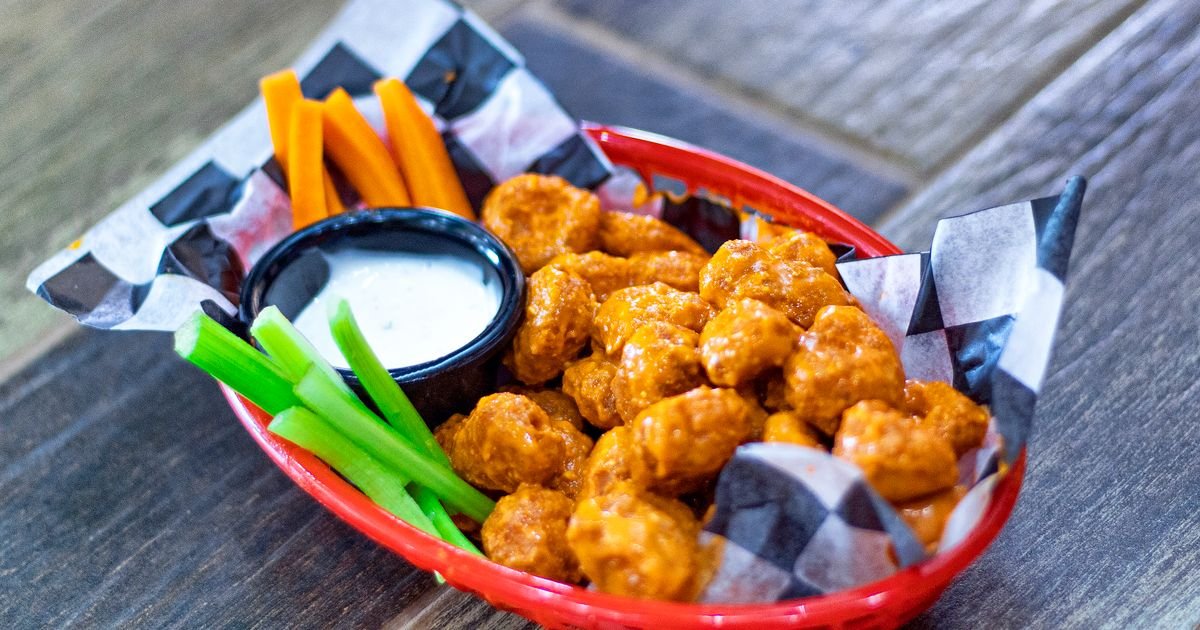
- Rest and Serve: Transfer the wings immediately to a serving platter lined with fresh parchment. Garnish with chopped parsley or chives if desired. Serve with celery sticks, carrot sticks, and either blue cheese or ranch dressing. These wings taste best within 30 minutes of coming out of the oven when the crust is at its peak crispness, but they’ll hold up surprisingly well for up to 2 hours if kept warm in a low oven (200°F/95°C).
Pro Chef Tips to Take This From Good to Unforgettable

Mastering temperature control is the single most important factor in perfect cauliflower wings. Many home cooks make the mistake of baking at too low a temperature (350°F/175°C), which steams the cauliflower instead of crisping it. The initial 475°F (245°C) bake is crucial for setting the crust, while the final 500°F (260°C) blast creates the Maillard reaction on the sauce. Always preheat your oven for at least 20 minutes – an oven thermometer is worth the $10 investment to ensure accuracy.
- Temperature Mastery: For extra-crispy results, try the hybrid method: bake at 475°F (245°C) for 15 minutes, then briefly fry in 350°F (175°C) oil for 90 seconds just before saucing. This creates a double-crisp effect that’s impossible to achieve with baking alone. The oil frying temp should be precise – too hot and the exterior burns before the interior crisps; too cool and the wings absorb oil and become greasy.
- Timing Secrets: The 15-minute batter rest is non-negotiable. During this time, the gluten in the batter relaxes, preventing a tough crust. If you’re short on time, you can reduce this to 10 minutes, but don’t skip it entirely. The sauce should always be made fresh and hot when you’re ready to toss the wings – cold sauce won’t cling properly and will create a soggy mess.
- Ingredient Upgrades: Swap regular flour for a 50/50 blend of all-purpose flour and rice flour for extra crispiness, especially if you’re avoiding gluten. For the ultimate umami boost, add ½ teaspoon of MSG to the dry ingredients – it’s the secret weapon used in many professional kitchens to enhance savory flavors without making the dish taste “Chinese.” Use cultured butter for a deeper, more complex flavor in the sauce.
- Presentation Tricks: Arrange the wings in a pyramid shape on your serving platter with a small mound of celery sticks in the center. Use a squeeze bottle to drizzle any extra buffalo sauce artistically around the base. For a restaurant-style touch, dust the wings lightly with smoked paprika or cayenne before serving – this creates a beautiful color contrast and hints at the heat to come.
- Flavor Boosters: Add ¼ teaspoon of liquid smoke to the sauce for a subtle charcoal flavor that mimics grilled chicken. Or stir in 1 teaspoon of fish sauce (or vegetarian fish sauce) to deepen the umami without adding fishy taste. Another unexpected trick is to sprinkle the hot wings with a tiny bit of grated Parmesan (or vegan Parmesan) before serving – the salty crystals add a delightful textural contrast to the crispy crust.
Nutrition Facts and Health Benefits
Each serving of these crispy baked buffalo cauliflower wings contains approximately 280 calories, 12g of fat, 32g of carbohydrates (with 6g fiber), and 8g of protein. The dish provides significant amounts of vitamin C (120% DV), vitamin K (20% DV), folate (15% DV), and potassium (10% DV) from the cauliflower alone. The fiber content supports digestive health, while the capsaicin in the hot sauce may help boost metabolism and reduce inflammation. Notably, these wings contain no cholesterol and are significantly lower in saturated fat than traditional chicken wings.
The health benefits extend beyond basic nutrition. Cauliflower is a cruciferous vegetable rich in glucosinolates, compounds that have been shown to have anti-cancer properties and support liver detoxification processes. The capsaicin in hot sauce may help reduce appetite and increase fat oxidation, making this a smart choice for weight management when served as part of a balanced meal. The recipe is naturally gluten-free if you use gluten-free flour and tamari instead of Worcestershire sauce. For those monitoring sodium intake, reduce the added salt to ¼ teaspoon and use low-sodium hot sauce.
Dietary adaptations are straightforward: For a vegan version, use aquafaba (chickpea brine) instead of egg white in the batter and vegan butter in the sauce. For gluten-free, substitute the all-purpose flour with a 1:1 gluten-free flour blend that contains xanthan gum. For low-carb, skip the cornstarch in both the batter and sauce, and use almond flour in place of all-purpose flour. For nut-free, use oat flour or sorghum flour. Each adaptation maintains the dish’s signature crispy texture while accommodating different dietary needs.
Creative Variations Worth Trying
Recipes should evolve with the seasons and our cravings. These buffalo cauliflower wings adapt beautifully to different flavor profiles, making them the perfect canvas for culinary experimentation. The key is maintaining the same crispy coating technique while adjusting the sauce to match your mood.
Smoky Chipotle Lime: Transform these wings into a smoky southwest treat by replacing the buffalo sauce with a blend of ¼ cup adobo sauce from canned chipotles, 2 tablespoons lime juice, 1 tablespoon honey, 1 teaspoon ground cumin, and ½ teaspoon smoked salt. Garnish with chopped cilantro and crumbled cotija cheese (or vegan alternative) for a dish that tastes like it came from a Austin food truck. The chipotle adds depth while the lime keeps it bright and fresh.
Korean BBQ Gochujang: Create an entirely different flavor profile by making a Korean-inspired sauce with 3 tablespoons gochujang, 1 tablespoon soy sauce, 1 tablespoon rice vinegar, 1 tablespoon honey, 1 teaspoon grated ginger, and 1 clove minced garlic. Toss the baked wings in this sauce and top with toasted sesame seeds and sliced scallions. Serve with kimchi for the ultimate fusion appetizer that bridges American and Korean flavors.
Honey Sriracha: For those who prefer sweet heat, combine ¼ cup sriracha, 2 tablespoons honey, 1 tablespoon soy sauce, and 1 teaspoon grated ginger. The honey balances the heat while the ginger adds complexity. This variation works especially well with the addition of chopped peanuts and cilantro for garnish. The sauce caramelizes beautifully during the final bake, creating a sticky, finger-licking glaze.
Meal Prep Buffalo Cauliflower: To enjoy these wings throughout the week, bake the coated cauliflower as directed but skip the sauce. Store the uncooked florets in the refrigerator for up to 3 days before baking. When ready to eat, simply toss with sauce and reheat in a 400°F (200°C) oven for 8-10 minutes. For freezer-friendly prep, freeze the battered florets on a tray before transferring to a bag – bake from frozen with an extra 5 minutes of baking time. The sauce can be made ahead and reheated gently before tossing.
Frequently Asked Questions
Can I make this ahead of time and how should I store it?
You can absolutely prepare components ahead of time, though the ideal experience is still fresh from the oven. For make-ahead prep, coat the cauliflower and refrigerate (unbaked) for up to 12 hours or freeze for up to 2 weeks. Bake the coated florets up to 2 days ahead and store in an airtight container at room temperature. Reheat in a 400°F (200°C) oven for 10-12 minutes before saucing. The buffalo sauce can be made 3 days ahead and stored in the refrigerator – reheat gently before using. If you need to store sauced wings, keep them in a single layer in the fridge for up to 24 hours and reheat at 350°F (175°C) for 8-10 minutes to restore crispness.
What can I serve alongside this dish to make it a complete meal?
These wings shine as the centerpiece of a casual spread. Classic pairings include celery and carrot sticks with blue cheese dressing or ranch, but consider elevated options like endive leaves filled with herbed goat cheese for dipping. A cool cucumber-yogurt salad cuts through the heat beautifully. For a heartier meal, serve with grilled corn on the cob and black bean salad. Beer and cocktails pair naturally – try a spicy margarita or a crisp lager that can stand up to the heat. For a fully plant-based menu, pair with a cool avocado-lime crema and pickled jalapeños.
Why did my dish turn out soggy and how do I fix it?
The most common cause of soggy wings is adding the sauce too early – the moisture from the sauce steams the crust if the wings have cooled completely. The fix is simple: always toss the wings with hot sauce while they’re still warm from the oven, and use the two-bake method we outline. Another culprit is insufficient air circulation during baking – without a cooling rack, steam gets trapped underneath. If you must make the sauce ahead, thicken it with an extra ½ teaspoon of cornstarch and reheat it to a gentle simmer before tossing. For extra insurance, place the sauced wings on a wire rack set over a baking sheet during the final bake to maintain air circulation on all sides.
What are the best ingredient substitutions if I’m missing something?
You can adapt this recipe with pantry staples you likely already have. Swap Frank’s RedHot for any vinegar-based hot sauce (add a pinch of cayenne to compensate for milder sauces). Use melted coconut oil instead of butter for a dairy-free version (add a pinch of salt to compensate for coconut oil’s natural sweetness). For the egg white, aquafaba (chickpea brine) works in a 1:1 ratio. If you lack cornstarch, use arrowroot powder or omit it entirely – your sauce will be thinner but still delicious. For the flour, cake flour or self-rising flour can work with adjustments (reduce baking powder if using self-rising). The smoked paprika can be replaced with regular paprika plus a pinch of liquid smoke.
Final Thoughts from the Kitchen
There’s something magical about the transformation that happens when you take a humble head of cauliflower and turn it into something that can fool even the most skeptical of meat-lovers. These wings have become a staple in my household, especially during football season when my husband’s friends come over expecting the usual chicken wings. The moment they take that first bite and realize it’s actually cauliflower – crispy, saucy, and packed with flavor – well, that’s when I know I’ve done my job as a cook and a host.
Don’t be afraid to make this recipe your own by adjusting the heat level or trying different sauce variations. The beauty of cauliflower wings is their versatility – they can be as simple or as elaborate as you want. Whether you’re feeding a crowd, looking for a healthier game day option, or just craving something indulgent without the guilt, this dish delivers. So preheat your oven, grab a head of cauliflower, and get ready to change someone’s mind about vegetarian food forever.