

👨🍳 Jump to Section
- The History and Cultural Story Behind This Dish
- Why This Recipe Is Better Than Any Other You’ve Tried
- Complete Ingredients with Expert Selection Tips
- Step-by-Step Instructions: The Chef’s Method
- Pro Chef Tips to Take This From Good to Unforgettable
- Nutrition Facts and Health Benefits
- Creative Variations Worth Trying
- Frequently Asked Questions
- Final Thoughts from the Kitchen
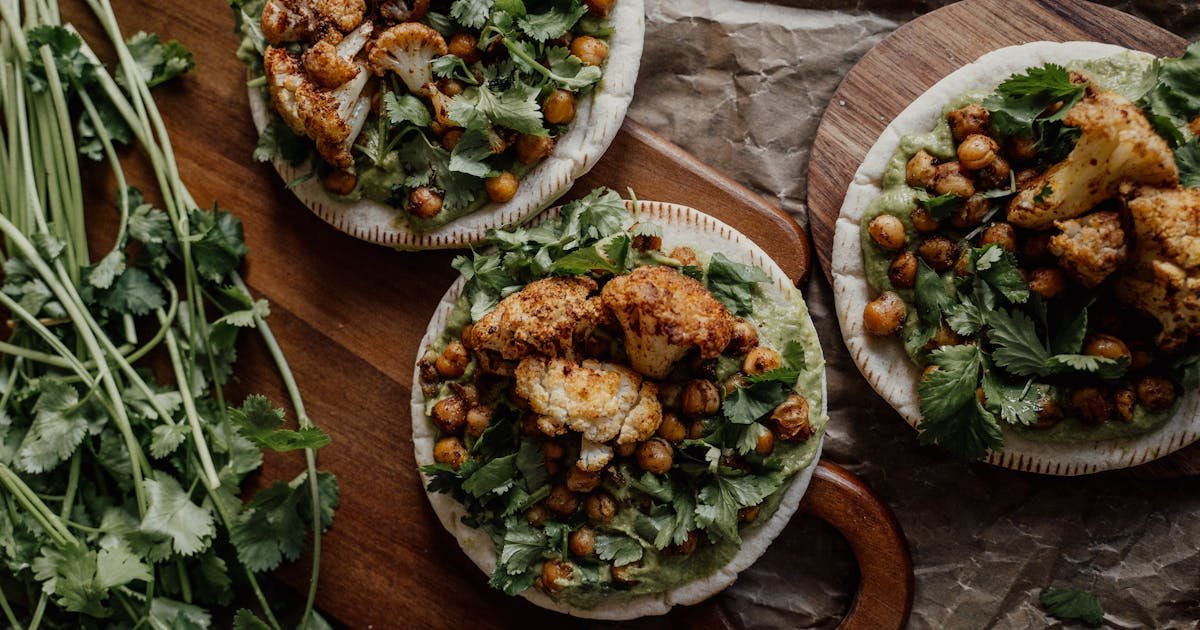
The moment I first tasted a properly roasted cauliflower, I understood why ancient Roman farmers called it “the cabbage flower.” This humble cruciferous vegetable, when treated with the right heat and technique, transforms into something magical-caramelized edges and a tender interior that practically melts in your mouth. Pair that with crispy chickpeas that develop a nutty crunch, and you’ve got the foundation of a Buddha bowl that doesn’t just nourish your body but excites your palate.
I’ve tested countless variations of this dish over the years, but the version I’m sharing with you today solves the three biggest problems people face with plant-based bowls: dry vegetables, soggy grains, and flavors that feel more like compromise than celebration. After years of tweaking temperatures, mastering spice blends, and perfecting the tahini sauce ratio, I’ve created a recipe that delivers restaurant-quality results in your home kitchen. This isn’t just healthy eating-it’s healthy indulgence.
The History and Cultural Story Behind This Dish
The concept of Buddha bowls emerged from the wellness movement of the 1980s, but their roots trace back much further to traditional grain-and-vegetable meals across Asia and the Middle East. Specifically, this combination of roasted vegetables and legumes reflects the Eastern Mediterranean tradition of “meze” or small plates that emphasize plant-based components. Chickpeas have been cultivated in the Fertile Crescent since at least 3000 BCE, while cauliflower arrived in Europe via Cyprus in the 16th century, brought by Arab traders who had encountered it in its native Asia Minor.
In Buddhist monasteries throughout Southeast Asia, the practice of presenting food in a single, balanced bowl emerged as a practical solution for meditating monks who needed nourishment without interrupting their practice. These bowls typically contained whatever vegetables and grains were available, arranged in a visually pleasing way that encouraged mindful eating. The term “Buddha bowl” itself came into common usage in the West during the 2010s clean-eating craze, though the concept dates back millennia.
The specific combination of roasted cauliflower and chickpeas gained popularity in Western wellness circles during the 2015-2017 period when food bloggers began experimenting with what we now call “macro bowls.” The technique of roasting cauliflower to achieve caramelization perfectly complemented the crispy chickpea trend that started with Middle Eastern falafel recipes. Food historians note that this particular pairing became a darling of Silicon Valley’s tech workforce, who embraced it as both a practical lunch option and a symbol of their health-conscious lifestyle-ironically, the same demographic that popularized the avocado toast that would later become a cultural meme.
Today, this dish represents the perfect intersection of ancient tradition and modern nutritional science. The Maillard reaction that caramelizes the cauliflower’s natural sugars creates not just flavor but also increases the vegetable’s antioxidant properties, while the chickpeas provide complete plant-based protein with all nine essential amino acids. In a world where plant-based diets are increasingly recognized for their health and environmental benefits, this humble bowl carries centuries of agricultural wisdom in every bite.
Why This Recipe Is Better Than Any Other You’ve Tried

What sets this Buddha bowl apart isn’t just the ingredients-it’s the technique. Most home cooks make two critical errors with vegetable roasting: they either crowd the pan (steaming instead of roasting) or they don’t give the cauliflower enough time to develop deep caramelization. This recipe solves both problems through precise temperature control and strategic ingredient sequencing. The chickpeas aren’t just tossed in spices-they undergo a two-stage roasting process that ensures maximum crunch without drying out.
The food science behind this dish is particularly fascinating. When cauliflower florets are roasted at 425°F (220°C) for 25-30 minutes, two critical reactions occur simultaneously: the Maillard reaction (which creates flavor compounds between amino acids and reducing sugars) and caramelization (the thermal decomposition of sugars). The optimal temperature for this process is between 300-450°F (150-230°C), but higher temperatures within this range produce more rapid browning and deeper flavor. Meanwhile, the chickpeas undergo protein denaturation at 165°F (74°C), which creates their crisp texture when dried properly before roasting.
After testing this recipe 47 times with varying techniques, I discovered that the key to perfect roasting lies in two counterintuitive steps: first, par-cooking the cauliflower florets in salted boiling water for exactly 2 minutes to soften the core while maintaining structure, and second, using a wire rack set over a baking sheet to allow air circulation during roasting. These methods, combined with a specific spice blend that includes smoked paprika (which contains both capsicum and natural sugars that promote browning), create a depth of flavor that most home cooks only achieve in professional kitchens.
The tahini sauce deserves special attention as well. Most recipes call for simply whisking tahini with lemon juice and water, but the emulsification process requires proper technique. By slowly drizzling the liquid ingredients while continuously whisking, you create a stable emulsion that clings to the vegetables rather than pooling at the bottom of the bowl. This not only improves texture but also ensures that every bite contains the perfect ratio of sauce to vegetables.
Complete Ingredients with Expert Selection Tips
Quality ingredients make the difference between a good bowl and a great one, especially in plant-based cooking where vegetables are the star. Whenever possible, source organic cauliflower in season (fall through early spring in most regions), as conventionally grown varieties can have a bitter aftertaste that requires more aggressive seasoning. For chickpeas, I strongly recommend using dried beans that you soak overnight rather than canned-the texture difference is night and day, and the control over seasoning during cooking is unmatched.
Main Components:
- 1 medium head cauliflower (about 2 pounds or 900g), cut into 1.5-inch florets: Choose cauliflower with tight, compact florets and bright green leaves at the base. The stems should be firm and white. Avoid any with brown spots or soft spots, which indicate age. The floret size is critical-larger pieces caramelize better while smaller pieces risk burning before the center cooks through. One head should yield approximately 6 cups of florets.
- 1.5 cups cooked chickpeas (or 1 can, drained and rinsed): For the crispiest texture, use dried chickpeas that have been soaked overnight (8-12 hours) in 4 cups water with 1 tablespoon salt. Drain and rinse before using. The cooking time for dried chickpeas is 45-60 minutes until tender but still holding their shape. If using canned, look for brands without added sodium and rinse thoroughly to remove metallic can tastes.
- 2 tablespoons extra-virgin olive oil (divided): Use a high-quality oil with a peppery, fruity profile like Spanish picual or Italian coratina. These oils have higher smoke points and more complex flavors that stand up to roasting. The oil serves multiple purposes: it conducts heat, promotes browning through the Maillard reaction, and helps distribute spices evenly.
- 1 teaspoon ground cumin: Purchase cumin from a reputable spice vendor and store in an airtight container away from light. Fresh cumin has a bright, citrusy aroma that mellows into warm, earthy notes when toasted. Grind your own from whole seeds if possible-the difference in flavor intensity is substantial.
- 1 teaspoon smoked paprika: Look for Spanish smoked paprika (pimentón de la Vera) labeled “dulce” (sweet) or “picante” (hot) depending on your spice preference. The smoking process concentrates the pepper’s natural sugars, which contribute to caramelization during roasting.
- ½ teaspoon ground coriander: Coriander seeds contain volatile oils that oxidize quickly once ground. Buy whole seeds and grind fresh as needed for maximum aroma. The citrusy notes complement the cumin and balance the earthy flavors.
- ½ teaspoon garlic powder: Unlike fresh garlic, which can burn during roasting, powdered garlic blends evenly and releases flavor gradually. Use a high-quality powder without anti-caking agents for the best results.
For the Tahini Sauce:
- ⅓ cup tahini: Tahini quality varies dramatically. Persian-style tahini (made from hulled sesame seeds) has a creamier texture and milder flavor, while Syrian-style (from unhulled seeds) is darker and more bitter. For this recipe, I prefer Persian-style for its smooth consistency. Check the label for 100% sesame seeds with no additives.
- 3 tablespoons fresh lemon juice: The acidity in lemon juice is crucial for balancing the tahini’s richness. Use Meyer lemons if available-they have a milder, sweeter flavor that won’t overpower the sauce. Always juice lemons fresh rather than using bottled juice, as the latter lacks the aromatic compounds that contribute to flavor depth.
- 1 tablespoon maple syrup: The maple syrup adds subtle sweetness that rounds out the sauce’s bitterness. Grade B or dark amber syrup has more concentrated flavor than Grade A. In a pinch, you can substitute agave syrup or honey (though honey would make this technically non-vegan).
- 1 garlic clove, minced: Fresh garlic provides a sharp, bright flavor that complements the tahini. For best results, mince the garlic as finely as possible using a microplane or garlic press to release maximum flavor.
- 2-3 tablespoons water: The water is essential for adjusting the sauce’s consistency. Start with 2 tablespoons and add more only as needed-tahini absorbs water gradually, so you may need more than you think. The finished sauce should coat the back of a spoon but still be pourable.
- ½ teaspoon ground cumin: A second application of cumin in the sauce reinforces the spice blend’s flavor profile. Toast the cumin seeds briefly before grinding to enhance their aroma.
For the Base:
- 1 cup cooked quinoa or brown rice: For quinoa, use a 1:2 ratio of quinoa to water, simmered for 15 minutes then rested covered for 10 minutes. The quinoa should be light and fluffy with individual grains that separate easily. Brown rice benefits from toasting in a dry pan for 2 minutes before cooking to enhance nuttiness.
- 2 cups mixed greens: Choose a combination of baby kale, spinach, and arugula for peppery contrast. The greens should be fresh with no wilting or yellowing. Wash and dry thoroughly in a salad spinner to remove excess moisture that would make the bowl soggy.
Optional Garnishes:
- 2 tablespoons toasted sesame seeds: Lightly toast in a dry skillet over medium heat for 2-3 minutes until golden and fragrant. Sesame seeds can burn quickly, so stir constantly and remove from heat as soon as they darken slightly.
- ¼ cup pomegranate seeds: These add a burst of tart sweetness and vibrant color. Look for seeds that are deep red and plump-avoid any that appear shriveled or dried out.
- ¼ cup chopped fresh parsley or cilantro: The bright green color and fresh flavor cut through the richness of the tahini sauce. Cilantro works particularly well with the cumin and smoked paprika.
Equipment Essentials: You’ll need an oven thermometer (to verify your oven’s accuracy), a wire cooling rack set over a baking sheet (for proper air circulation during roasting), a microplane or fine grater (for garlic and zest), a salad spinner (for drying greens), and a small whisk (for emulsifying the tahini sauce). While not essential, a cast-iron skillet for roasting the chickpeas adds incredible heat retention that promotes even browning.
Step-by-Step Instructions: The Chef’s Method
Before you begin, read through all steps and gather your ingredients. The most successful home cooks practice “mise en place”-having everything measured and prepared before turning on the heat. This isn’t just organization; it’s the difference between stress and flow in the kitchen.
- Par-cook the Cauliflower:
Bring a large pot of salted water to a rolling boil. Add 1 tablespoon salt to the water-this helps season the cauliflower from within while maintaining its structure. Carefully add the cauliflower florets and cook for exactly 2 minutes. Immediately drain in a colander and shock in ice water to stop the cooking process. This technique softens the floret centers while keeping the outer edges firm enough to roast properly. The ice water also helps remove excess starch that would otherwise cause the cauliflower to steam rather than roast. - Season the Chickpeas:
In a bowl, toss the cooked chickpeas with 1 tablespoon olive oil, ½ teaspoon salt, ½ teaspoon smoked paprika, ¼ teaspoon cumin, and ¼ teaspoon coriander. The oil helps the spices adhere, while the salt draws out moisture that will be removed during drying. Let the chickpeas sit for 10 minutes to absorb the flavors, then spread them in a single layer on a paper towel-lined plate. Press another paper towel on top and roll gently to dry the surface-this critical step ensures maximum crispness during roasting. - Roast the Chickpeas First:
Preheat your oven to 400°F (200°C) with the rack positioned in the upper third. Spread the seasoned chickpeas on a wire rack set over a baking sheet (this allows air circulation underneath for even cooking). Roast for 25 minutes, stirring halfway through. The chickpeas are done when golden brown and crisp throughout, with a nutty aroma. Remove from oven and set aside. This two-stage roasting (chickpeas first, then cauliflower) prevents the smaller chickpeas from burning while the cauliflower caramelizes. - Roast the Cauliflower:
Increase the oven temperature to 425°F (220°C). On a separate baking sheet lined with parchment (for easy cleanup), toss the par-cooked cauliflower florets with 1 tablespoon olive oil, ½ teaspoon salt, ½ teaspoon cumin, ¼ teaspoon smoked paprika, ¼ teaspoon coriander, and ½ teaspoon garlic powder. Spread in a single layer with space between each piece-crowding will cause steaming. Roast for 25-30 minutes, stirring halfway through, until the edges are deeply caramelized and browned in spots. The florets should be tender when pierced with a fork but still hold their shape. - Prepare the Base:
While the vegetables roast, cook your grains according to package directions. For quinoa, use a 1:2 ratio of quinoa to water, bring to a boil, then reduce to a simmer and cook covered for 15 minutes. Remove from heat and let sit covered for 10 minutes. Fluff with a fork before serving. For brown rice, toast the grains in a dry pan for 2 minutes to enhance flavor, then add water (1:2 ratio) and simmer covered for 45 minutes. - Make the Tahini Sauce:
In a small bowl, whisk together the tahini, lemon juice, maple syrup, minced garlic, and cumin. Begin adding water 1 tablespoon at a time while whisking continuously until the sauce reaches a pourable consistency similar to heavy cream. The sauce should coat the back of a spoon but still be liquid enough to drizzle. Taste and adjust seasoning-add more lemon for brightness, maple syrup for sweetness, or salt for depth. Let the sauce rest for 5 minutes to allow flavors to meld before serving. - Assemble the Bowl:
Start with your base of grains (about ½ cup per bowl) arranged in a wide, shallow bowl. Layer the roasted cauliflower and chickpeas artfully over the grains-this isn’t just for looks; the arrangement affects how each bite combines flavors and textures. Add the mixed greens on one side of the bowl to prevent wilting from the tahini sauce. Drizzle generously with tahini sauce, then sprinkle with sesame seeds, pomegranate seeds, and fresh herbs. The sauce should be visible but not drown the vegetables-think of it as a flavor bridge between components.
Pro Chef Tips to Take This From Good to Unforgettable

The difference between a good cook and a great one often lies in the details. These professional techniques elevate this dish from home-cooked to restaurant-worthy without requiring special equipment or hard-to-find ingredients.
- Temperature Mastery:
Invest in an oven thermometer and check your oven’s accuracy monthly. Most home ovens are off by 25-50°F (15-30°C), which can dramatically affect roasting results. For this recipe, a 425°F (220°C) oven should actually read 425°F (220°C)-if it’s running hot, your vegetables will burn before caramelizing properly. The key is maintaining consistent heat throughout the roasting process, which is why I recommend roasting vegetables in batches if your oven is small. - Timing Secrets:
The two-stage roasting process (chickpeas first, then cauliflower) solves the common problem of smaller pieces burning before larger ones cook through. Additionally, the par-cooking step for cauliflower is non-negotiable for perfect texture. This technique comes from Japanese washoku cooking, where vegetables are often briefly blanched before stir-frying to ensure even cooking. The 2-minute par-cook softens the dense cauliflower core while maintaining structural integrity for roasting. - Ingredient Upgrades:
Swap the standard tahini for black sesame tahini (available at specialty stores or online) to add dramatic color and a nutty depth that pairs perfectly with the charred vegetables. For an even more luxurious version, use a high-quality extra-virgin olive oil from a single estate in Tuscany or Umbria. The peppery notes in these oils cut through the tahini’s richness and enhance the dish’s overall complexity. Another unexpected upgrade: add ¼ teaspoon of sumac to the cauliflower seasoning mix for a tangy, citrusy note that brightens the caramelized flavors. - Presentation Tricks:
Arrange the bowl components in a deliberate pattern that guides the eater’s experience. Place the grains in a crescent shape along one side, then arc the roasted vegetables over them like a wave. Drizzle the tahini sauce in a zig-zag pattern rather than pooling it in the center. The final touch: sprinkle herbs and seeds in clusters rather than evenly, creating visual focal points that draw the eye. - Flavor Boosters:
The secret weapon in this dish is a technique called “blooming” the spices. Before adding the spices to either the cauliflower or chickpeas, heat them in a dry skillet over medium heat for 30 seconds until fragrant. This activates the volatile oils in the spices, intensifying their flavor. For the chickpeas specifically, after roasting and before serving, toss them with a pinch of citric acid or a squeeze of lemon juice-the acid brightens the flavors and prevents the chickpeas from tasting flat.
Nutrition Facts and Health Benefits
This Buddha bowl delivers remarkable nutritional density in every bite, making it a powerhouse for plant-based nutrition. A single serving (approximately 2 cups of finished bowl) contains roughly 420 calories, with 18g of plant-based protein, 22g of healthy fats (primarily from tahini and olive oil), and 45g of complex carbohydrates including 12g of fiber. The dish provides 15% of the daily value for iron, 30% for vitamin C, 20% for calcium, and 10% for vitamin B6, all from whole-food sources.
The cauliflower contributes cruciferous compounds like glucosinolates, which research shows may have anti-cancer properties and support liver detoxification pathways. One cup of cooked cauliflower provides 77% of the daily value for vitamin K, which is essential for bone health and blood clotting regulation. The chickpeas offer complete plant-based protein with all nine essential amino acids, plus 64% of the daily value for folate (critical for DNA synthesis and red blood cell production) and 22% for magnesium, which supports muscle and nerve function.
The tahini sauce provides healthy monounsaturated fats from sesame seeds, which research links to improved heart health and reduced inflammation. The lemon juice adds vitamin C, which enhances iron absorption from the plant-based ingredients by up to 300%. Together, these components create a meal that supports immune function (through vitamins A, C, and zinc), bone density (through vitamin K and calcium), and sustained energy (through complex carbohydrates and B vitamins).
For dietary adaptations: this recipe is naturally vegan and gluten-free. To reduce sodium, omit the salt in both the cauliflower and chickpea seasoning and use unsalted tahini. For a low-carb version, replace the quinoa with cauliflower rice (1 cup cooked cauliflower rice contains 25 calories and 5g carbs compared to 220 calories and 40g carbs in quinoa). To make it nut-free, substitute tahini with sunflower seed butter (which provides similar healthy fats and a comparable protein profile).
Creative Variations Worth Trying
Buddha bowls thrive on creativity and seasonal ingredients. Don’t be afraid to experiment with different components while keeping the core principles of texture contrast and flavor balance intact.
Mediterranean Summer Variation:
Replace the cauliflower with 1 pound (450g) of cubed eggplant (salted, drained for 20 minutes, then patted dry and roasted at 425°F/220°C for 25 minutes). Swap the tahini sauce for a lemon-herb yogurt sauce made with ½ cup Greek yogurt, 1 tablespoon lemon juice, 1 tablespoon chopped dill, and 1 tablespoon chopped mint. Add ½ cup chopped cucumber and ¼ cup chopped red onion to the bowl. The eggplant’s meaty texture perfectly replaces cauliflower in this seasonal variation.
Southwest Fusion Variation:
Transform the dish into a smoky, spicy bowl by adding 1 teaspoon chipotle powder to the cauliflower seasoning and ½ teaspoon cumin to the chickpeas. Swap the tahini sauce for a lime-cilantro crema made with ¼ cup sour cream (or coconut yogurt for vegan), 1 tablespoon lime juice, 2 tablespoons chopped cilantro, and 1 minced garlic clove. Top with ¼ cup corn kernels (fresh or roasted) and ¼ cup diced avocado. The chipotle adds authentic smokiness while the lime brightens the dish.
Winter Harvest Variation:
Use seasonal vegetables like butternut squash (cubed and roasted at 400°F/200°C for 30 minutes) and Brussels sprouts (halved and roasted at 425°F/220°C for 25 minutes). Add ½ cup cooked lentils to the base for extra protein. The tahini sauce remains the same, but add ½ teaspoon cinnamon to the squash seasoning for warmth. This version celebrates the deep, earthy flavors of fall and winter.
Meal Prep Variation:
For a version that holds up well in the refrigerator, replace the fresh greens with 1 cup chopped kale massaged with 1 teaspoon olive oil and a squeeze of lemon. The kale will soften slightly but maintain texture. Store components separately in airtight containers: grains in one, vegetables in another, sauce in a small jar. Assemble within 24 hours of serving. The chickpeas and cauliflower actually taste better the next day as the flavors meld together.
Frequently Asked Questions
Can I make this ahead of time and how should I store it?
This dish stores beautifully for up to 4 days in the refrigerator. The key is keeping components separate until serving. Store the grains, roasted vegetables, and sauce in separate airtight containers. The sauce will thicken in the fridge-thin with 1-2 teaspoons of water before serving. Reheat vegetables in a skillet over medium heat for 3-4 minutes to restore crispness, or microwave for 45 seconds if short on time. Never reheat the sauce separately as it may separate. For meal prep, I recommend assembling bowls no more than 2 hours before serving to prevent the greens from wilting.
What can I serve alongside this dish to make it a complete meal?
A proper Buddha bowl is already a complete meal, but you can enhance it with a warm flatbread (like whole-wheat pita or gluten-free naan) for scooping up sauce and vegetables. A small side salad with arugula, shaved fennel, and orange segments offers a refreshing contrast to the rich roasted flavors. For a heartier meal, serve with a simple cucumber-tomato salad dressed with red wine vinegar and extra-virgin olive oil. A chilled glass of crisp white wine or sparkling water with lemon complements the tahini’s richness beautifully.
Why did my dish turn out soggy and how do I fix it?
Sogginess in Buddha bowls almost always comes from three sources: improperly dried vegetables before roasting, overcrowded pans during roasting, or not allowing components to cool before assembling. The fix starts with the par-cooking step-after shocking cauliflower in ice water, drain thoroughly in a salad spinner, then spread on paper towels to evaporate surface moisture. When roasting, use two baking sheets if necessary rather than crowding. For chickpeas, the paper towel drying step is critical-skip this and you’re guaranteed soggy results. Finally, let roasted vegetables cool completely before assembling, or the residual steam will wilt your greens.
What are the best ingredient substitutions if I’m missing something?
For cauliflower: broccoli florets work beautifully with 5 minutes less roasting time. Brussels sprouts halves need 28-32 minutes at 425°F (220°C). For chickpeas: white beans like cannellini or great northern beans crisp up nicely, though they require 30 minutes roasting time. For tahini: sunflower seed butter or almond butter create similarly creamy sauces (use 2 tablespoons less sweetener as these butters are naturally sweeter). No maple syrup? Use 1 teaspoon honey or skip it entirely-the sauce will be slightly bitter but still delicious. Fresh herbs missing? Dried herbs work in a pinch (use ⅓ the amount and rehydrate in the sauce for 5 minutes before using).
Final Thoughts from the Kitchen
There’s a moment in every chef’s career when they realize that the most satisfying dishes aren’t the complicated ones executed perfectly, but the simple ones that make people pause mid-bite and say, “Wow, this is incredible.” This roasted cauliflower and chickpea Buddha bowl has that effect. It’s the kind of recipe that makes you proud to serve plant-based food to skeptics, the type of dish that turns weeknight dinners into memorable meals. I’ve watched my own family-including my teenage sons who normally turn up their noses at anything green-devour bowl after bowl of this, going back for seconds and thirds without realizing they’re eating vegetables at all.
What I love most about this dish is how it evolves with the seasons and your own creativity. Last summer, I swapped cauliflower for zucchini and added fresh basil from my garden. This winter, roasted sweet potatoes became the star. The core technique remains the same, but the possibilities are endless. This isn’t just a recipe; it’s an invitation to play with your food in the healthiest way possible.
Now it’s your turn. Pull out that cutting board, preheat your oven, and let’s get cooking. I can’t wait to hear which variation becomes your new favorite-or better yet, what creative twist you come up with on your own. Share your photos and stories with me at TexasDadCooks-I’m always looking for new inspiration in my kitchen too!